Creating a template
In the optimization of panels, the individual components are usually arranged arbitrarily in the unprocessed panel, e.g. to achieve minimum waste. However, if you now want to deliberately keep components together, intelliDivide offers the option of cutting the parts in a predefined arrangement using so-called templates.
Various drafts for the templates are available in intelliDivide. You can also create your own individual cutting templates. The selection of the template and the assignment of the parts within the template are done in the parts list in intelliDivide.
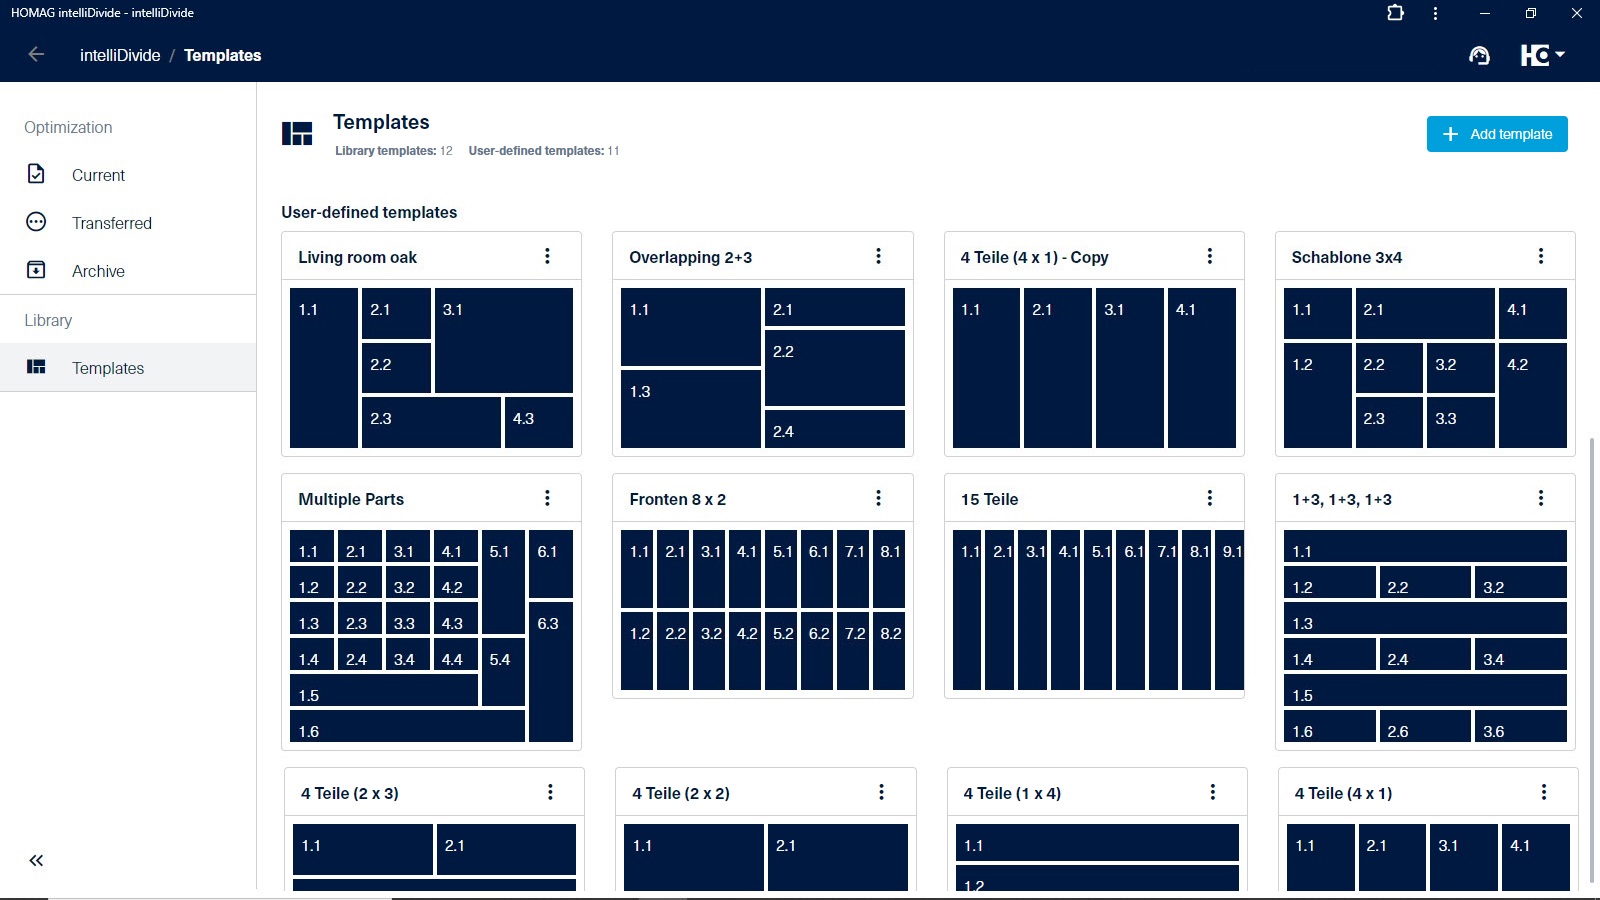
Example of custom templates
Note: This function is currently only available for intelliDivide Cutting, not for Nesting.
Example 1: Continuous veneer pattern
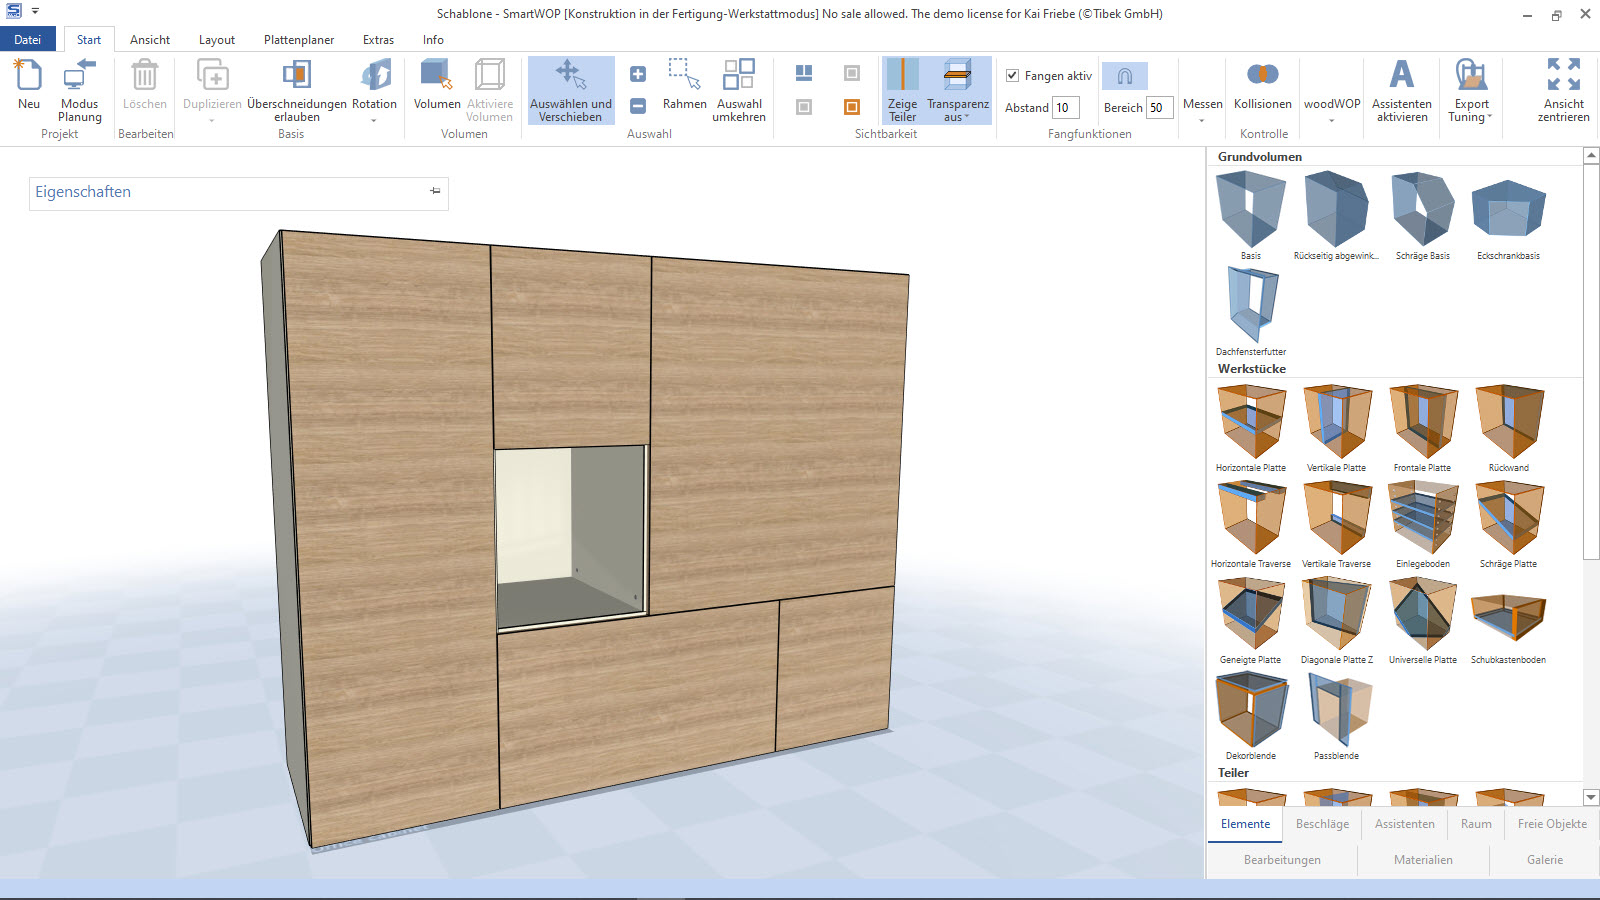
Furniture with veneered fronts and continuous veneer pattern.
This template is required for cutting.
Example 2: Overlapping fronts
Creating a template for overlapping fronts.
Video-Tutorial
How to create a new, individual cutting template.
Creating an individual cutting template
PLEASE NOTE:
- The template is only created as a diagram without specific dimensions. The exact dimensions are determined later by assigning the components in the parts list.
- A template must always be described completely. Gaps are not permitted because intelliDivide always checks the completeness of the template. This means that in this example the gap is also defined as a part and must later be described in the parts list as a component with a dimension.
- The template editor is based on a table with columns and rows. The numbering of the components within the template is derived from this table:
- the first digit describes the column
- the second number describes the line

Step by step instructions in screenshots
You can see how to create new templates here in descriptive screenshots – very easy step by step.
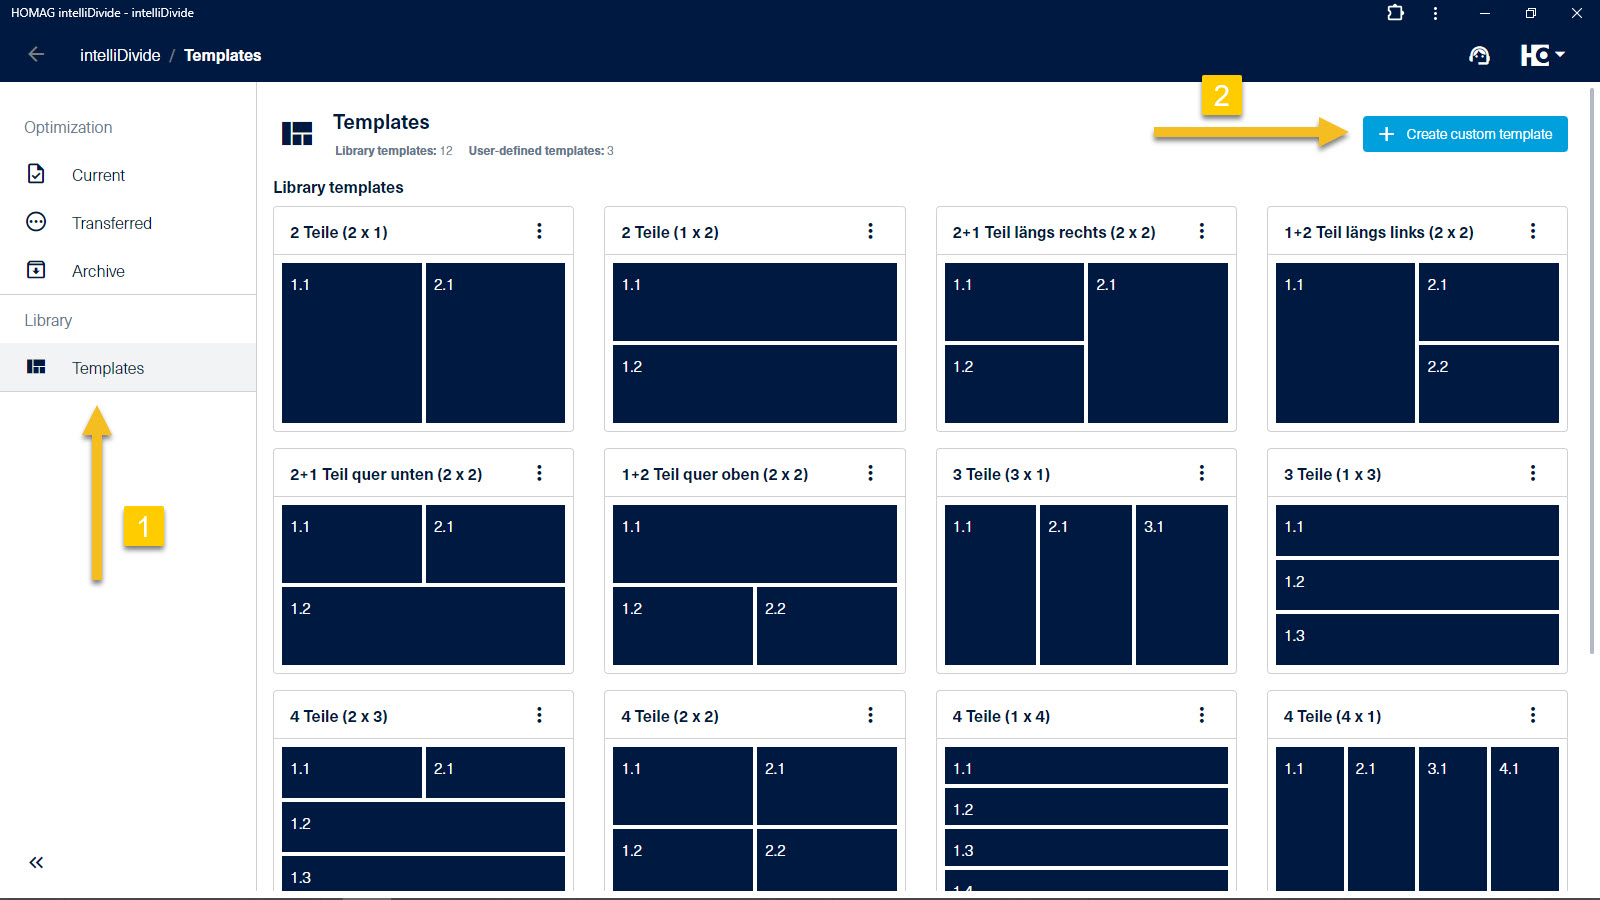
Step 1: Select the "Templates" menu item (1) and click on the button "Create custom template" (2).
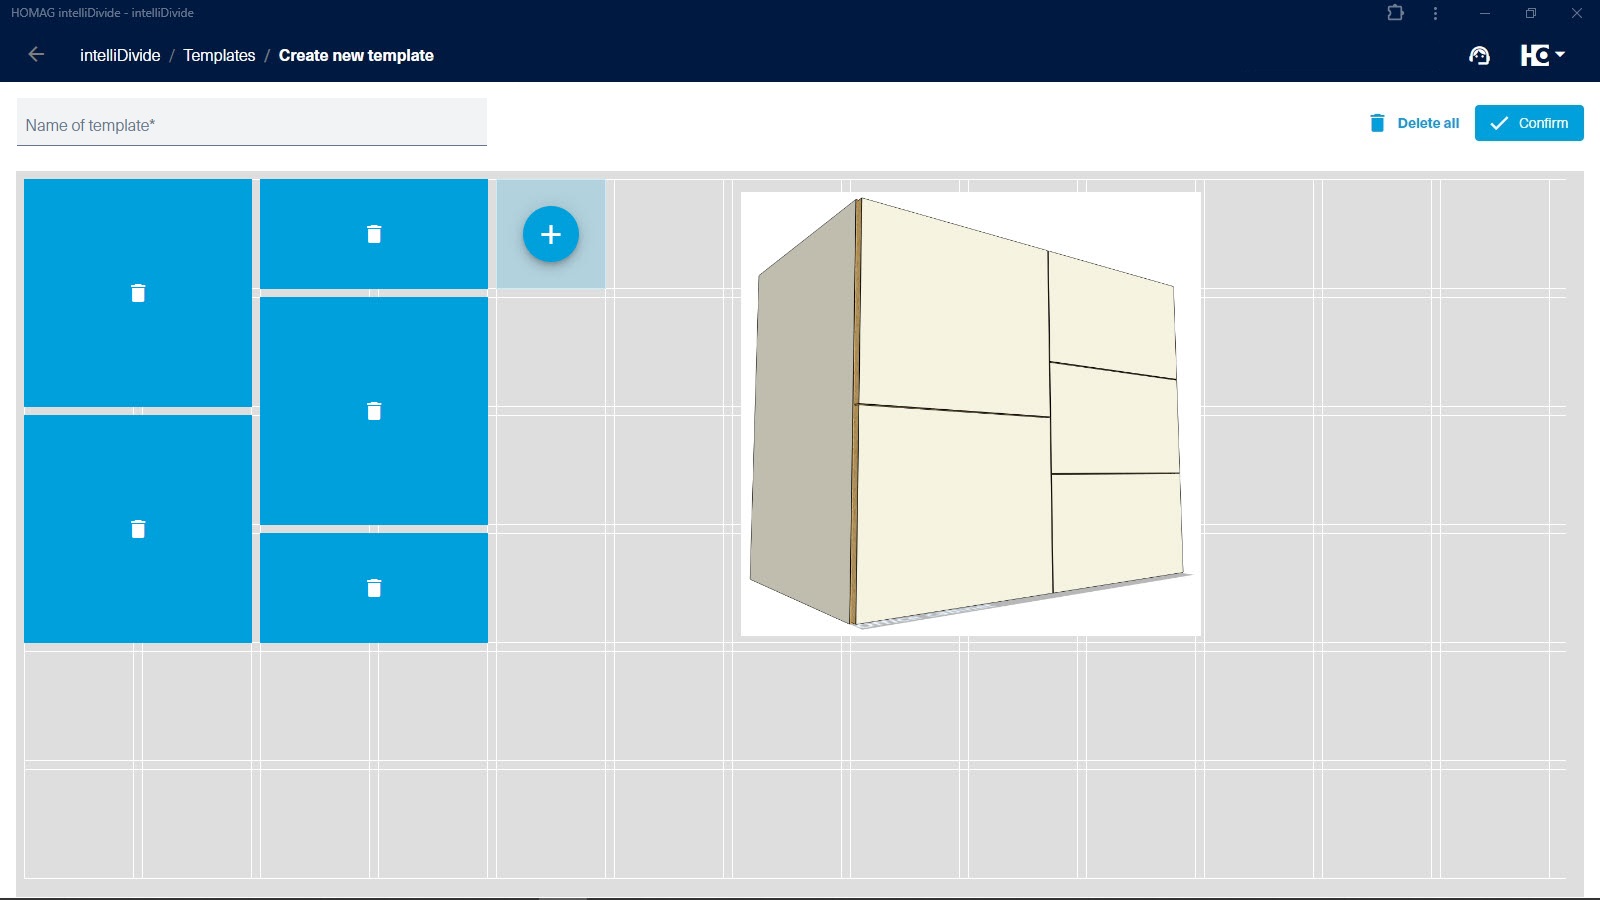
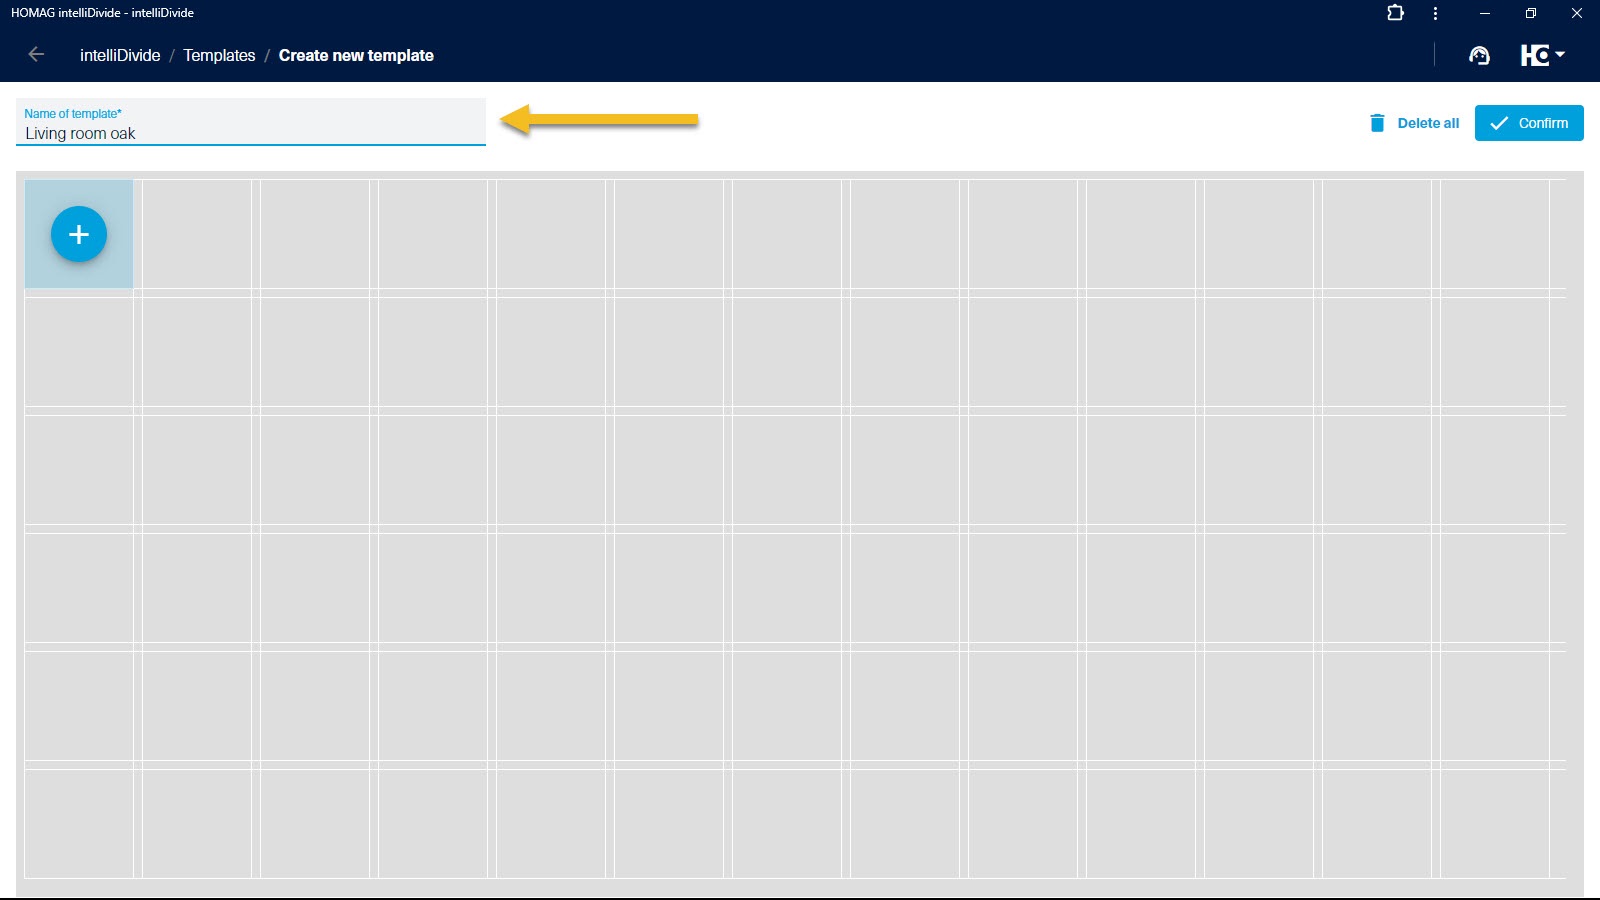
Step 2: A name must first be assigned to the template in the template editor.
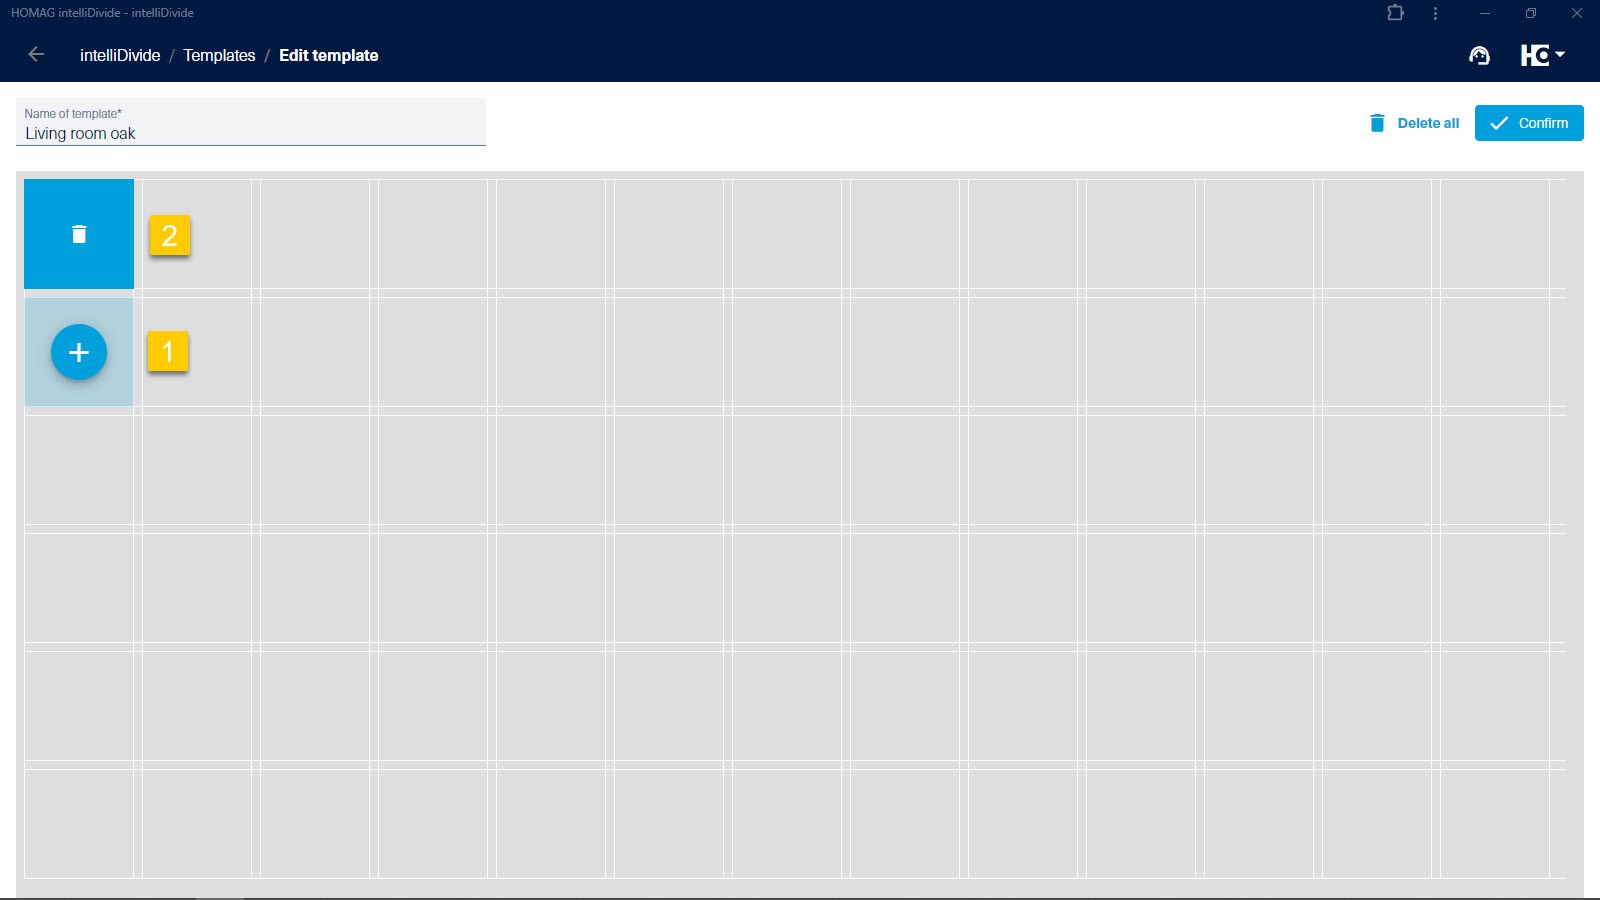
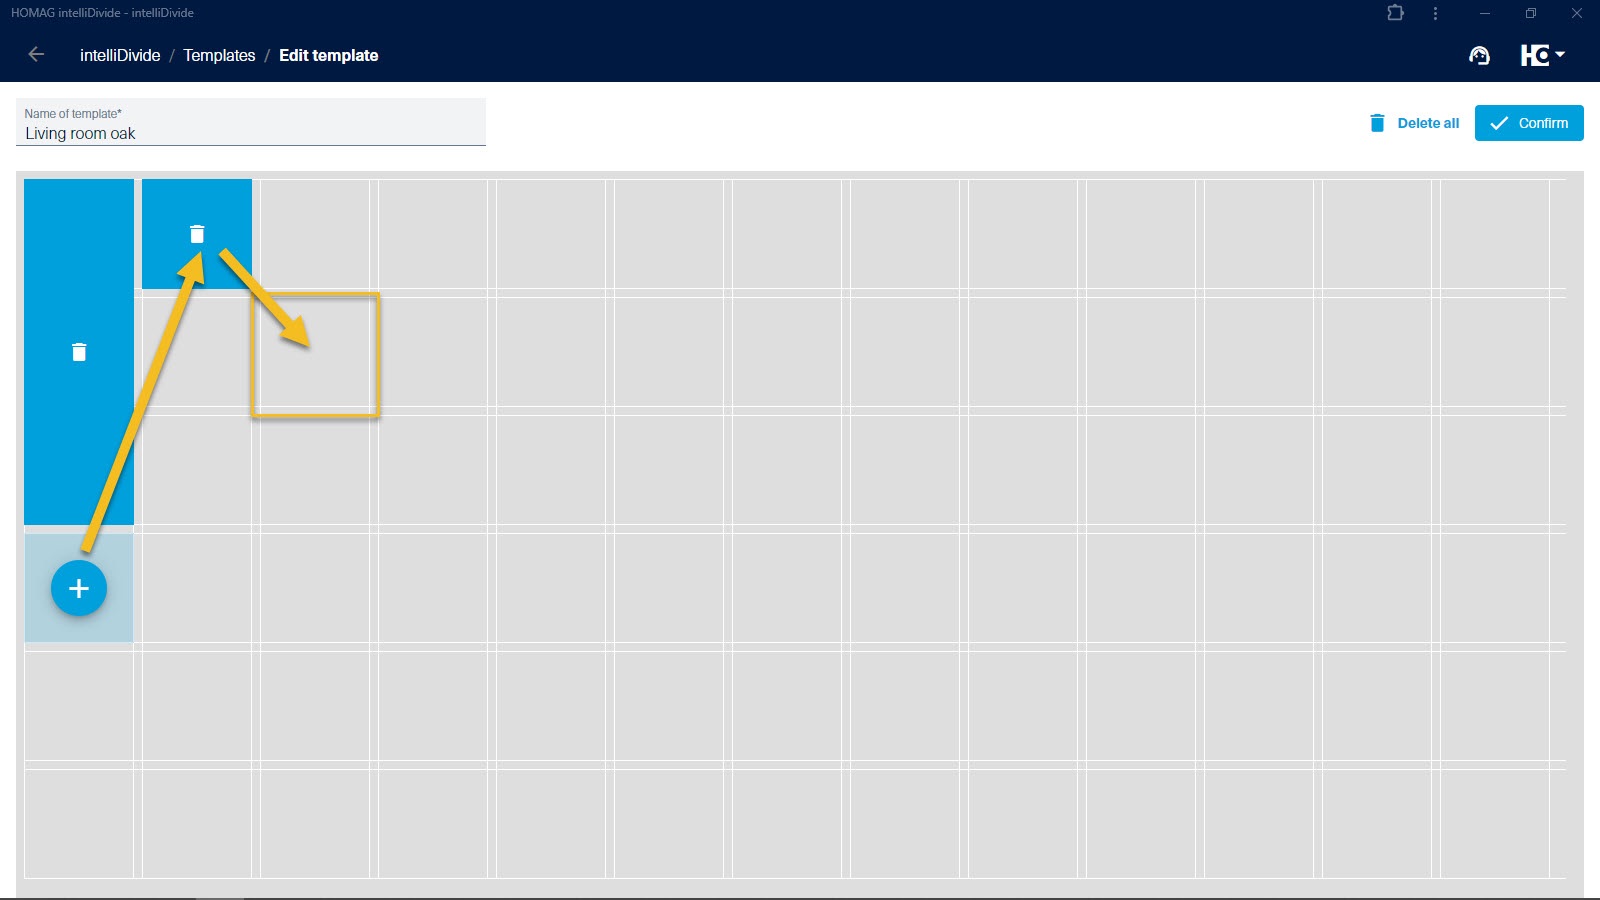
Step 3: Clicking the "+" button inserts a new part into the template (1). The part is deleted again with the trash can symbol (2).
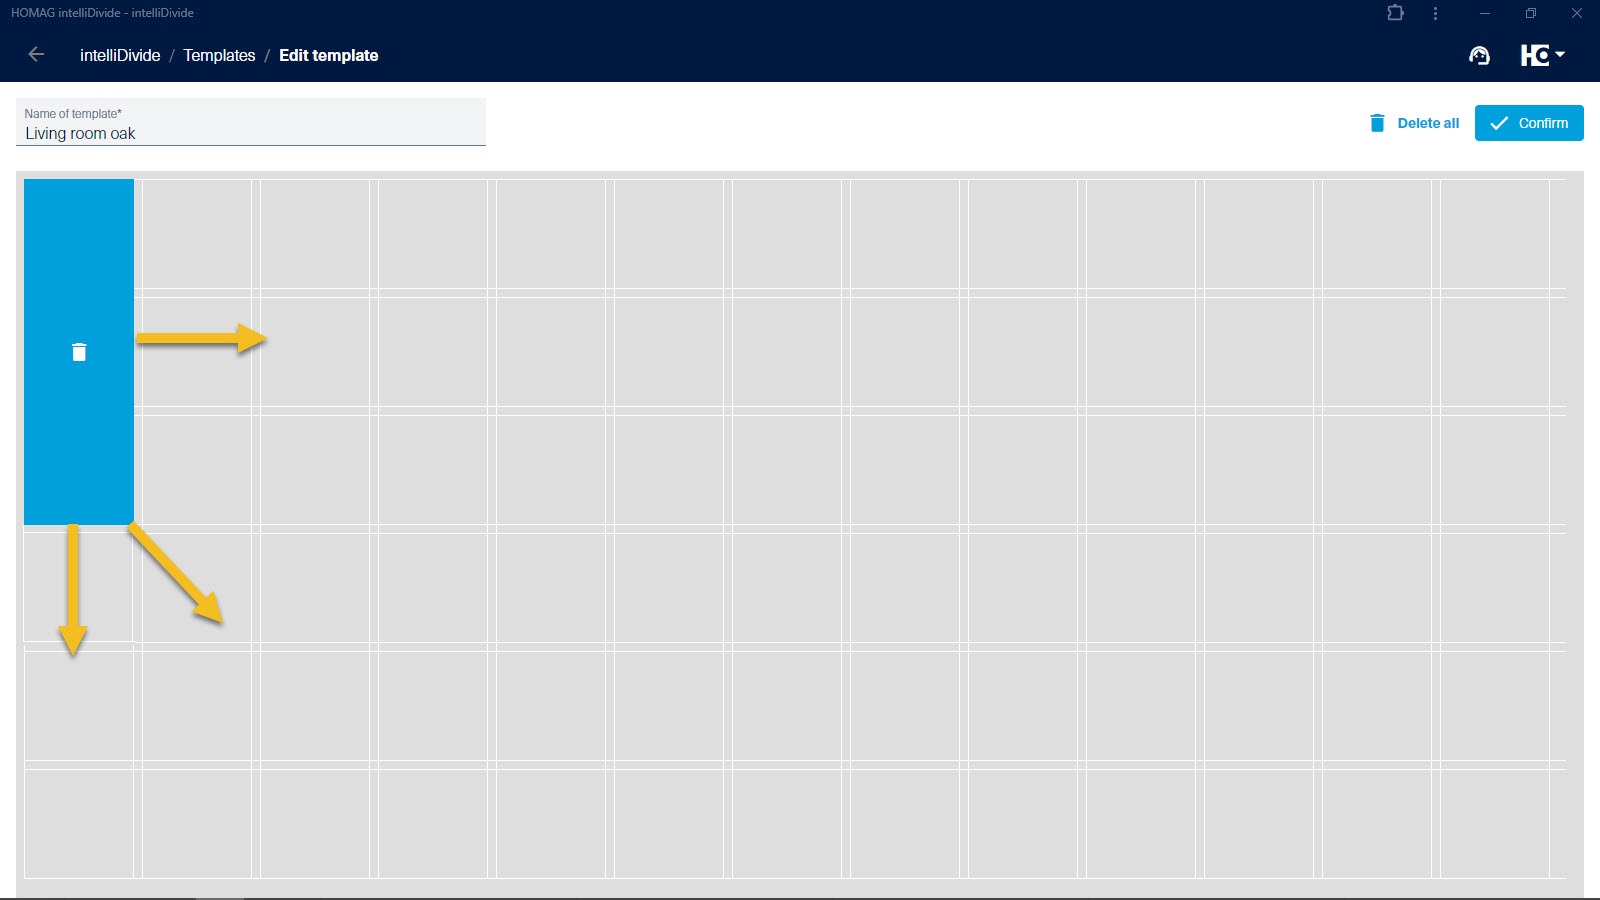
Step 4: Each inserted part can be changed to the desired size by dragging the side margins.
Step 5: The part can be moved to any position using drag & drop.
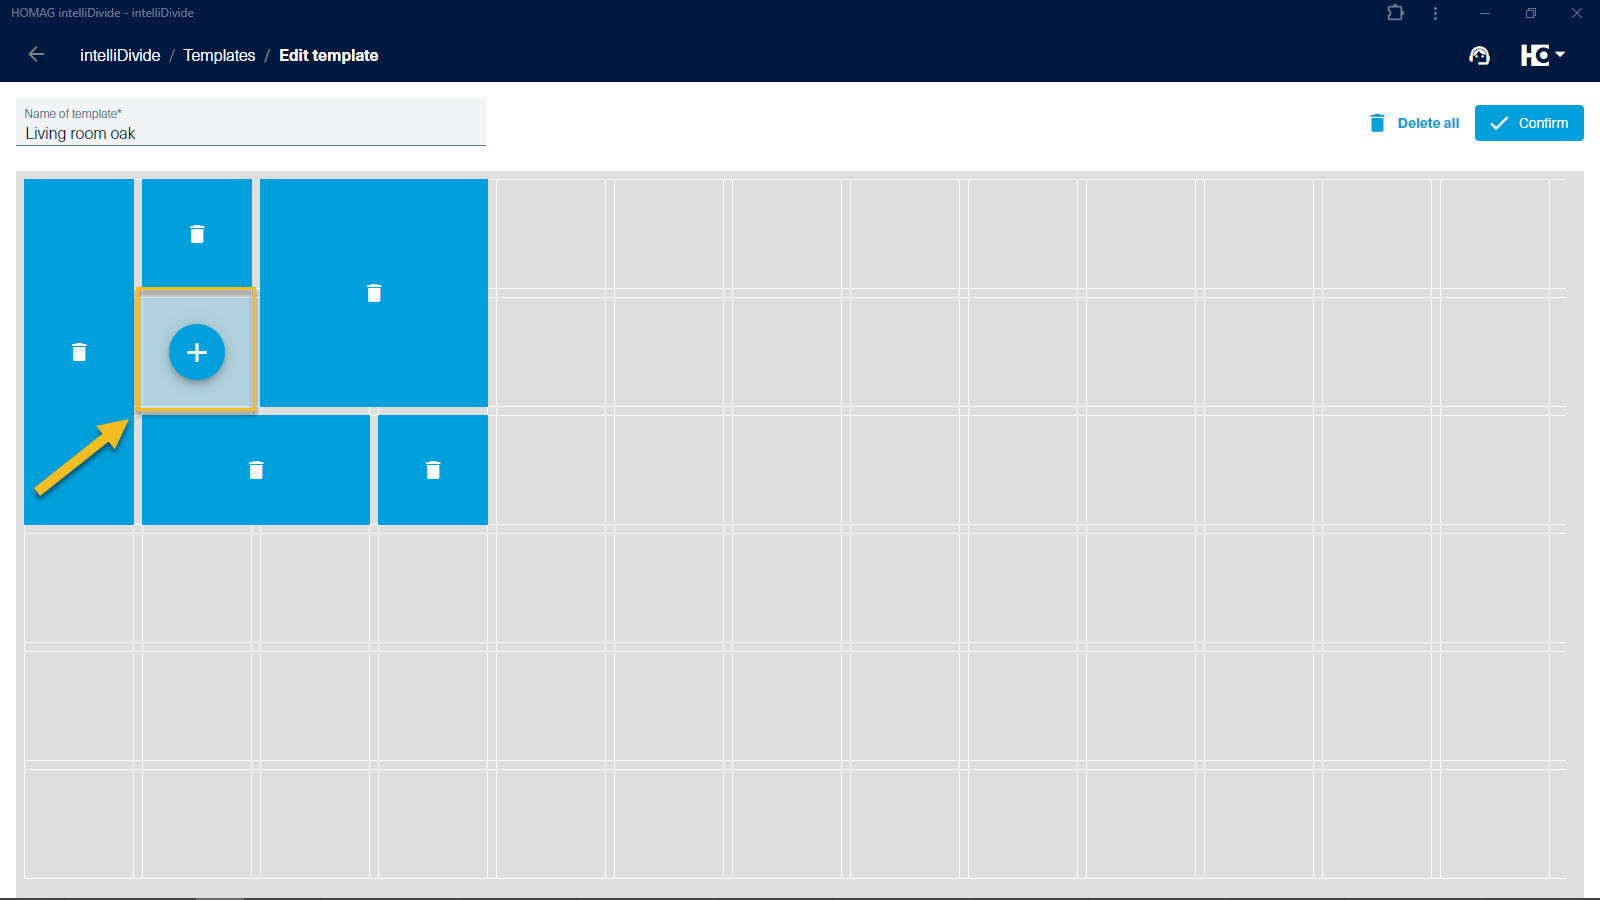
Step 6: The open compartment in the middle must also be specified as a part.
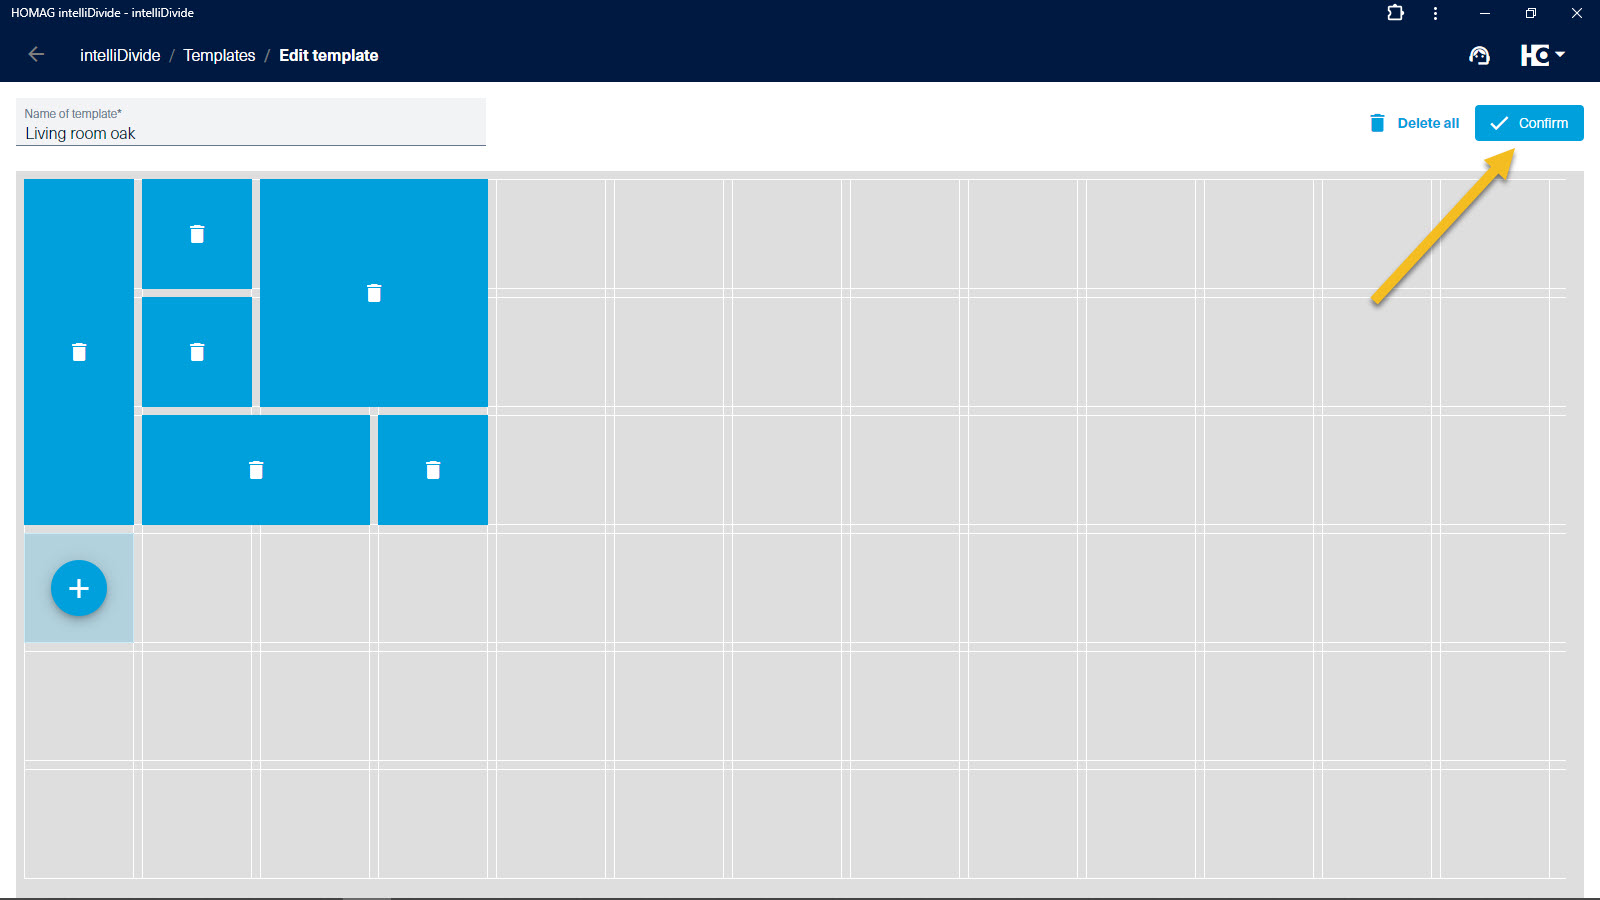
Step 7: Everything correct? Then save the template to finish.
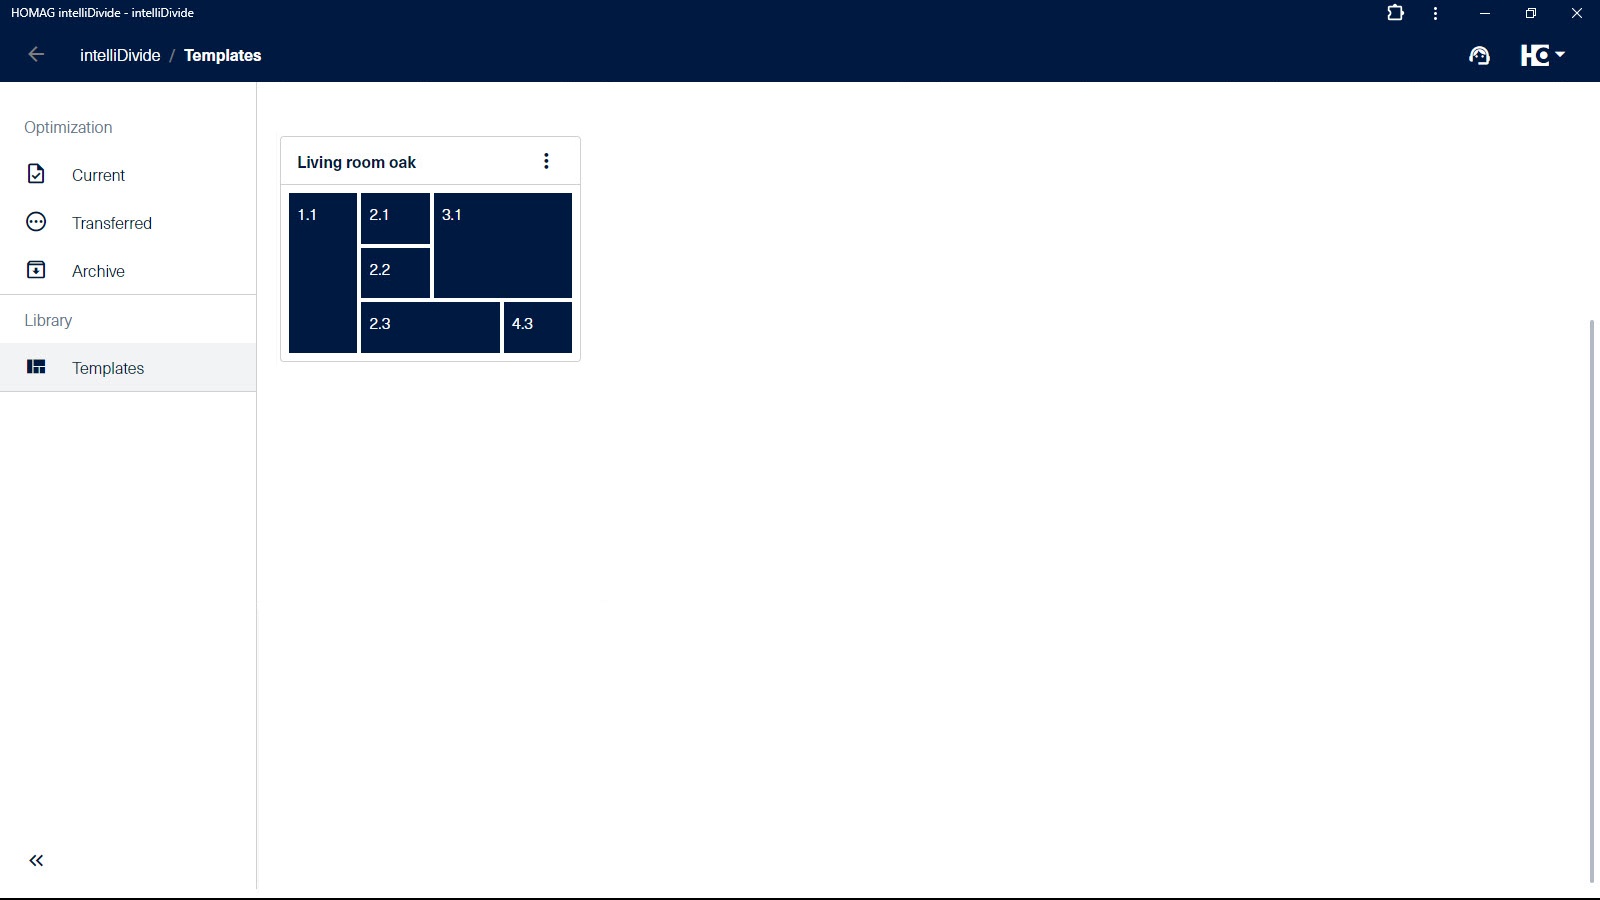
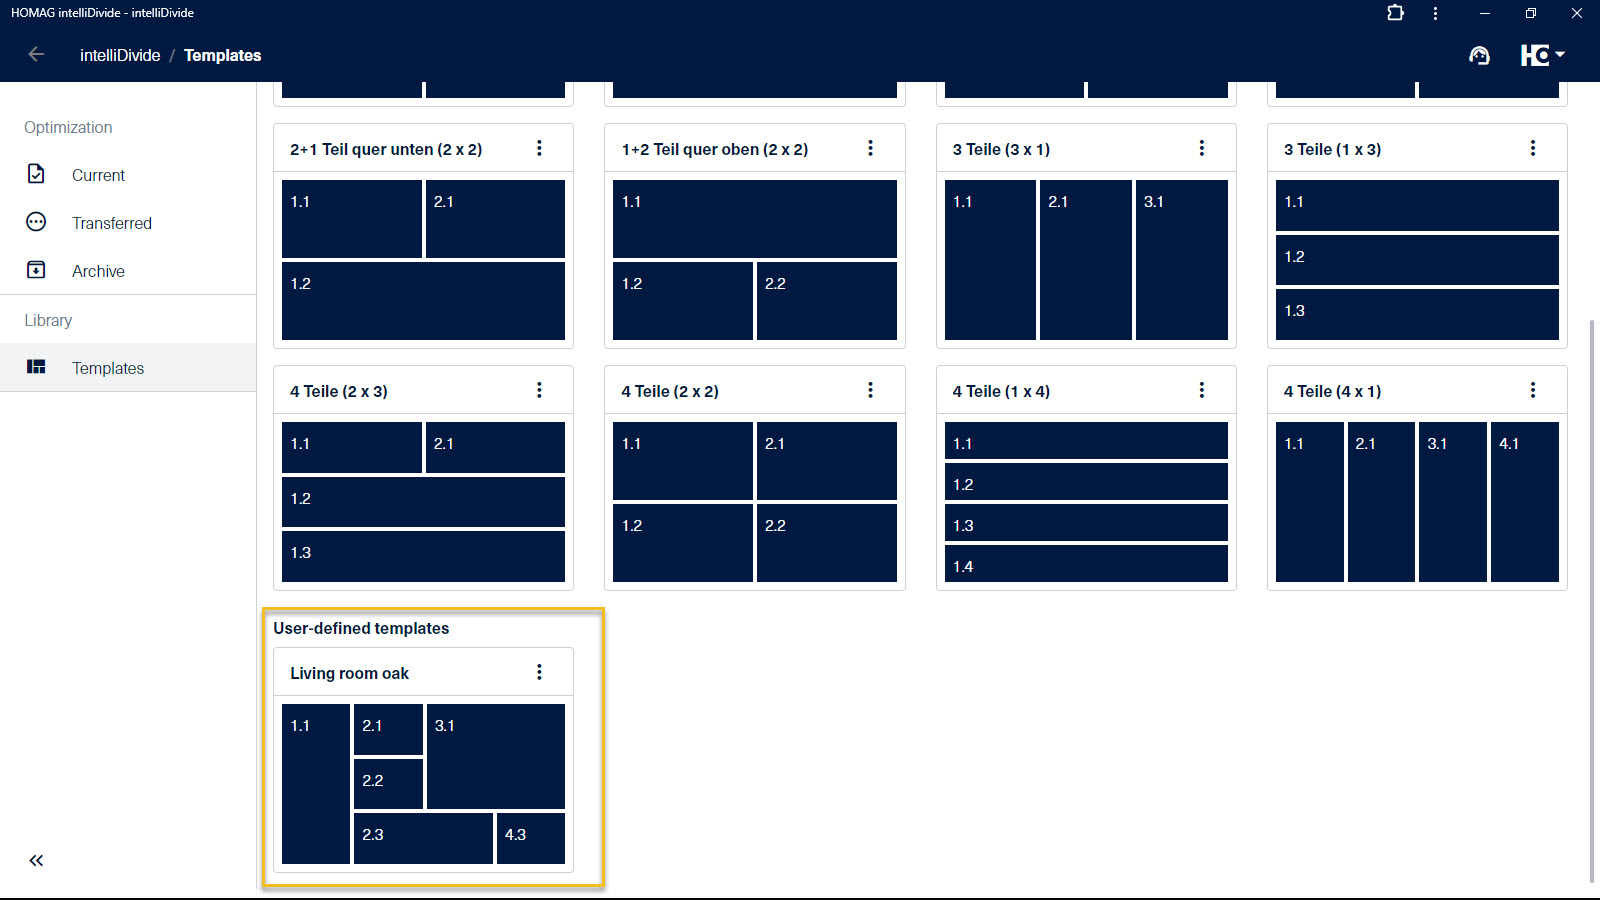
Step 8: The new template is now available.
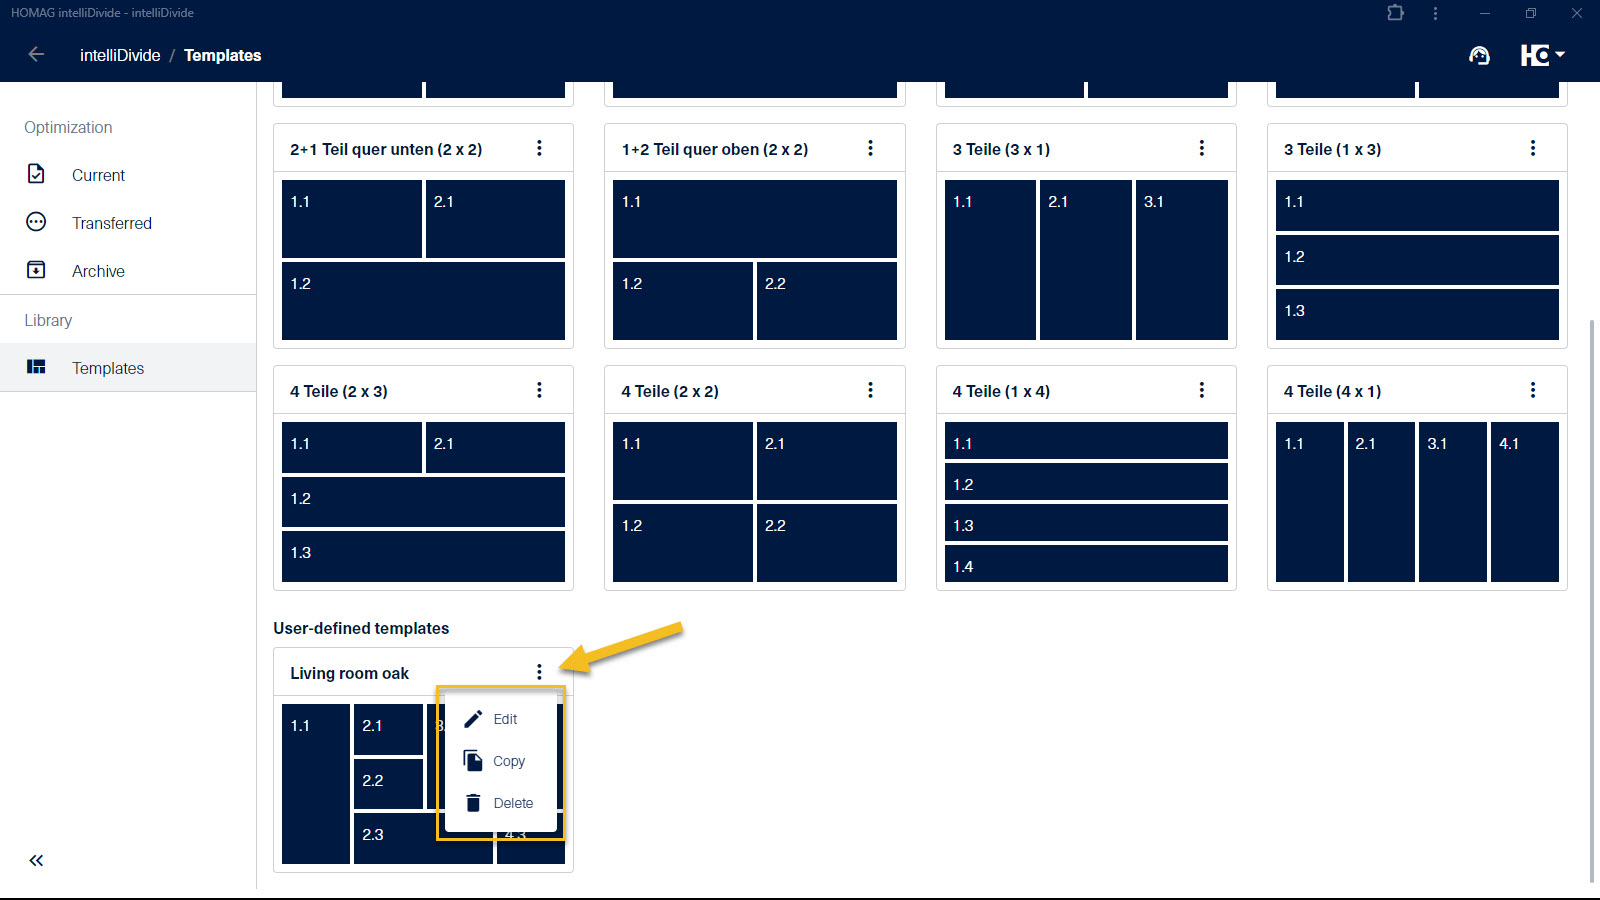
Step 9: A template can also be edited, copied or deleted via the submenu.