Add material
Difference between boards and edgebands
materialAssist is divided into two main areas: materialAssist Boards (1), for managing boards and offcuts and materialAssist Edge (2) for managing the edgebands in your workshop. Although both areas are similar in their basic structure, they have different process flows due to the specific operations for boards and edgebands. Within the areas "Boards" and "Edgebanding", additional workplaces can be added as required.

Differentiation between materialAssist Boards and materialAssist Edge
The "Store" tab in materialAssist Boards shows all boards and offcuts which either do not have a storage location yet or have been stored at another workstation. In this view, you have the option to store materials. The "Remove" tab shows the materials which already have a storage location at this workstation and are therefore ready for removal.

"Store" overview in materialAssist Boards
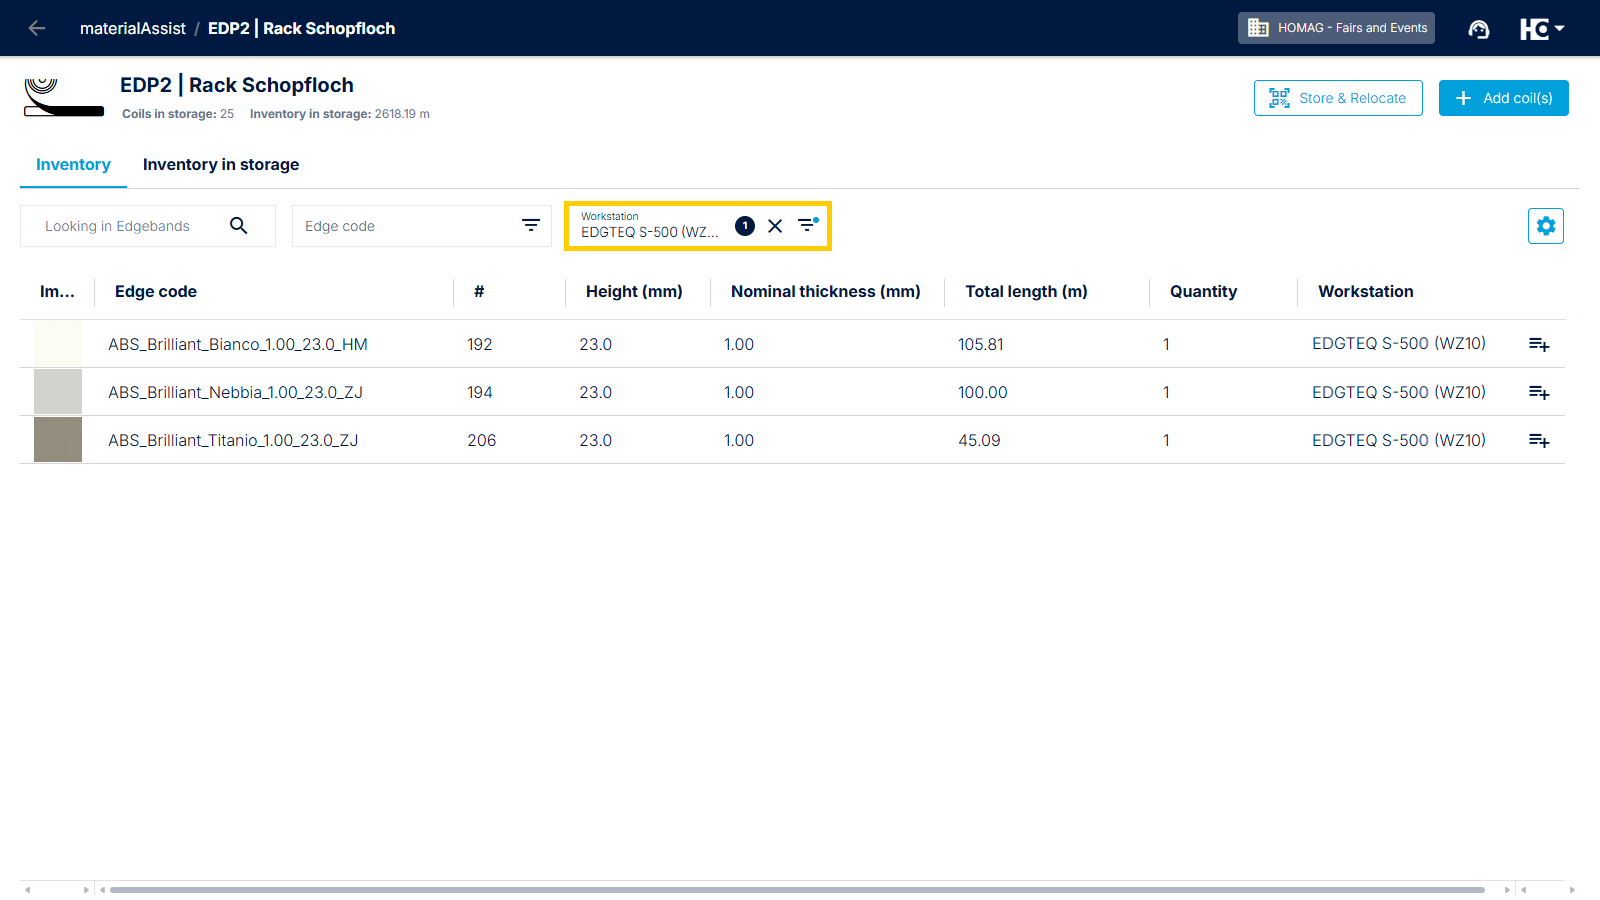
The "Inventory" tab of materialAssist Edge provides you with a complete overview of all edgebands. This includes those already stored, those at other workstations or at edgebanding machines (if corresponding machines are connected) and those not yet stored. On the other hand, the "Inventory in storage" tab exclusively shows the edgebands stored at the selected workstation.
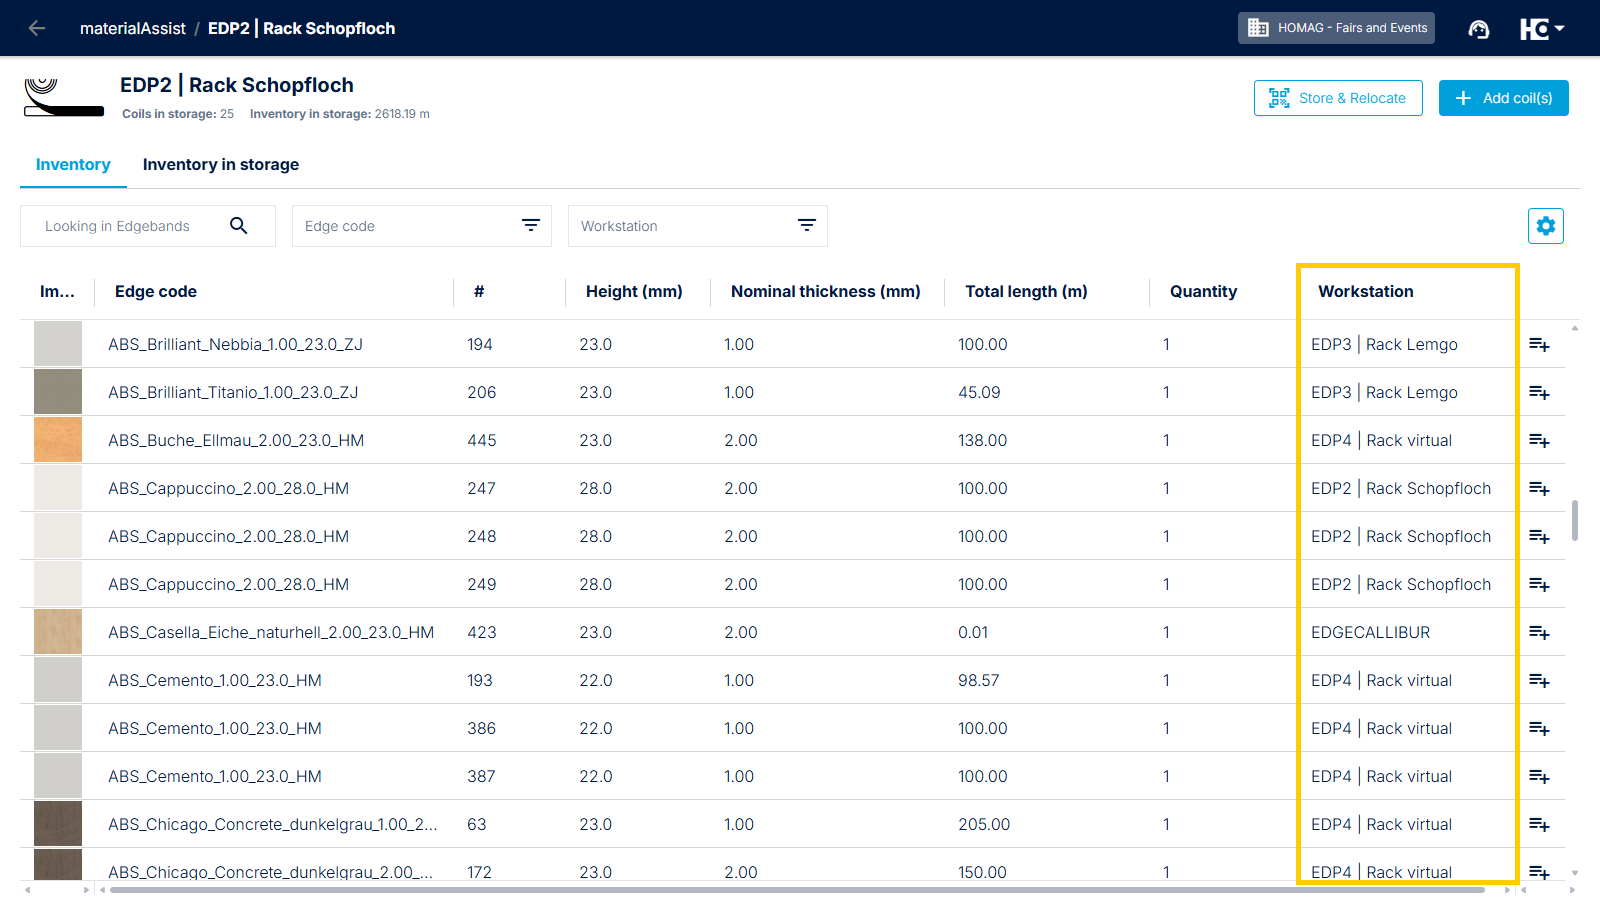
Overview materialAssist Edge including workstations
Filtered overview: edgebands stored on a selected machine
Adding a material
When starting materialAssist Boards, the "Store" tab is opened by default. Boards are generally either an offcut or a board.
Therefore, you can either "+ Add board(s)" (1) or "+ Add offcut(s)" (2).

Adding a board or offcut in the "Store" overview
In materialAssist Edge, you store edgebands in the "Inventory" or "inventory in storage" tab. Here, you can manage your material inventory and store edgeband coils using the "+ Add coil(s)" button.

Adding an edgeband in the "Inventory" overview
This opens the "Selecting material" dialog window. The view is divided into two sections. At the top you will find the materials which you have already created in materialManager. Below this you will find the catalog data from different manufacturers. If you only want to see your own materials from materialManager, you can hide the manufacturers' catalog data with the "materialManager only" toggle button. To make it easier to distinguish between your own material types and the catalog data, the board code resp. edgeband code of the material types already created is highlighted in bold.


Display of board types arleady created in materialManager
Display of edgeband types already created in materialManager
If you have not yet created a required material type in materialManager, you can search for it in the manufacturer's catalog or create a new one manually via "Material not found in catalog?". Similar to materialManager, the board catalog contains the material master data of the manufacturer Egger, while the edgeband catalog contains the material master data of the manufacturers REHAU, EGGER, Harnipex and Ostermann.
You can filter or search for the required material type as you would when adding materials in materialManager.

Selection of the material type from the catalog
A material type can easily be selected by scanning the QR or barcode on the material using the scan icon on the tablet or a connected Bluetooth scanner. The scanned information is then used to execute a search, from which you can select the appropriate material.
For scanned article numbers from the manufacturer Ostermann, materialAssist checks whether the edgeband type has already been created in materialManager. If it has, the dialog for adding coils will open. If the type is not yet set up, the dialog for creating a new edgeband type appears.

Search for material via scan
Once you have found the desired material type, select the appropriate card. This will open a dialog in which various information can be stored depending on the material type.
For all materials, the quantity and notes may be entered. This is particularly helpful if, for example, the material has been ordered as part of a specific customer order or if you want to make a note of any special information. You can set the management type for both boards and edgebands. By default, offcuts are stored as single boards (1).
Note: In both materialAssist and materialManager, the notes column can be added to the table view.
Furthermore, you have the option to assign a storage location (2). You can either select it from the existing list or alternatively scan the label at the location. When selecting the storage location by scanning, materialAssist will automatically record the material and the appropriate labels will be printed. Alternatively, you can add the material to your stock by clicking "Confirm". When proceeding with "Label & Confirm", the material is stored at the selected location and labels are printed according to the chosen material management type (3).
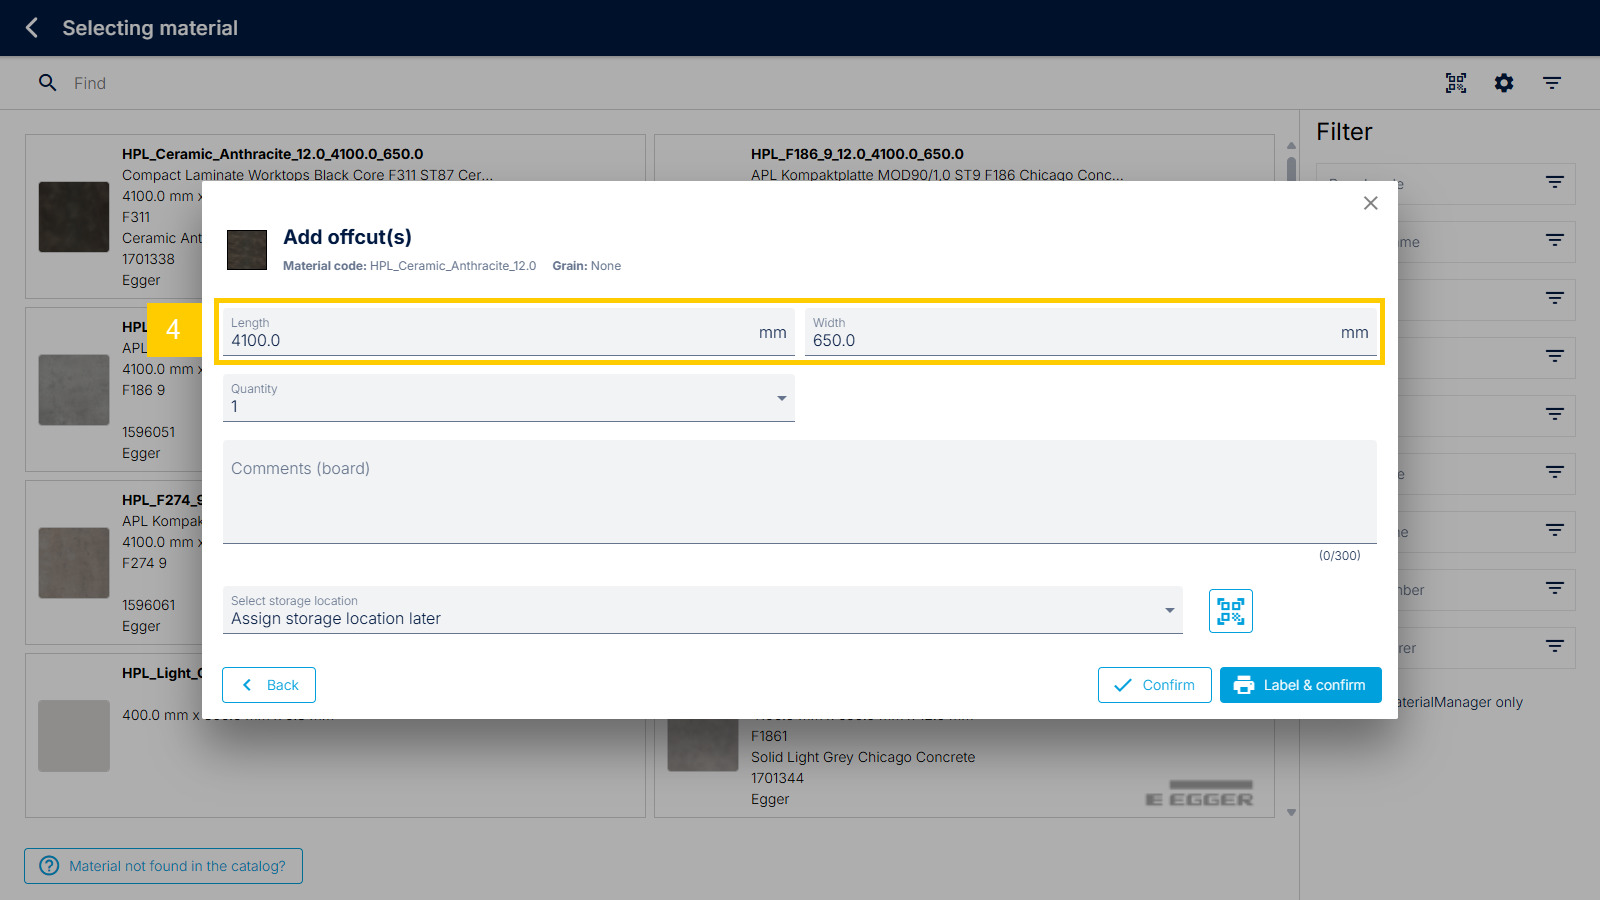
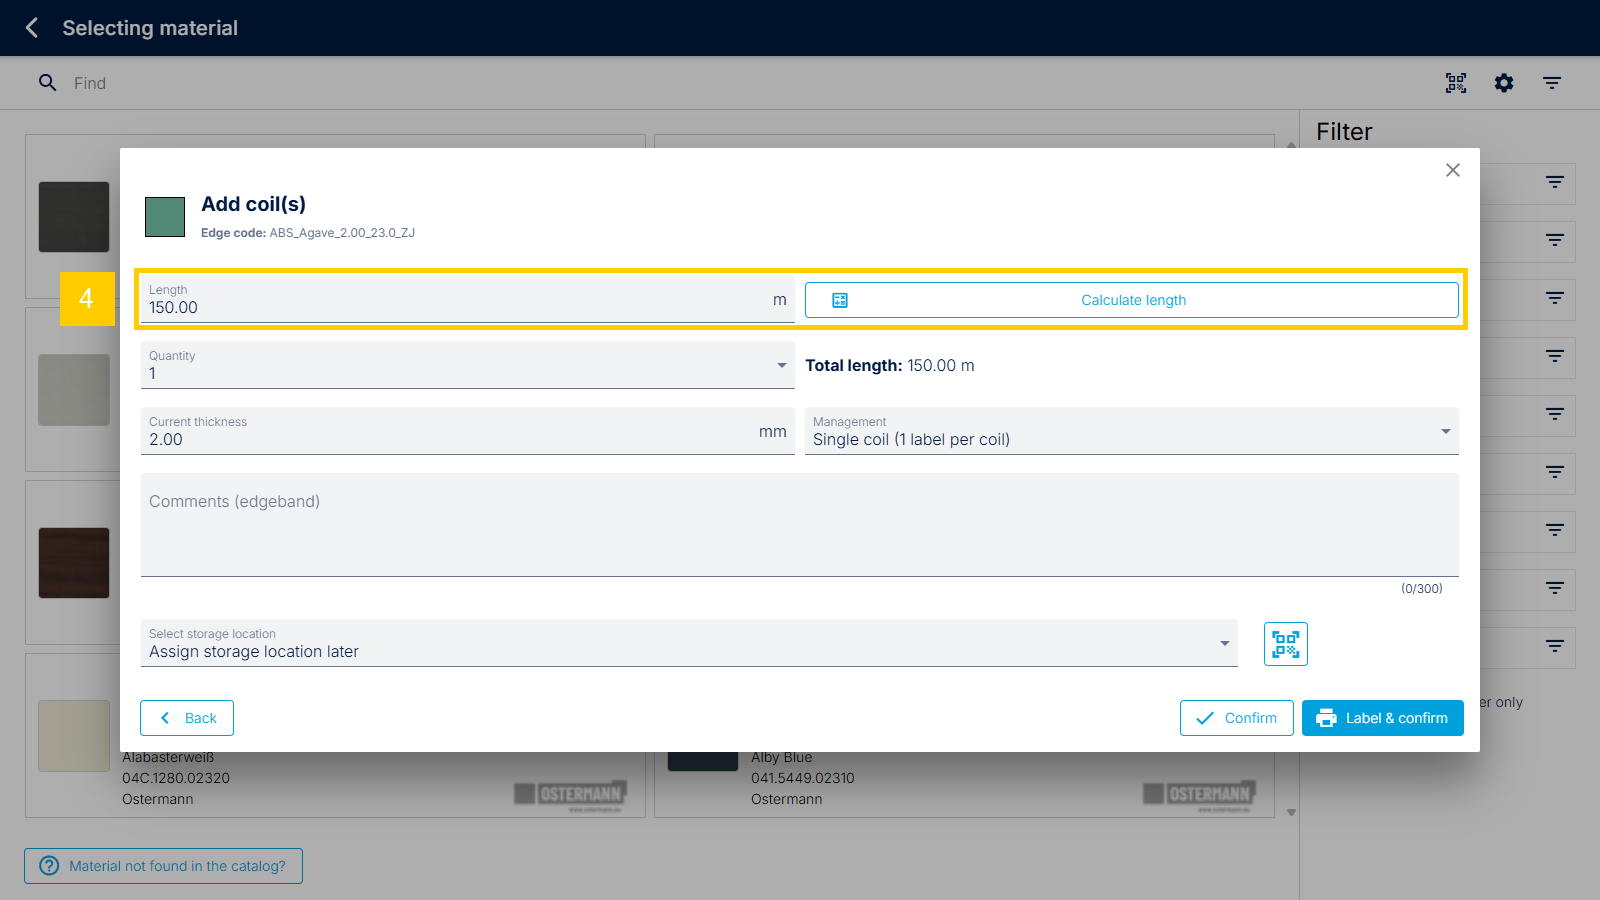
For edgeband coils and offcuts, the dimensions (4) can also be adjusted accordingly.
Note: By assigning the storage location later, you can record incoming goods without assigning the material to a specific storage location. The material will already appear in the apps, giving you an overview of your current inventory at all times.
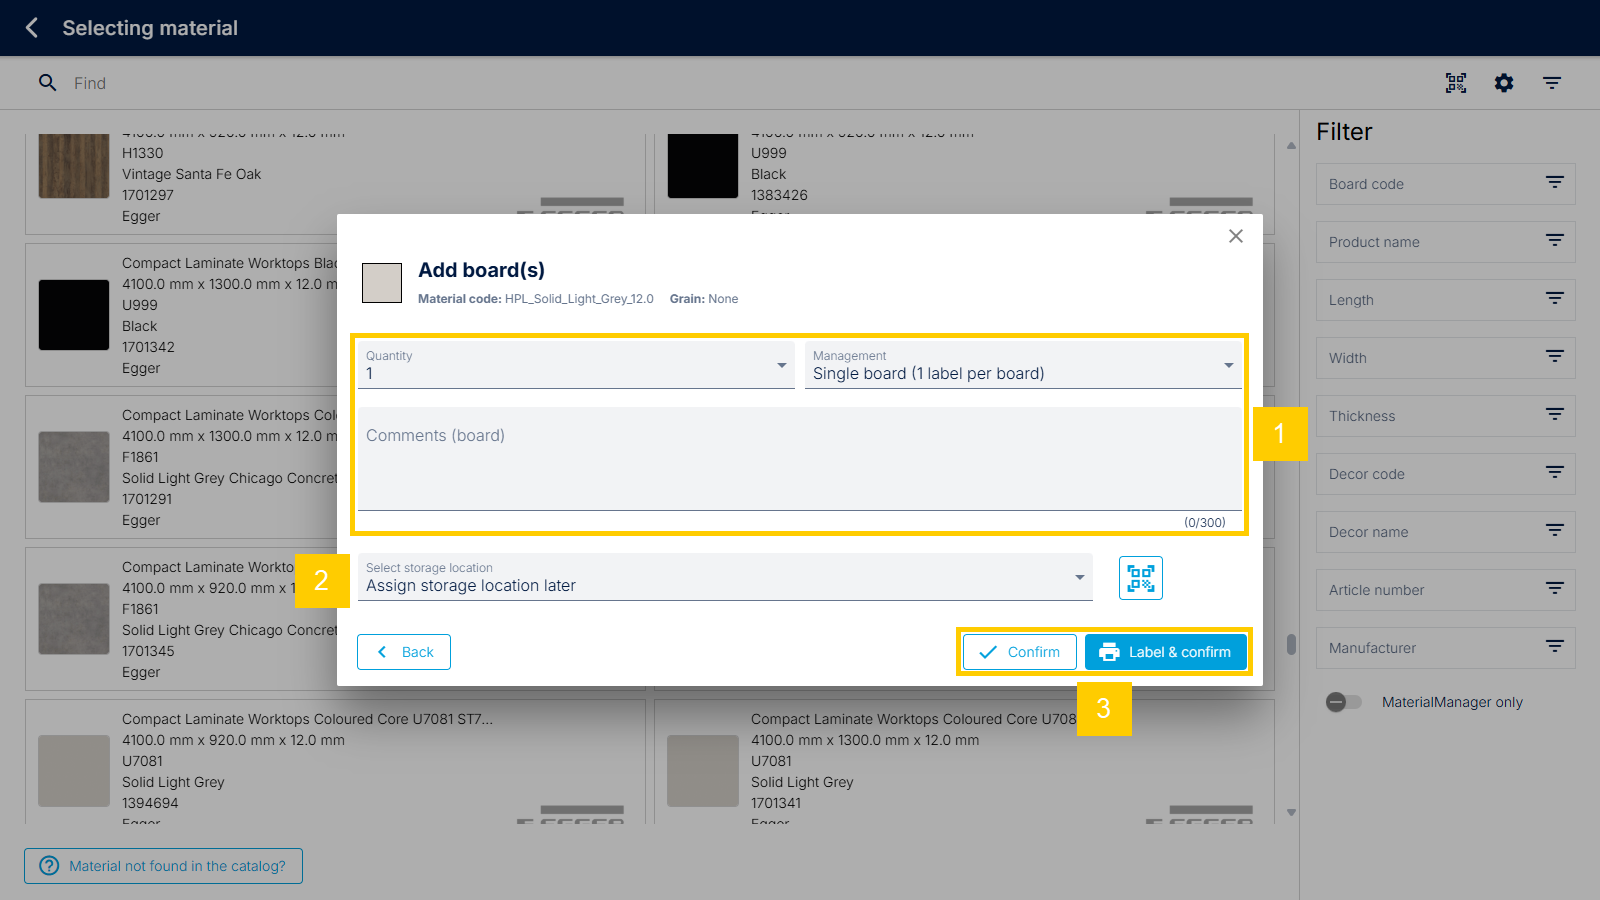
Storage dialog for boards
Storage dialog for offcuts
Storage dialog for edgebands