Install CUBE & printer
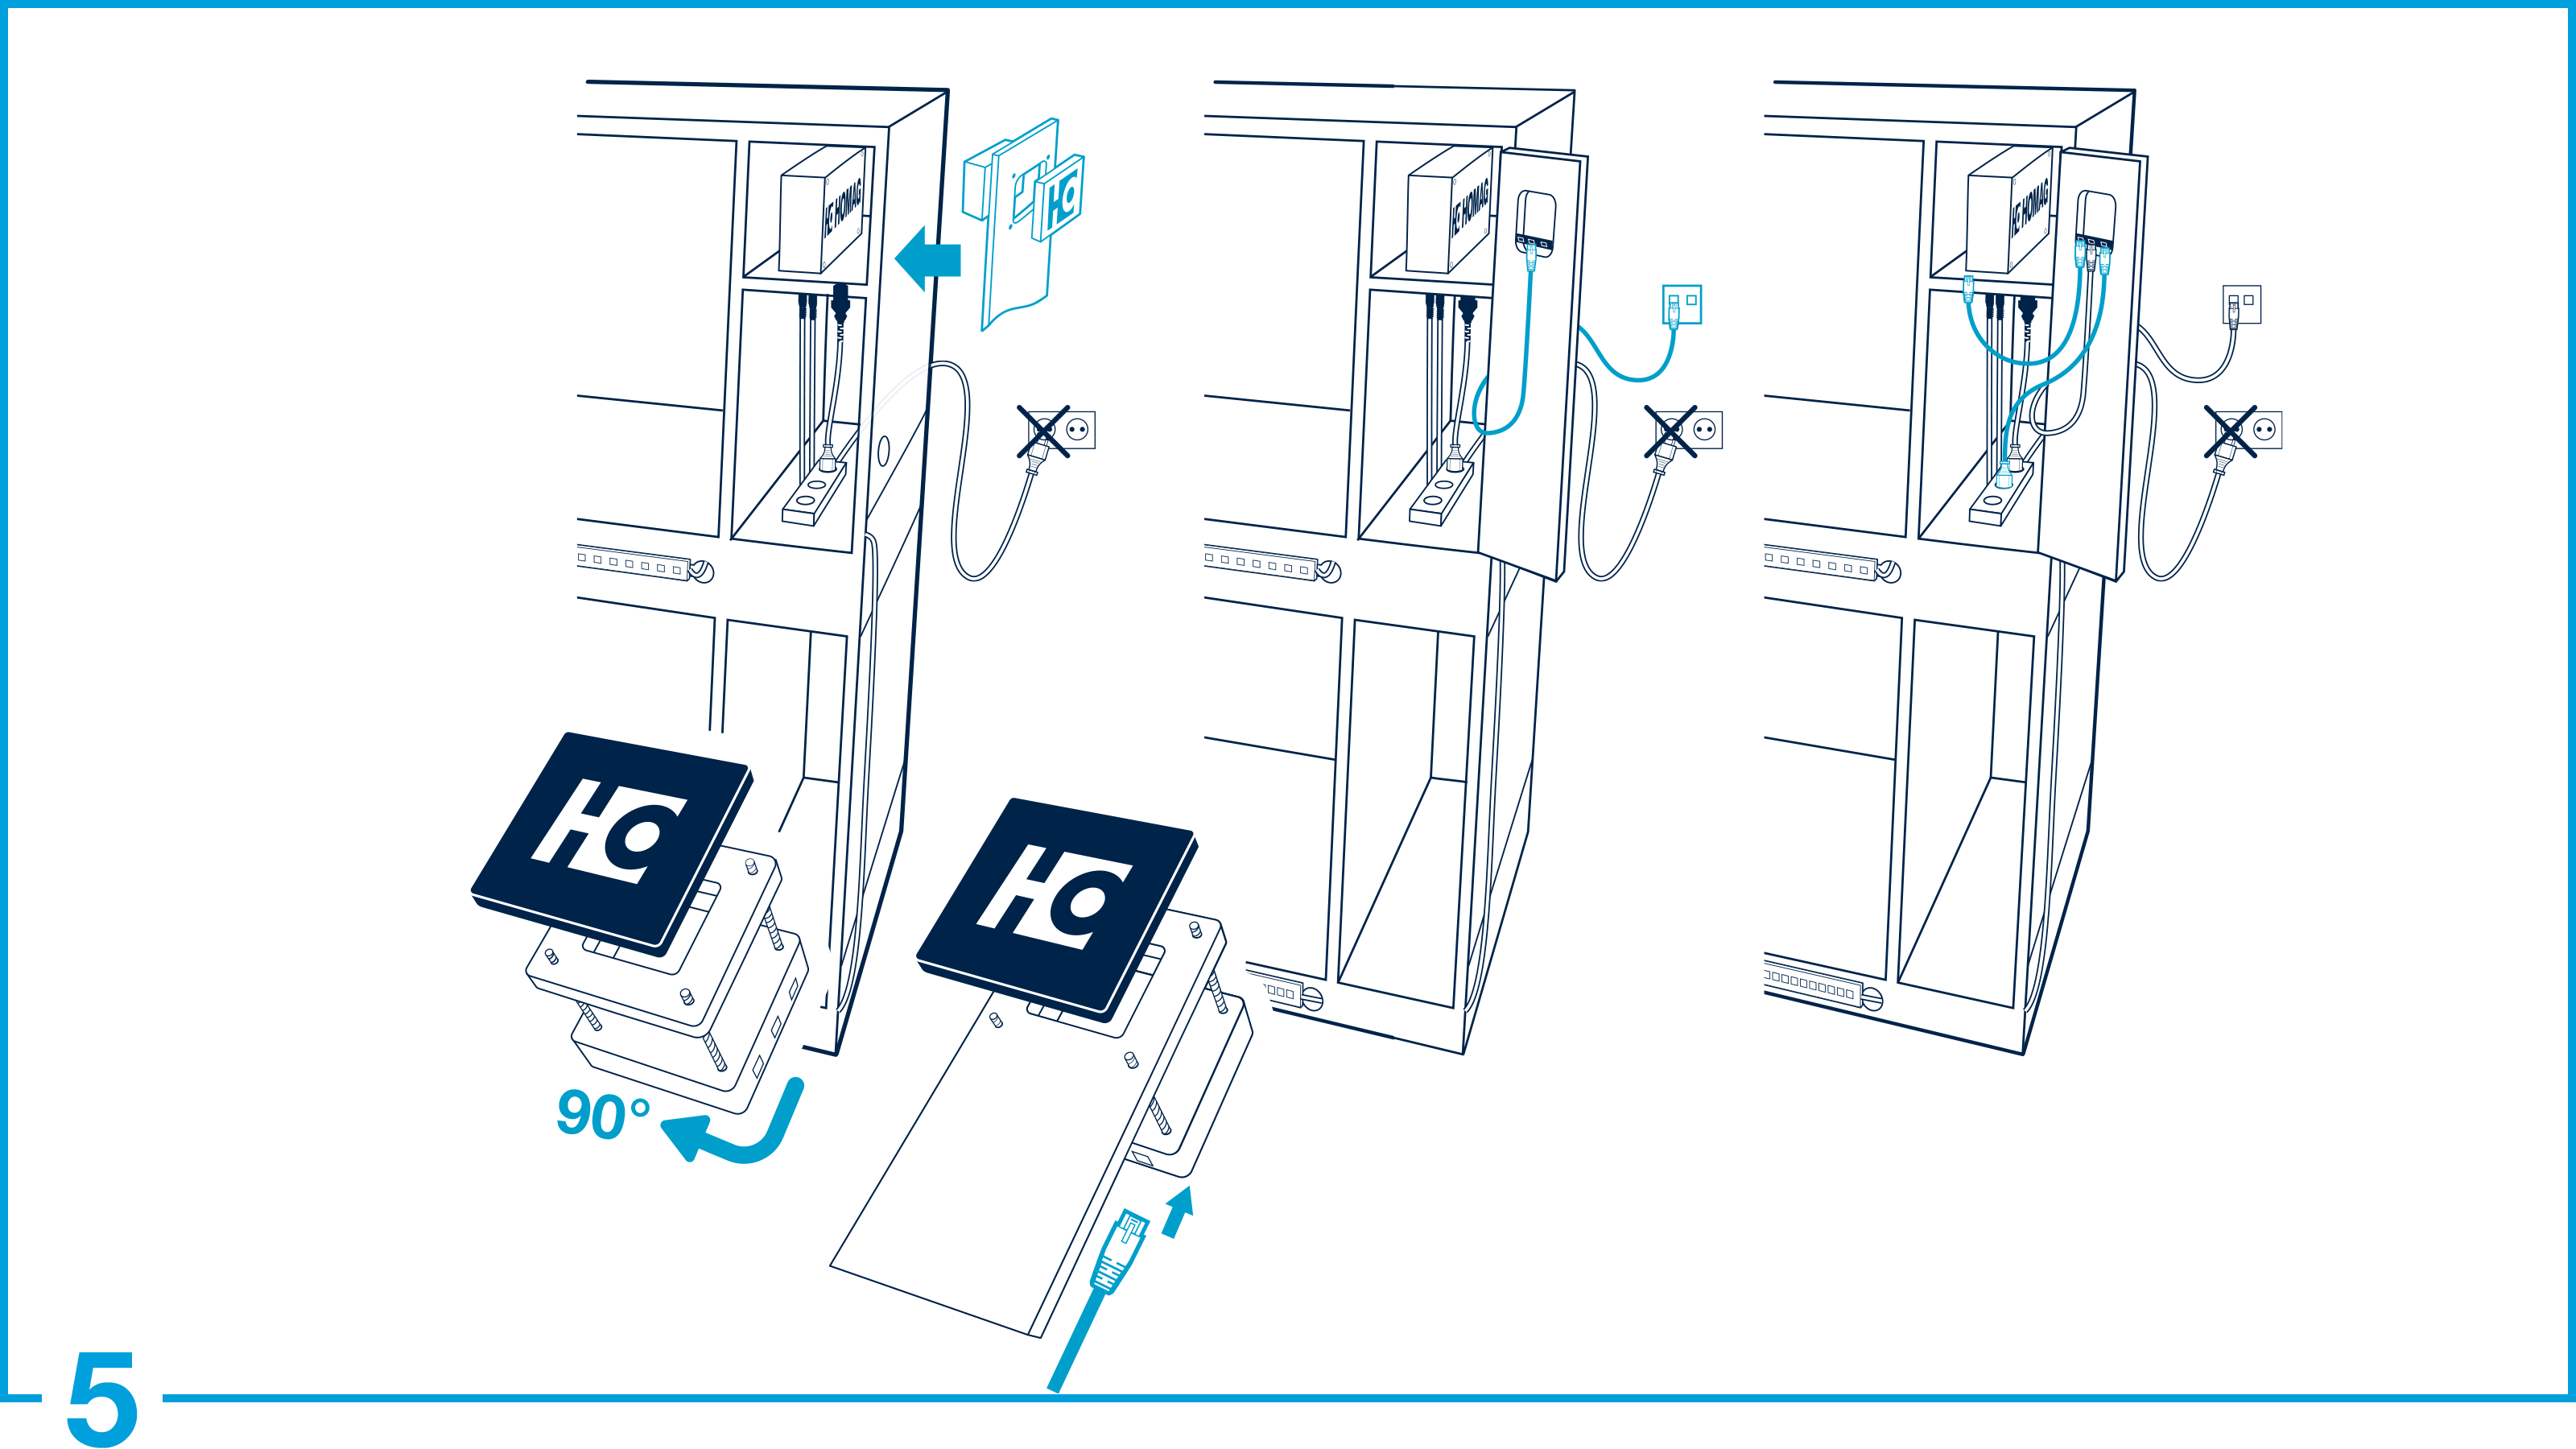
Install the HOMAG CUBE
Open the housing of the HOMAG CUBE by loosening the 4 screws on the rear side. Remove the rear panel and pull out the cable connecting plug between front and rear panel. The front side of the CUBE can be removed by loosening the 4 screws. The wooden part between front and rear side serves only as a placeholder. However, you can use the wooden part as a drilling template for the door. First mount the front in the door, then reconnect the cable and screw the back of the CUBE tight.
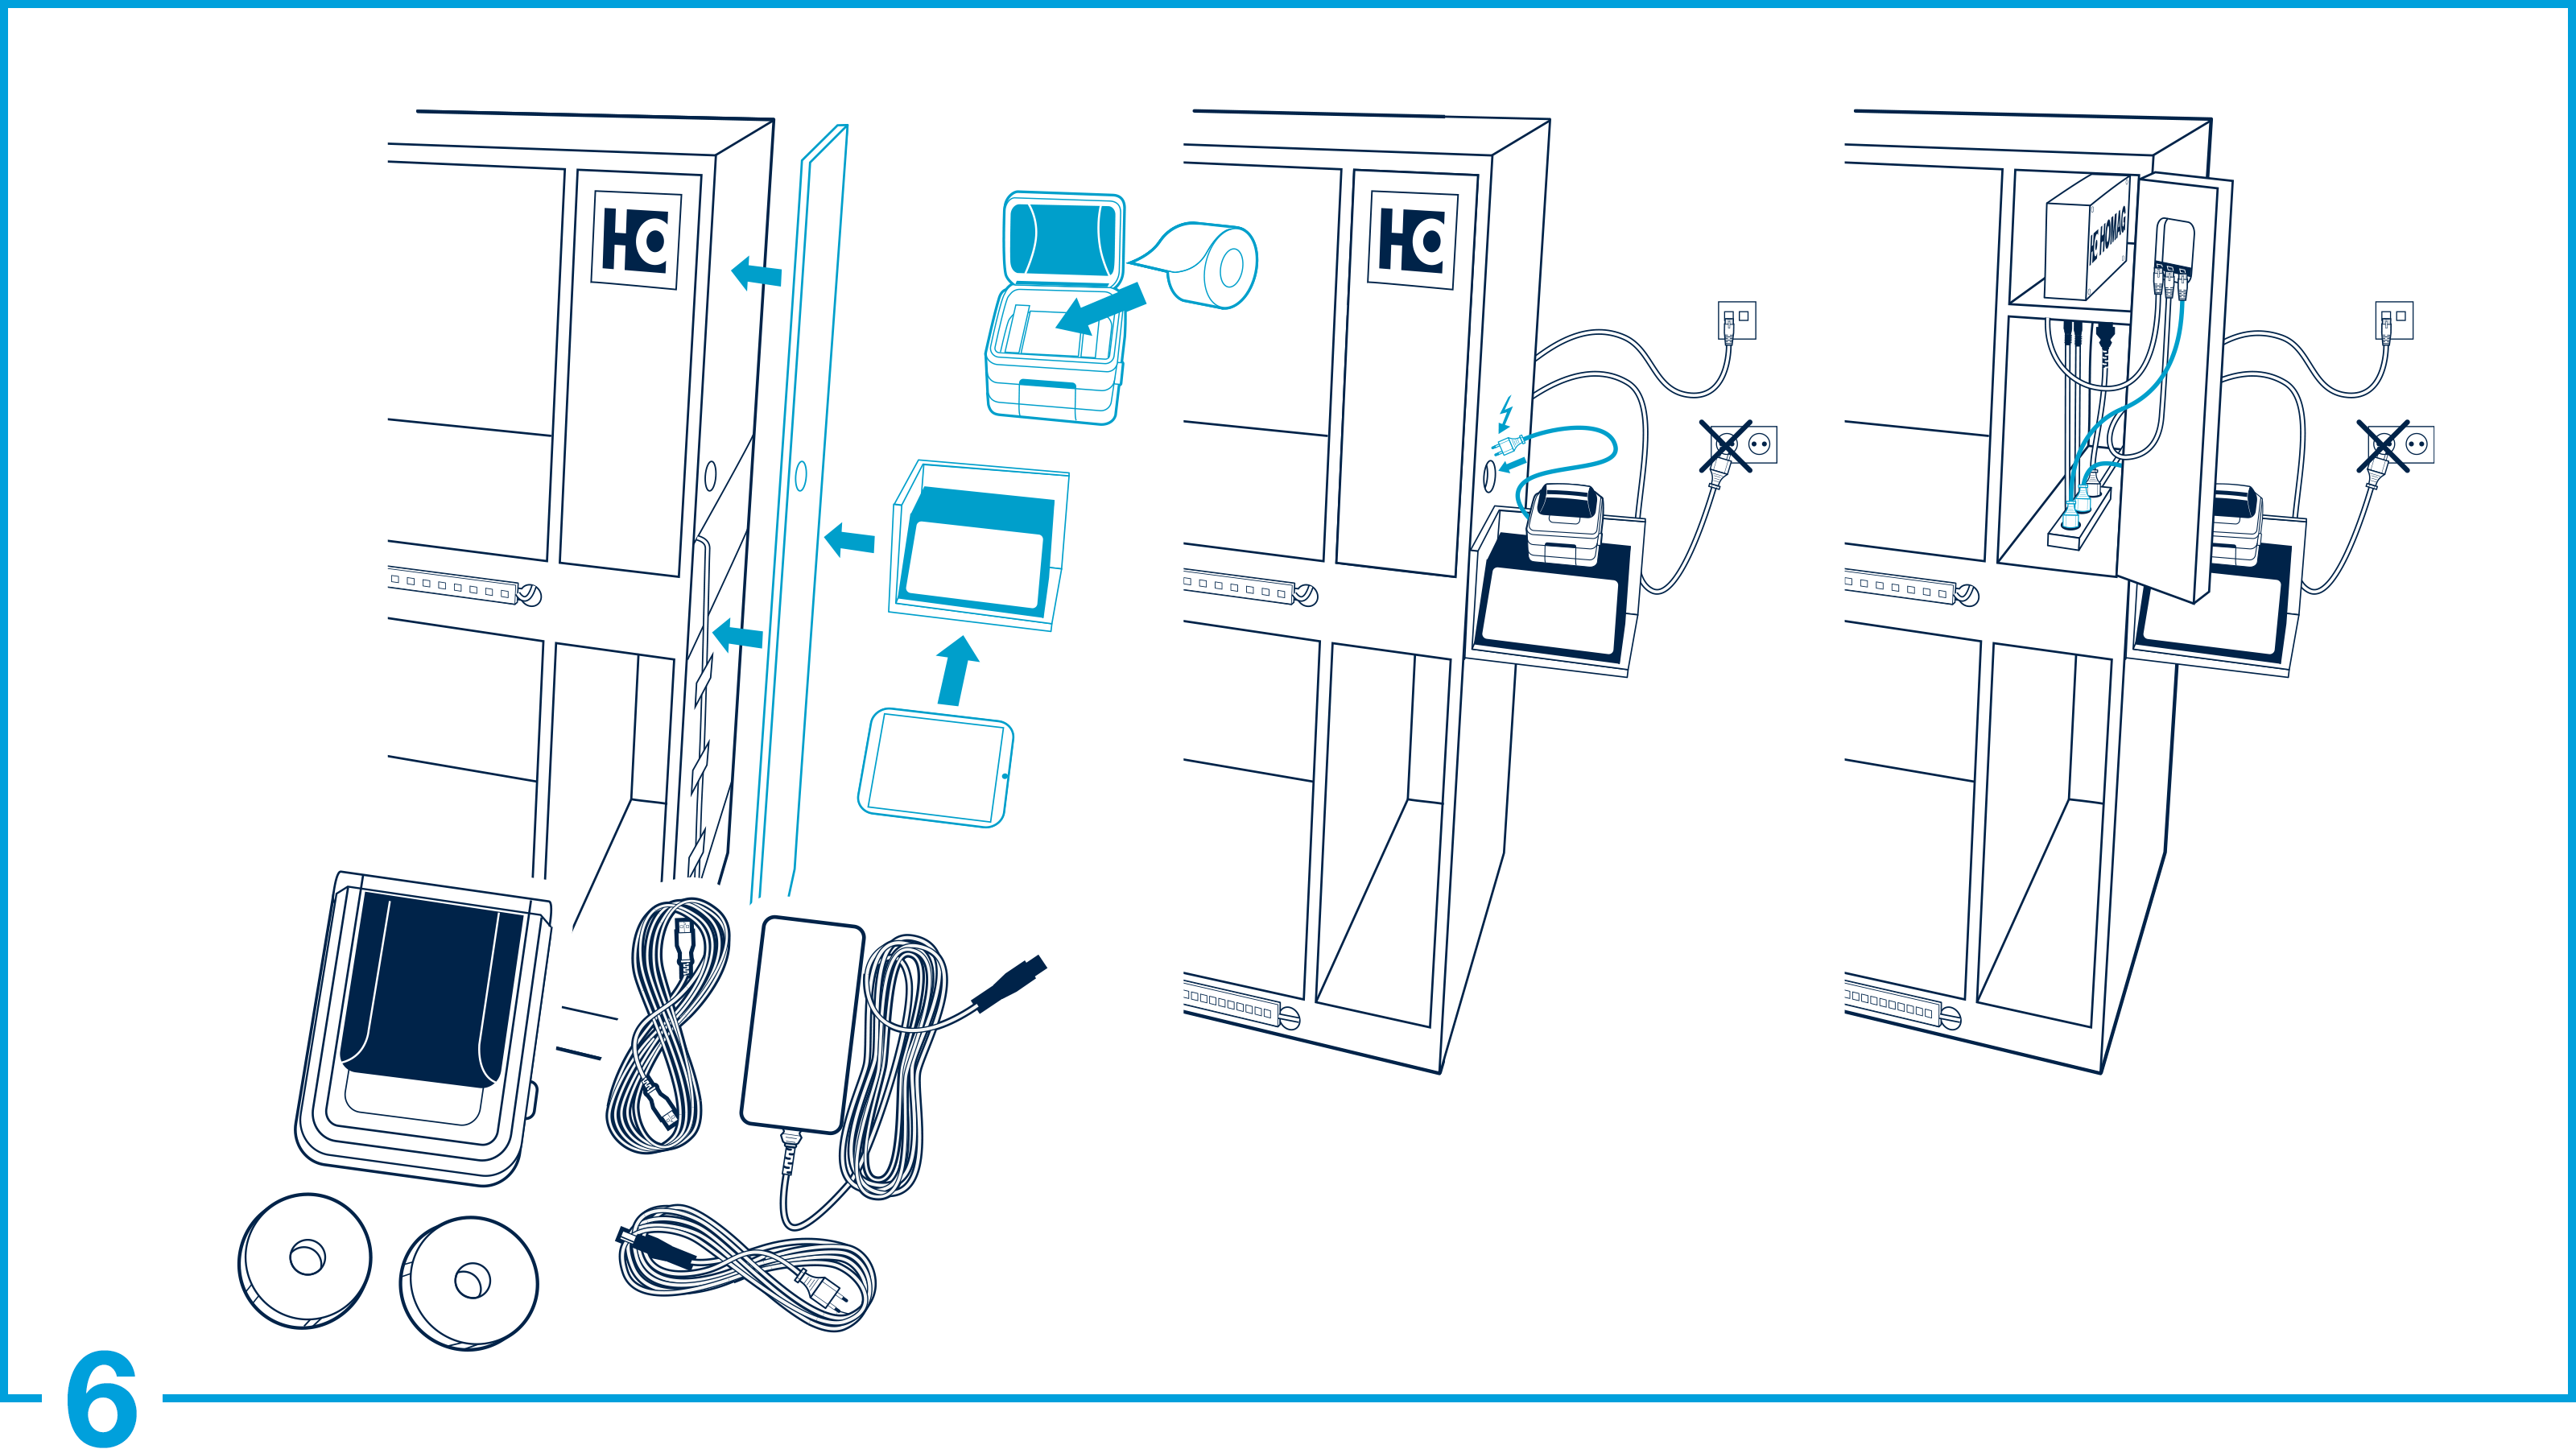
Install label printer
Connect all components according to the connection plan. If you have manufactured the rack according to the construction plans, then the printer stands on a tray on the right side of the shelf. Please route the USB cable and the power supply cable inside the rack and plug in both cables.
Install CUBE
Install printer