Make partitions
Rack setup
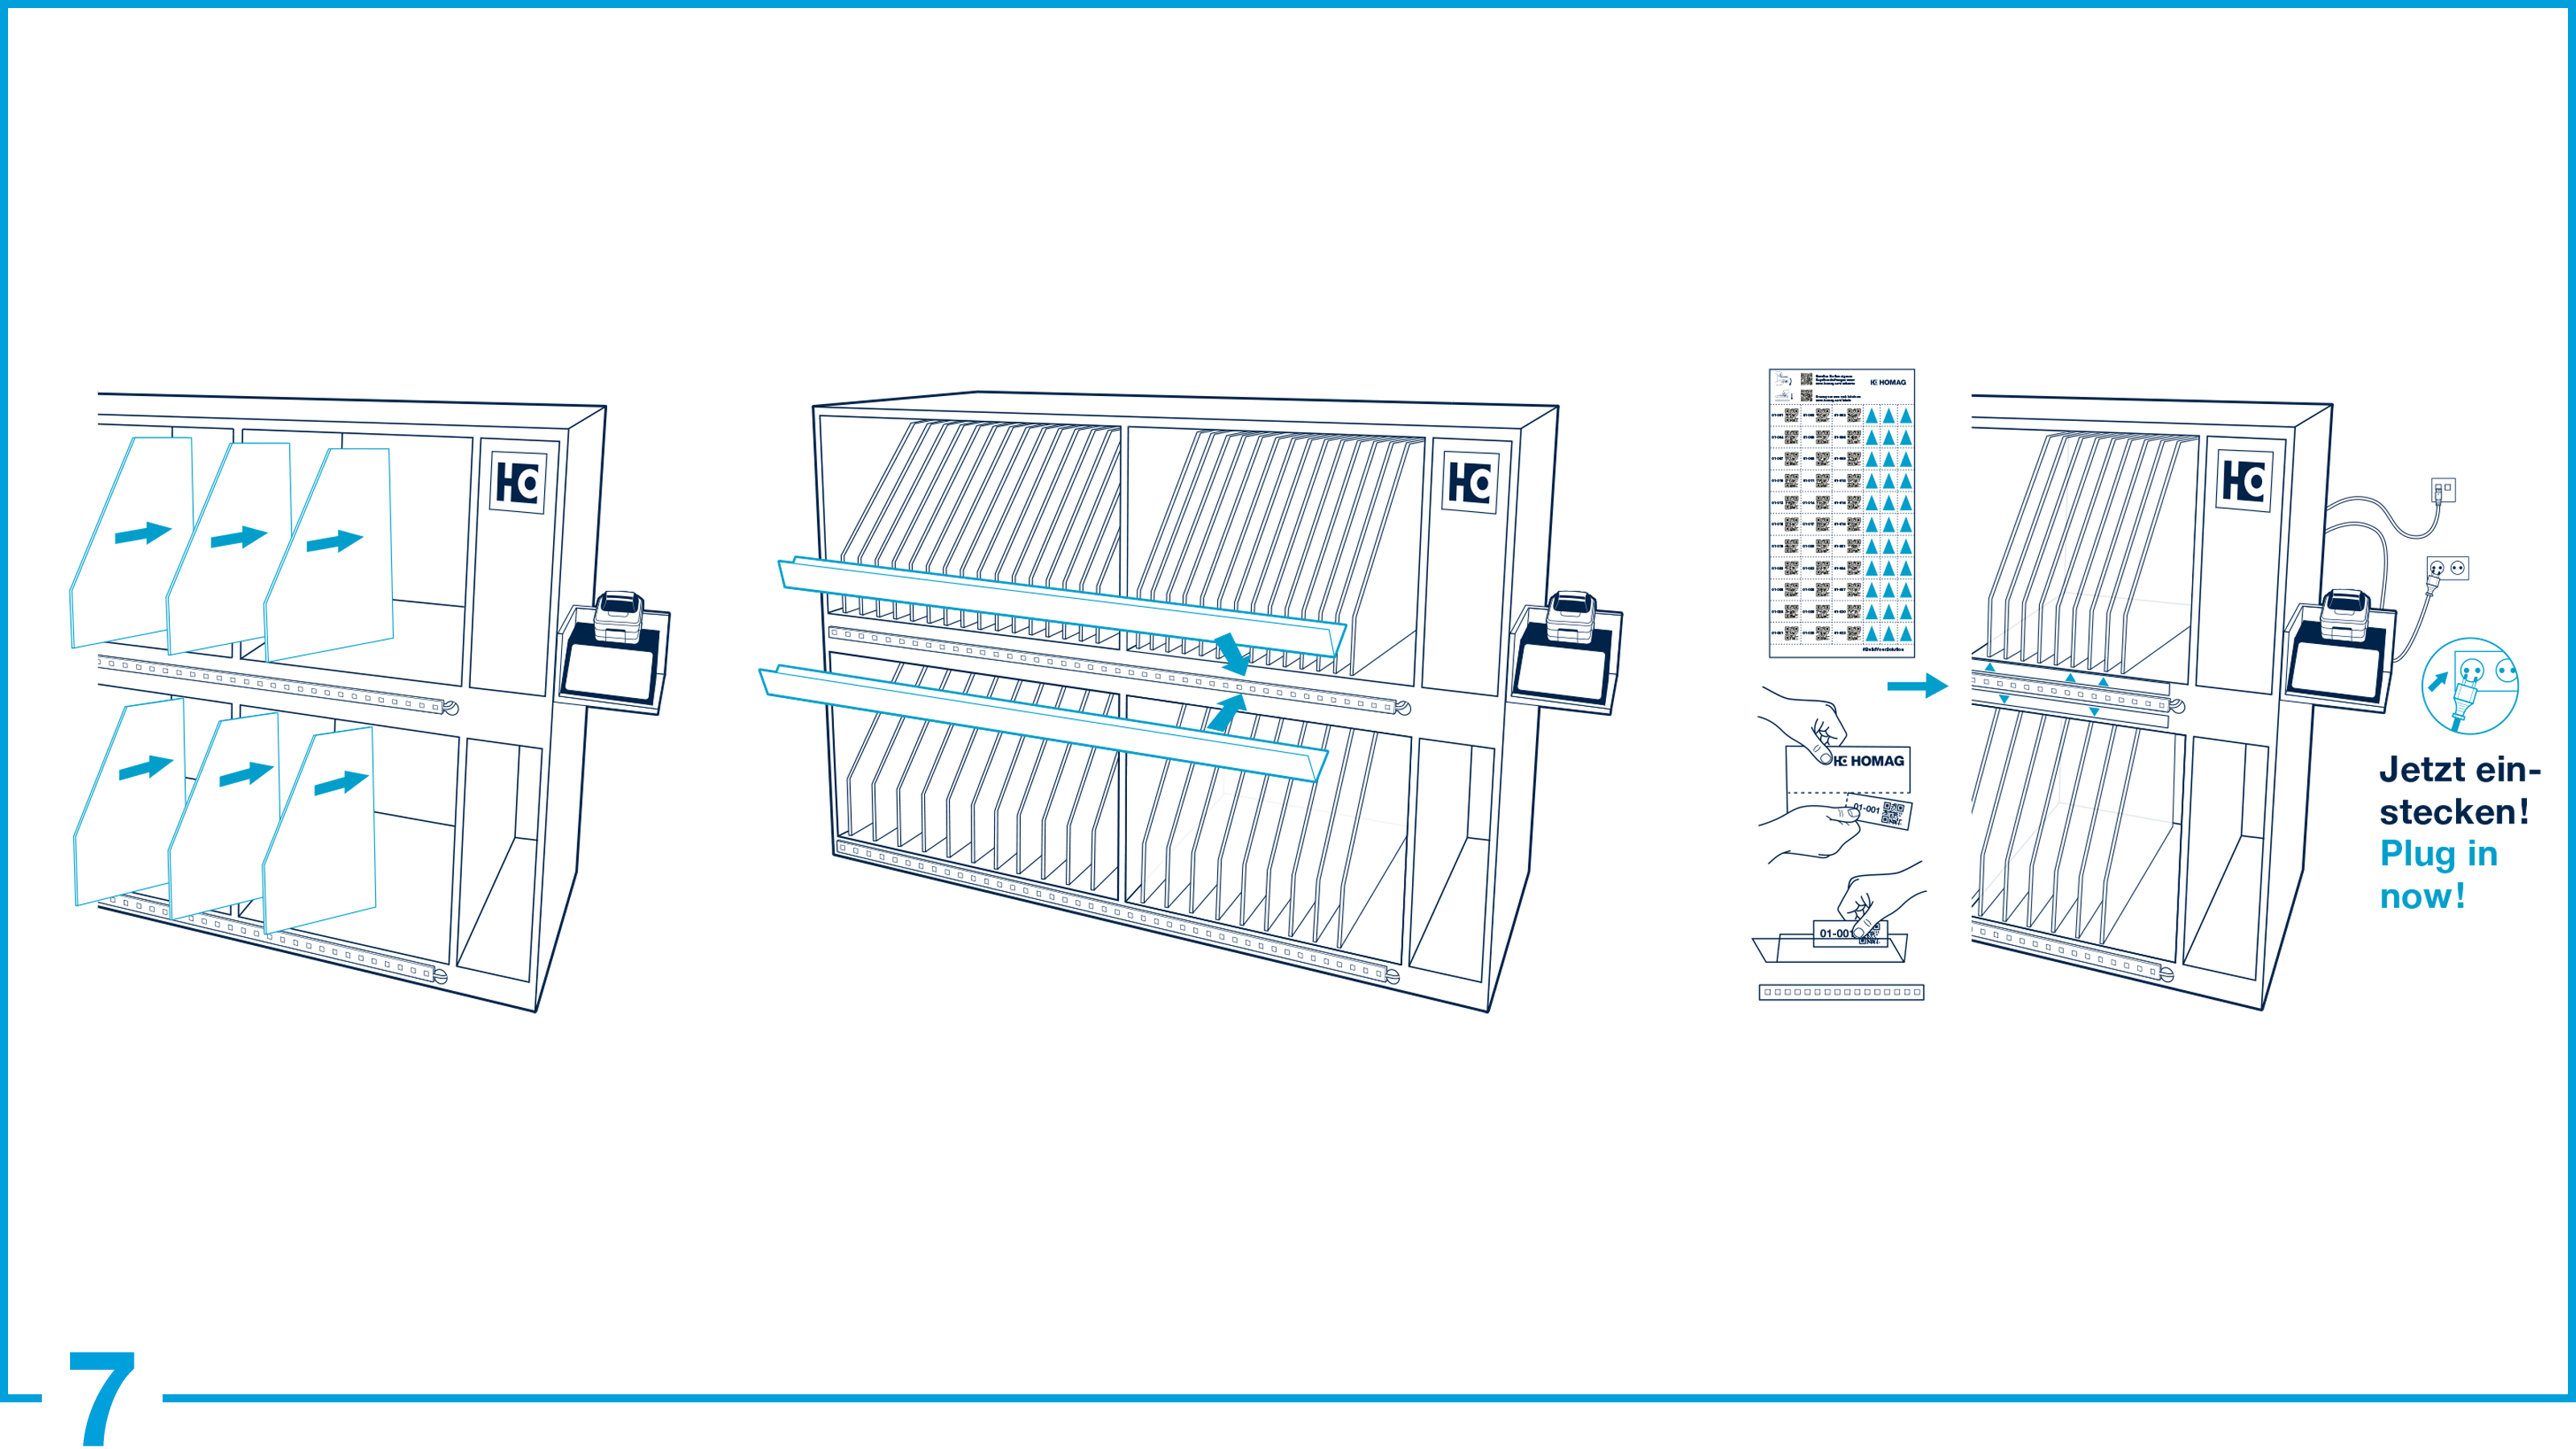
- To set up the rack, first slide the dividers into the grooves provided according to your requirements. Use the different sizes of the dividers, depending on where you want to store rolls with smaller or larger diameters.
- Then mount the label holders above and below the upper LED strip. For this, remove the protective film from the adhesive strip and press on the label holders. Make sure that the opening of the label holders points upwards.
- Remove the supplied labels from the packaging and separate the labels along the perforated line. Now place one label at a time into the label holder centered in front of each tray. We recommend starting at the top left with the first label and then distributing them from left to right.
- To visually separate the compartments from each other, we recommend that at the transition from one compartment to the next, to stick a label with a blue triangle with the tip pointing in direction of the compartments.
- To create your own labels, use our label tool.
Power plug in
- Now insert the plug of the multiple socket.
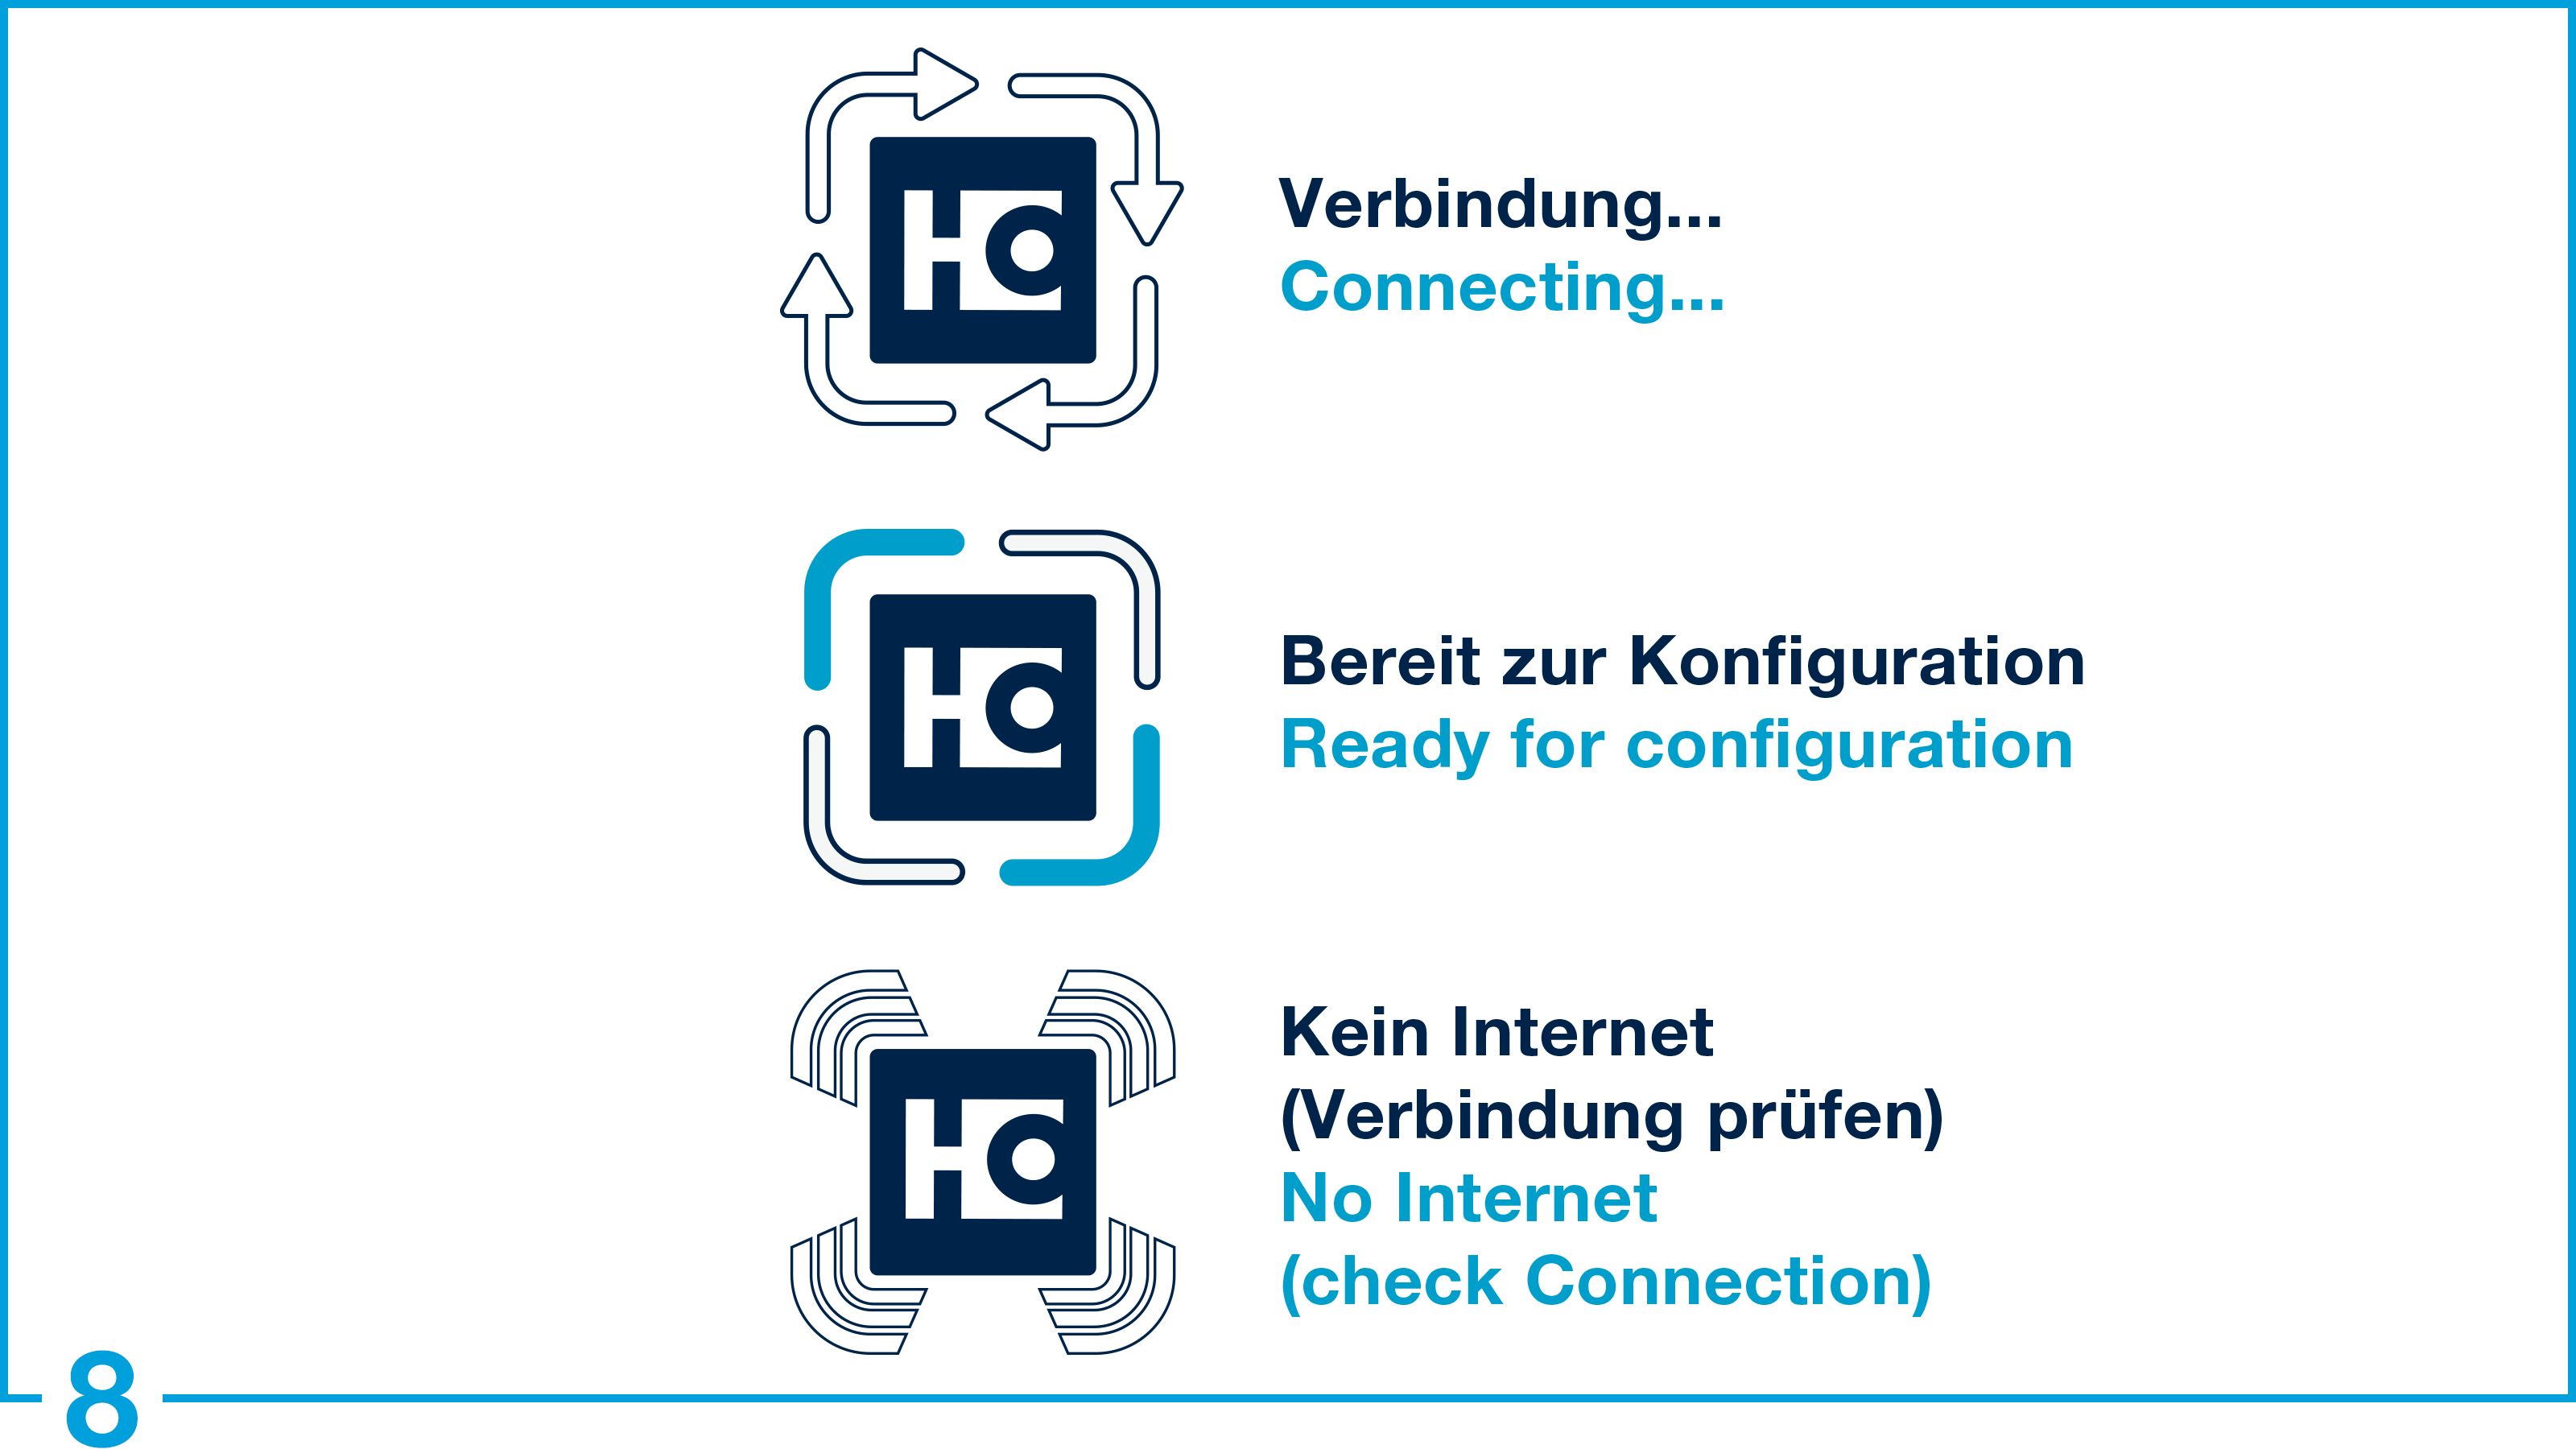
- The HOMAG CUBE will start to light up after approx. 1-2 minutes.
- If everything has been connected correctly, the HOMAG CUBE lights up blue-white and you can proceed with the configuration in the app.
- To find out what the individual color signals mean, click here.
Make partitions
Go online