Setting up the network
Settings Internet
| Priority | Port | Protocol | Name of the protocol | Description |
|---|---|---|---|---|
| required | 123 | UDP | NTP | Access to the time server provided by the DHCP server. Secure connections cannot be established without NTP as certificates cannot be validated. |
| required | 53 | UDP | DNS | Domain Name Service - name resolution on the Internet. This protocol is used to resolve Internet addresses (e.g. .tapio.one) into IP addresses. |
| required | 443 | TCP | HTTPS | Encrypted connection to the Internet. Is required to connect the tapio cloud and the HOMAG cloud services. |
| optional | 13 | ICMP | ICMP | Outgoing pings are required to verify the connection to cloud services. |
* optional: These ports are not required for the operation of the sR Bridge and are used for diagnosis and analysis in support cases.
Settings for the internal network
The sR Bridge has various diagnostic services that should be accessible in the local network. It is recommended that these services are only available in the internal network.
| Priority | Port | Protocol | Name of the protocol | Description |
|---|---|---|---|---|
| required | 80 | TCP | HTTP | Local diagnostics page of the sR Bridge. |
| required | 37001 | TCP/UDP | Discovery Service for the device pairing process. Communication between the machines and the sR Bridge. | |
| optional* | 5353 | UDP | mDNS | Multicast DNS service for providing the SR Bridge name in the local network. |
| optional* | 5355 | UDP | LLMNR | Link-Local Multicast Name Resolution; allows hosts to perform name resolution for devices in the same LAN. |
| optional* | 13 | ICMP | ICMP | Incoming pings to check whether the sR Bridge is online - Attention: Only one ping is allowed per second! |
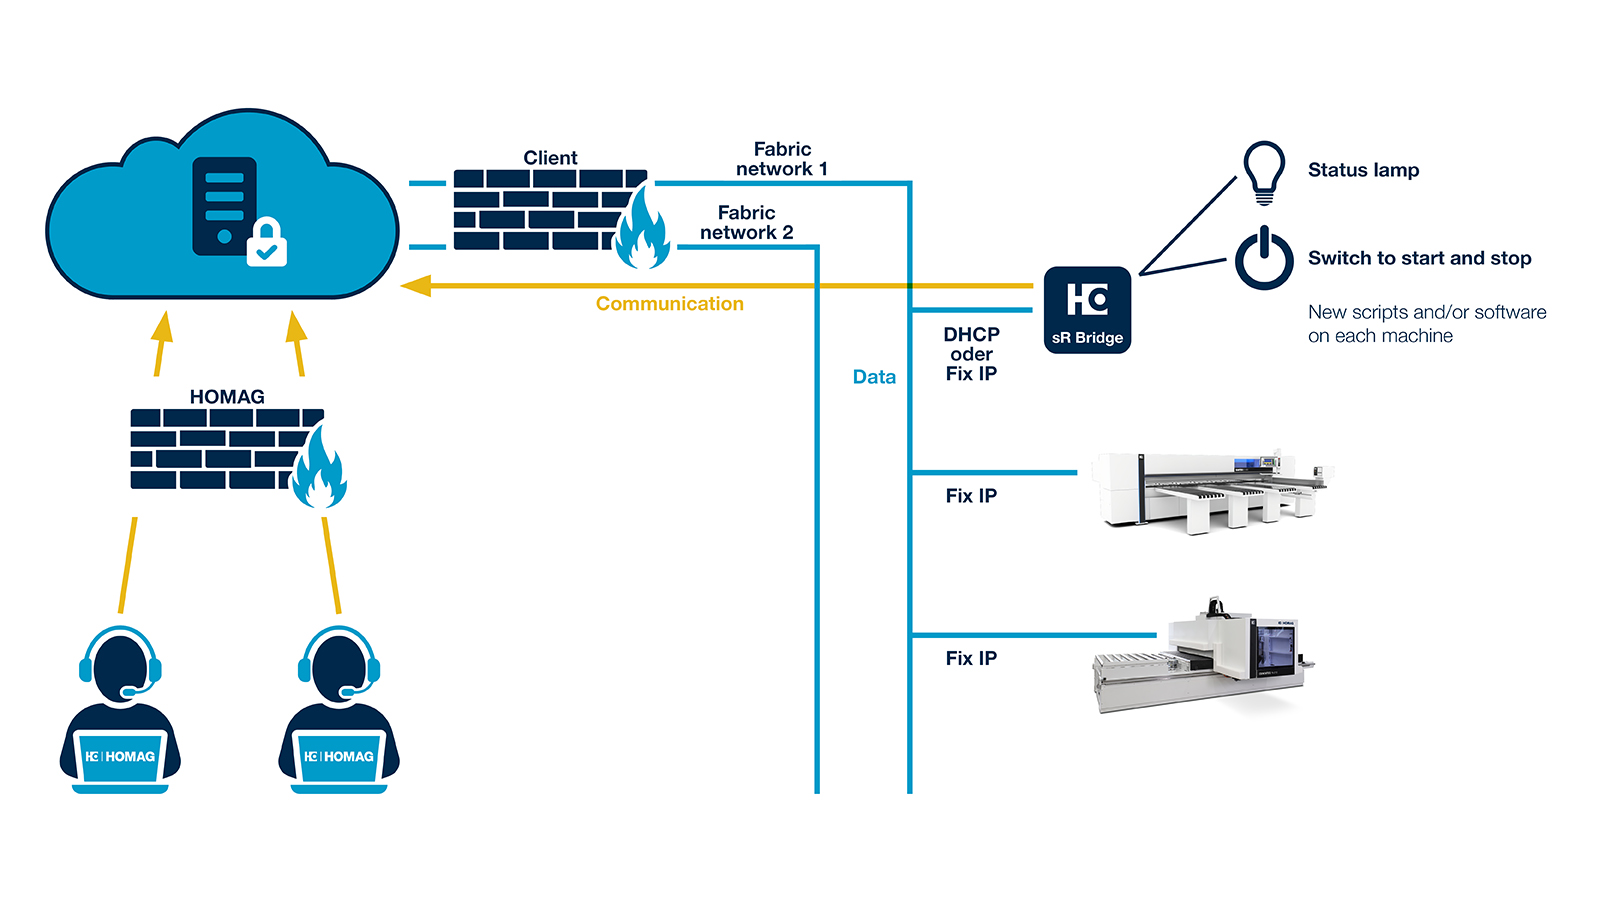
| optional | 22 | TCP | SSH | The SSH service is deactivated by default and must be activated manually via the diagnostic web interface. In the event of local maintenance or remote maintenance, the service employee can activate the function manually. If the SSH service is activated, the status is displayed in the diagnostics pages and via the status light. |
*optional: These ports are not required for the operation of the sR Bridge and are used for diagnostics and analysis in support cases.
Required URLs
| Priority | Used for | URL |
|---|---|---|
| necessary | HOMAG serviceRemote | https://api.serviceremote.net https://dispatcherde01.serviceremote.net https://dispatcherus01.serviceremote.net https://dispatchersea01.serviceremote.net API for serviceRemote Data connection for serviceRemote |
| necessary | HOMAG sh-core API | https://smarthardware-core.homag.cloud API for the firmware update |
| necessary | HOMAG Storage | https://dfshcoreprdeu01sa.blob.core.windows.net/* https://osu-cdn.homag.cloud Data memory for firmware updates |
| necessary | Time synchronization (fallback) | time.windows.com time1.google.com time2.google.com time3.google.com time4.google.com These URLs serve as a replacement function if no valid NTP server has been configured via DHCP or the local configuration page. |
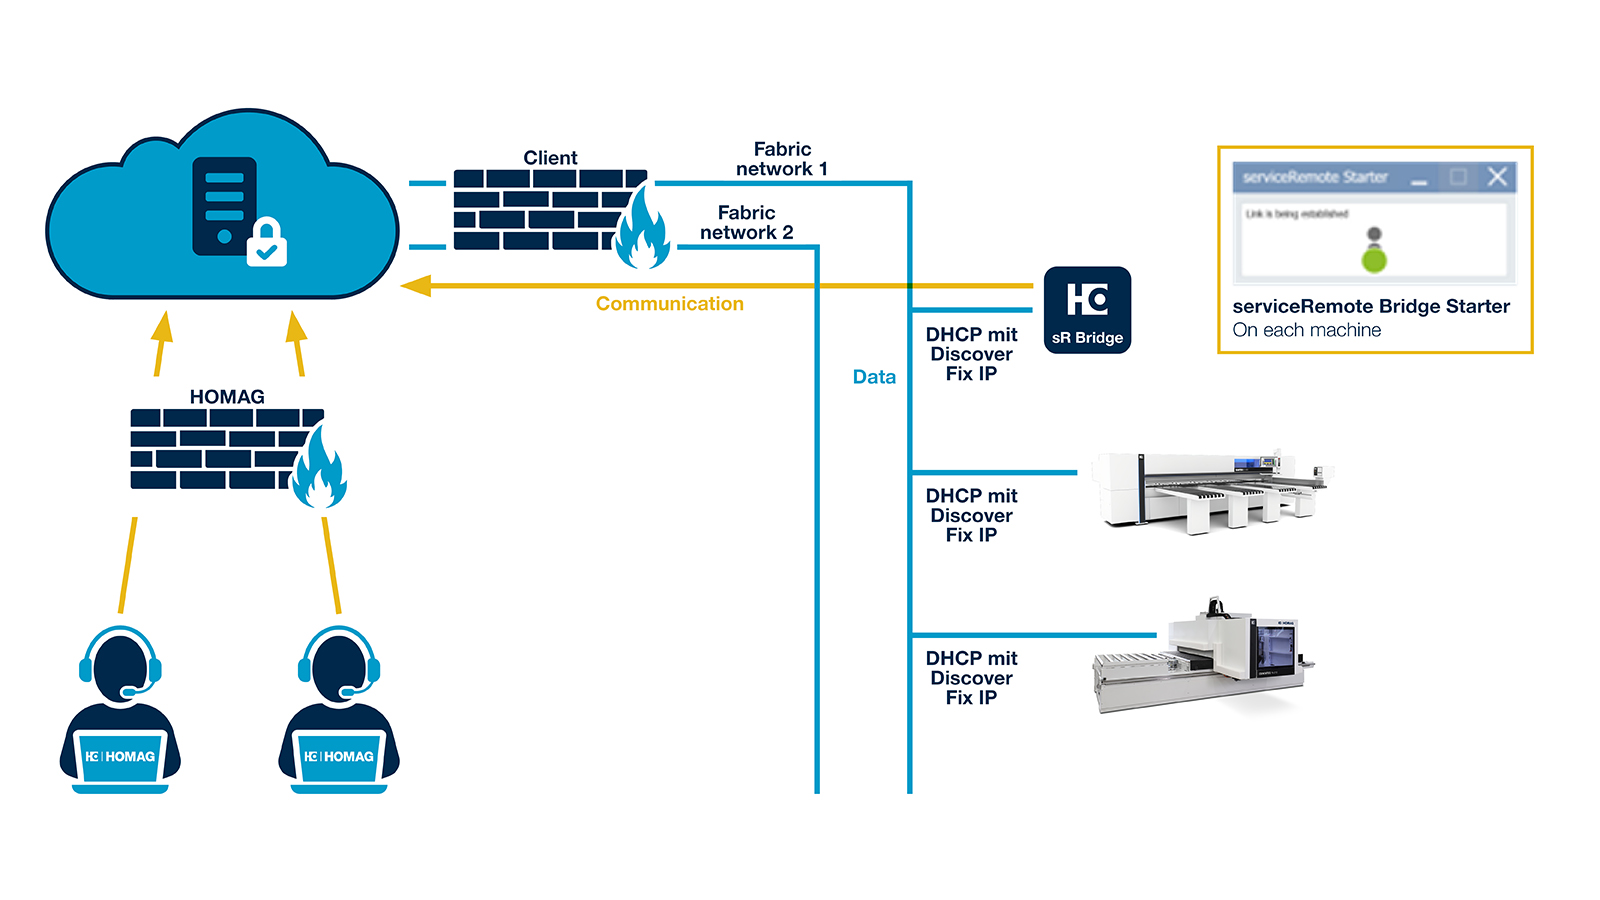
Settings for the sR Bridge network
You can adjust the network settings of your sR Bridge via the local diagnostics page. Manual adjustment of the settings is necessary if you want to set special IP settings for the sR Bridge in your network. By default, the sR Bridge receives the required network configurations from your Internet router via DHCP.
NOTE: If DHCP is deactivated in the network, access to the device interface is complicated. It is advisable to temporarily activate DHCP for commissioning. For more information, see the Troubleshooting section in the manual or the FAQs.
You can find more information on the Diagnostics in the local network page.
We recommend accepting the default configuration via DHCP. If the configuration is incorrect, the function of the sR Bridge is no longer guaranteed.
In a current Internet browser, enter the host ID or, if known, the IP address in the address bar and press Enter. Now log in to the device interface with the device password. The host ID and password can be found on the label on the back of the sR Bridge or on the enclosed additional label.
You have the following setting options on the diagnostics page:
Host name: Change the host name of the sR Bridge
- The host name of the CUBE is composed as follows when delivered: homag-iot-<mac address>
- You can access the sR Bridge via the host name of the sR Bridge (without knowing the IP address) on the local diagnostics page. This is helpful if you have Internet problems when setting up the sR Bridge, for example. The local diagnostics page will help you with this.
NOTE: If you have configured a domain in your network, please use the following scheme to access the local diagnostics page: <hostname>.<domain>
DNS: Customize name server for the sR Bridge
- The name server is used to resolve the host name into an IP address. In small networks, this is often the Internet router. In larger networks, a separate DNS server is often operated.
Default gateway
- The default gateway is a node in your network via which sR Bridge finds its way to the Internet. By default, this is your Internet router.
NTP server: Time server
- If you have your own time server in your network, you can configure it here. Some DHCP servers provide this automatically so that you do not have to configure it. If you do not have an NTP server in your network, please ensure in your firewall that the sR Bridge can access one of the following default servers via the NTP protocol.
- time1.google.com
- time2.google.com
- time3.google.com
- time4.google.com
- time.windows.com
DHCP / Static network settings
- You can use the "Enable DHCP client" selection to specify whether your sR Bridge should receive the network configuration from a DHCP server or a static network configuration.
- ATTENTION: We recommend the standard configuration via DHCP. If the configuration is incorrect, the sR Bridge will no longer function. However, you can return to the standard configuration via the factory settings.
The network settings are only applied after confirming a dialog by clicking the "Save and activate" button.
Note: The settings for the “LAN 2” network adapter must not be changed.
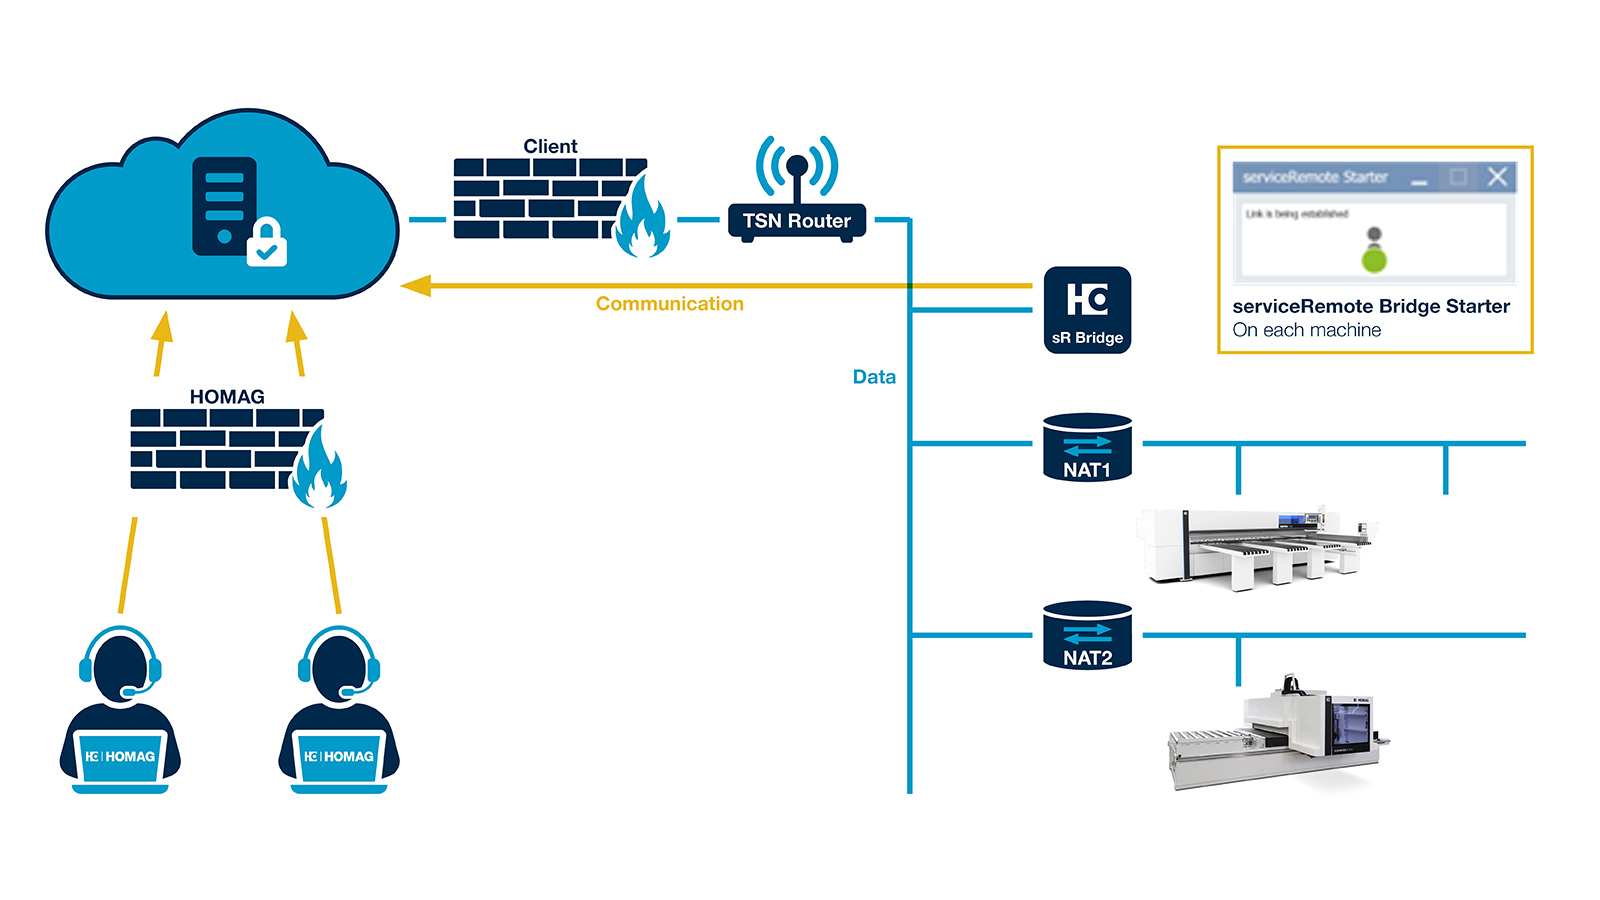
Connecting the sR Bridge with a TSN Router
Integration of sR Bridge with TSN + ISN Soft
Integration of sR Bridge Linux and the legacy operating system