Processing an order
In the order details you will find the "Nesting patterns" and the "List of production".
At the top of the app view you will find important data about the opened job in the overview:
- Ordername
- Number of parts
- Number of needed boards
- Status
Choosing a nesting pattern
Under the "Nesting patterns" tab, the patterns to be edited are displayed graphically.
Board information is displayed for each plan. If the board type has been registered in the materialManager, the decor is also displayed.
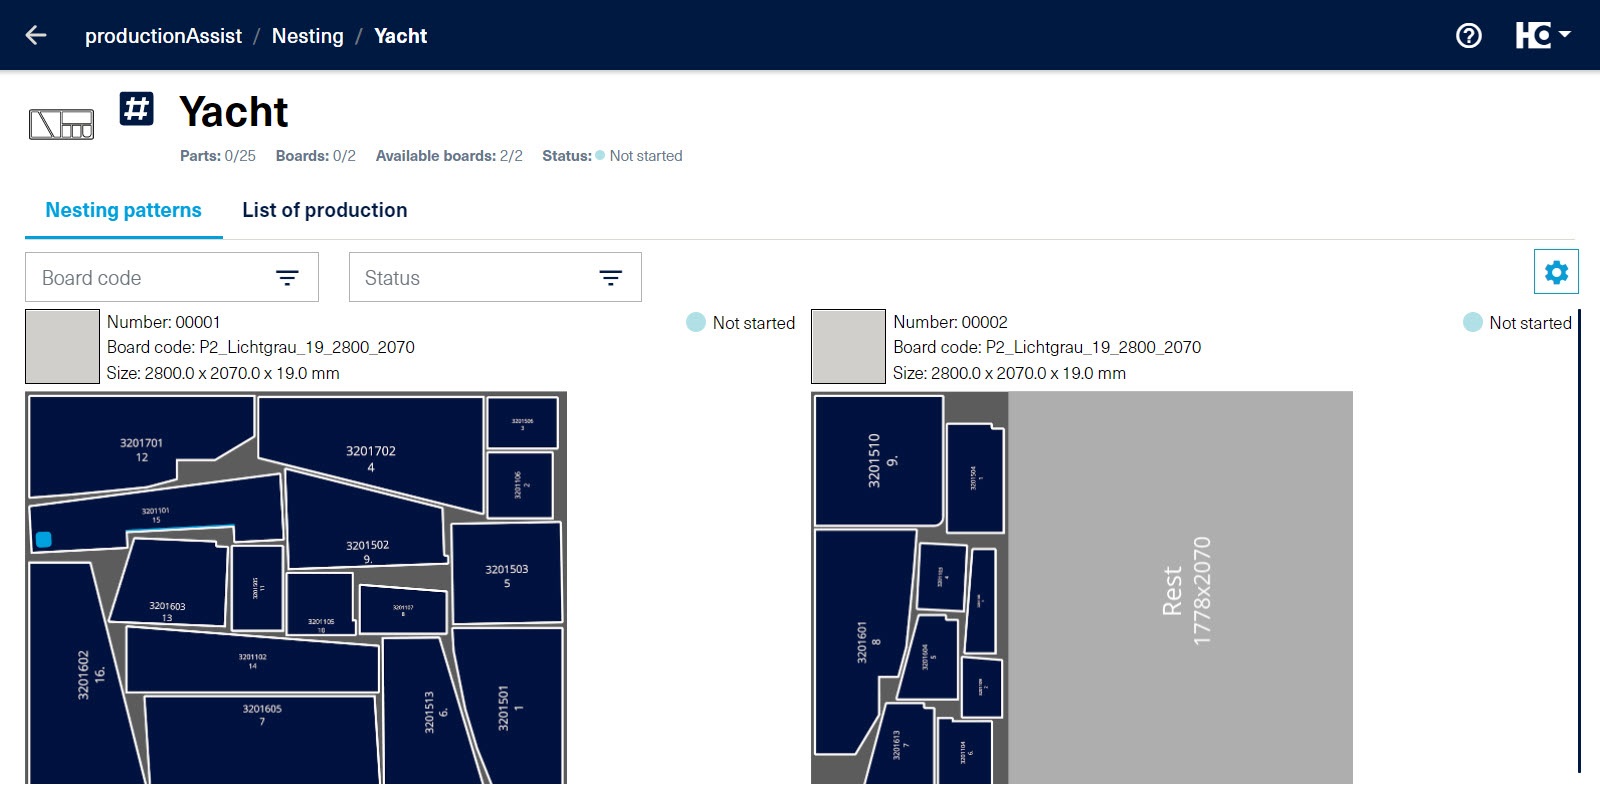
Overview of the nesting plans
You can narrow down the displayed pattern via filters, for example according to the material used and according to the processing status.
If you manage your inventory with the materialAssist Boards, cutting patterns of a board type are marked with a warning triangle (1) as soon as there are not enough boards for this production order in the inventory.
The brackets next to the board code indicate the available such as the required number of boards (2).
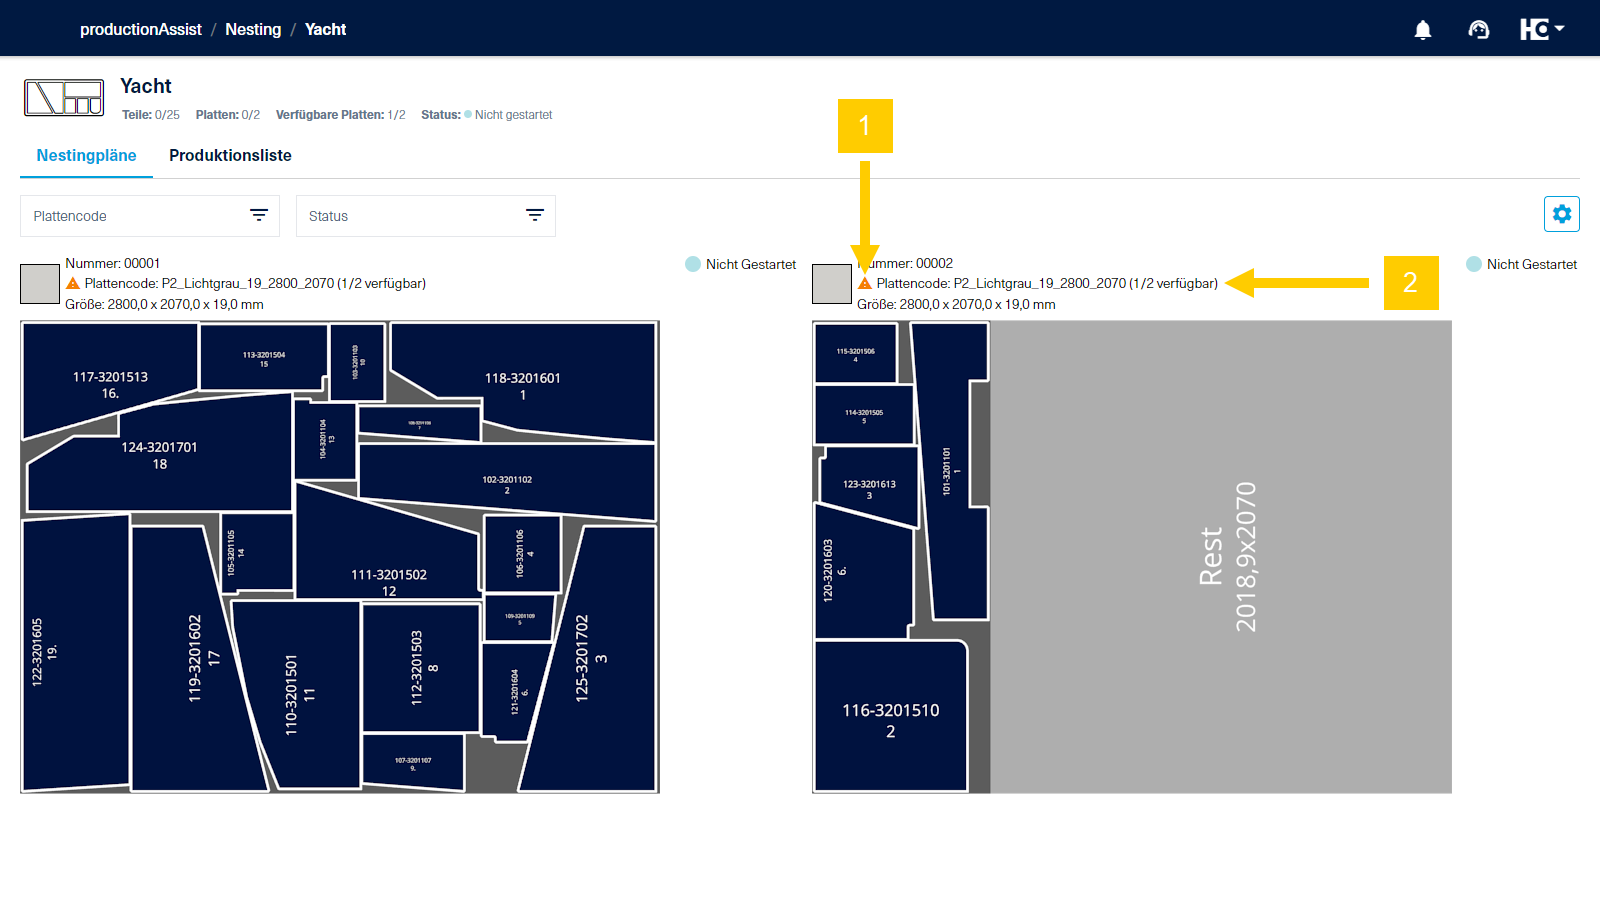
To start editing, select a pattern. Here you can deviate from the order suggested by intelliDivide Cutting.
Selection of a board / offcut
First you select which board or offcut you want to use for the nesting plan. The available boards or offcuts are displayed with their respective storage locations and the available quantity.
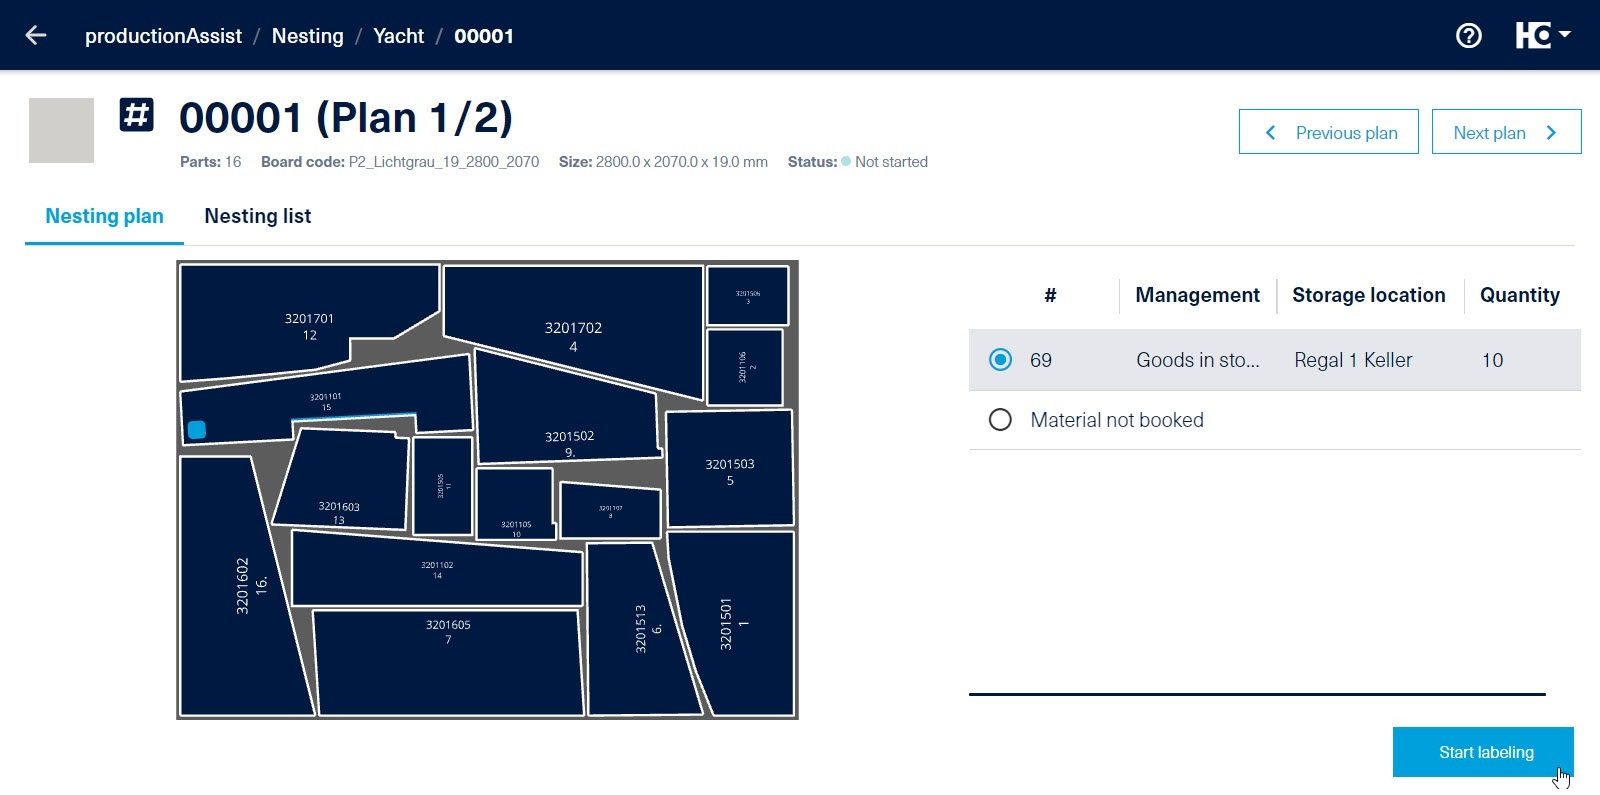
Selection of a board from the materialAssist boards
If you want to use a board that has not been registered in materialAssist, select the option "Material not booked".
Now you can start labeling.
If a board or offcut has been selected, it will be registered as removed when you start cutting in materialAssist Boards.
Labeling
With productionAssist Nesting you have two possibilities to print the labels:
1. print all labels of a nesting plan at once.
2. print part by part. To do this, click in the interactive nesting plan on the part that is to be labeled.
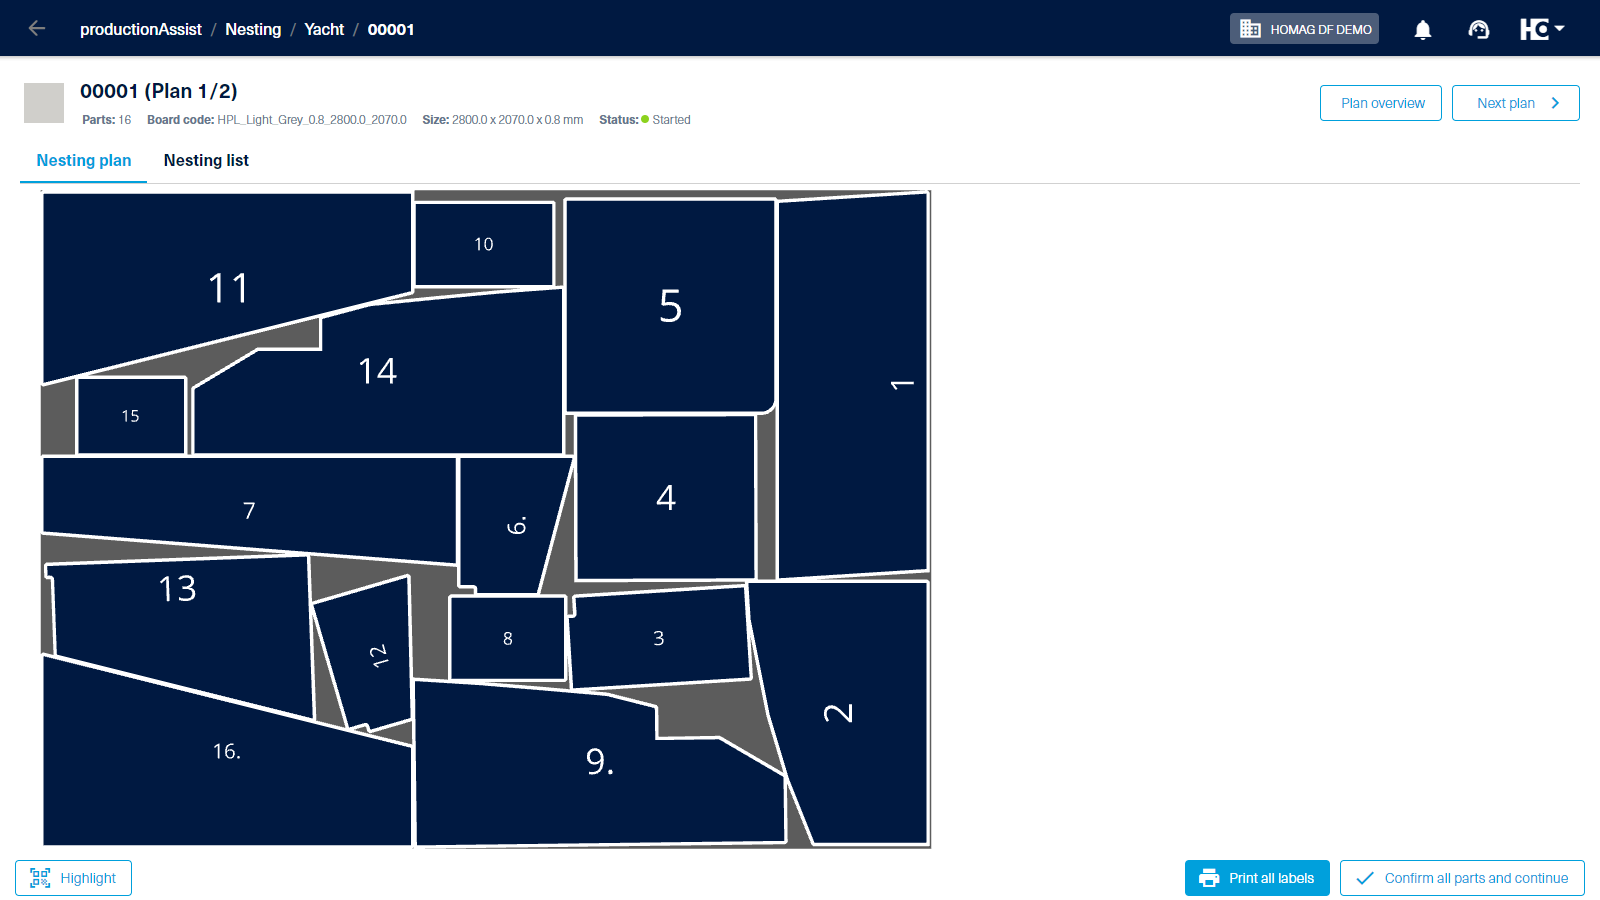

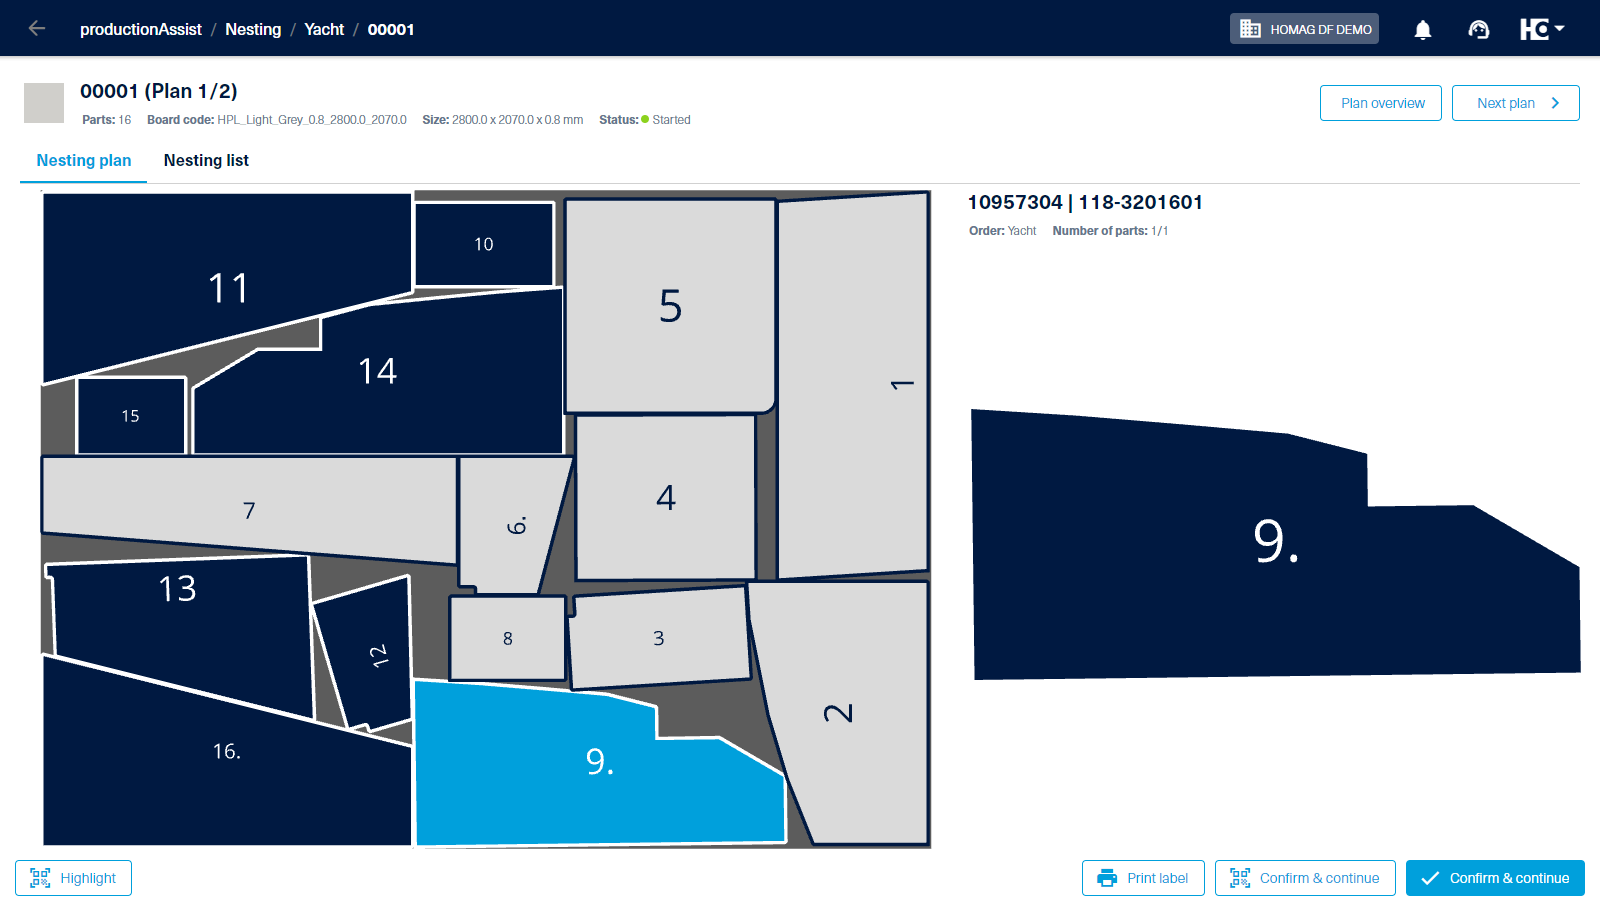
The productionAssist guides you through the necessary steps. All labeled and/or confirmed workpieces in the nest are displayed in light grey. The status of the order changes to "started".
For easy assignment from the label to the part, the parts in the nest are numbered consecutively. The same number is printed on the label.

Assignment of the label to the part in the nest