Working with templates
In this chapter, we will show you how to use templates in intelliDivide. You will also learn how to assign individual components from the parts list to a template.
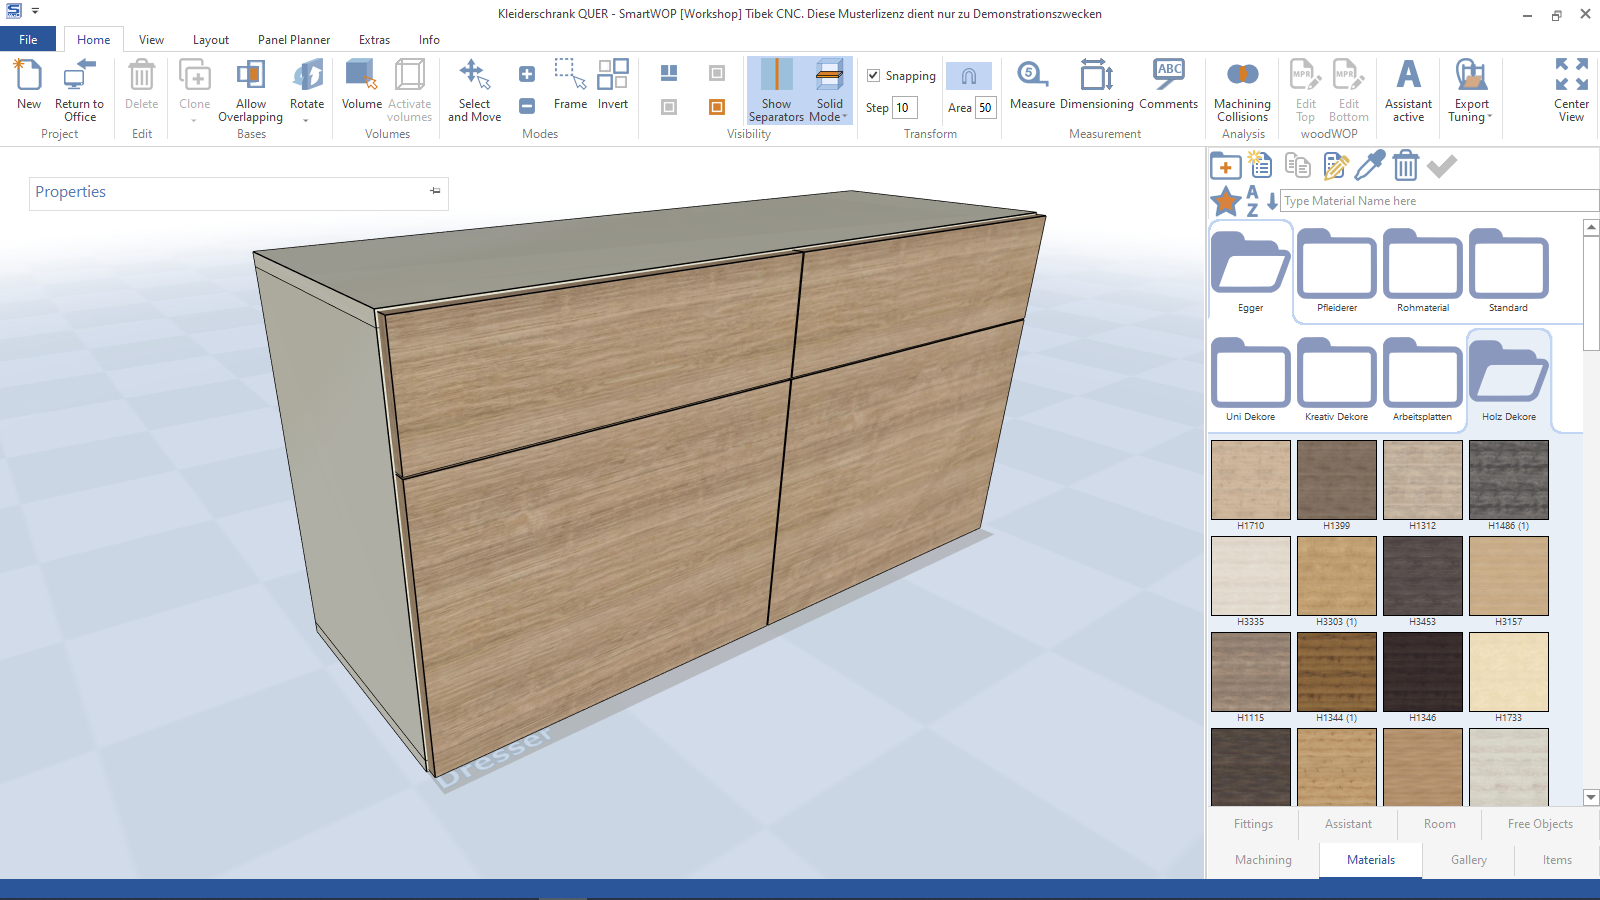
Example 1: Furniture with veneered fronts and continuous veneer pattern
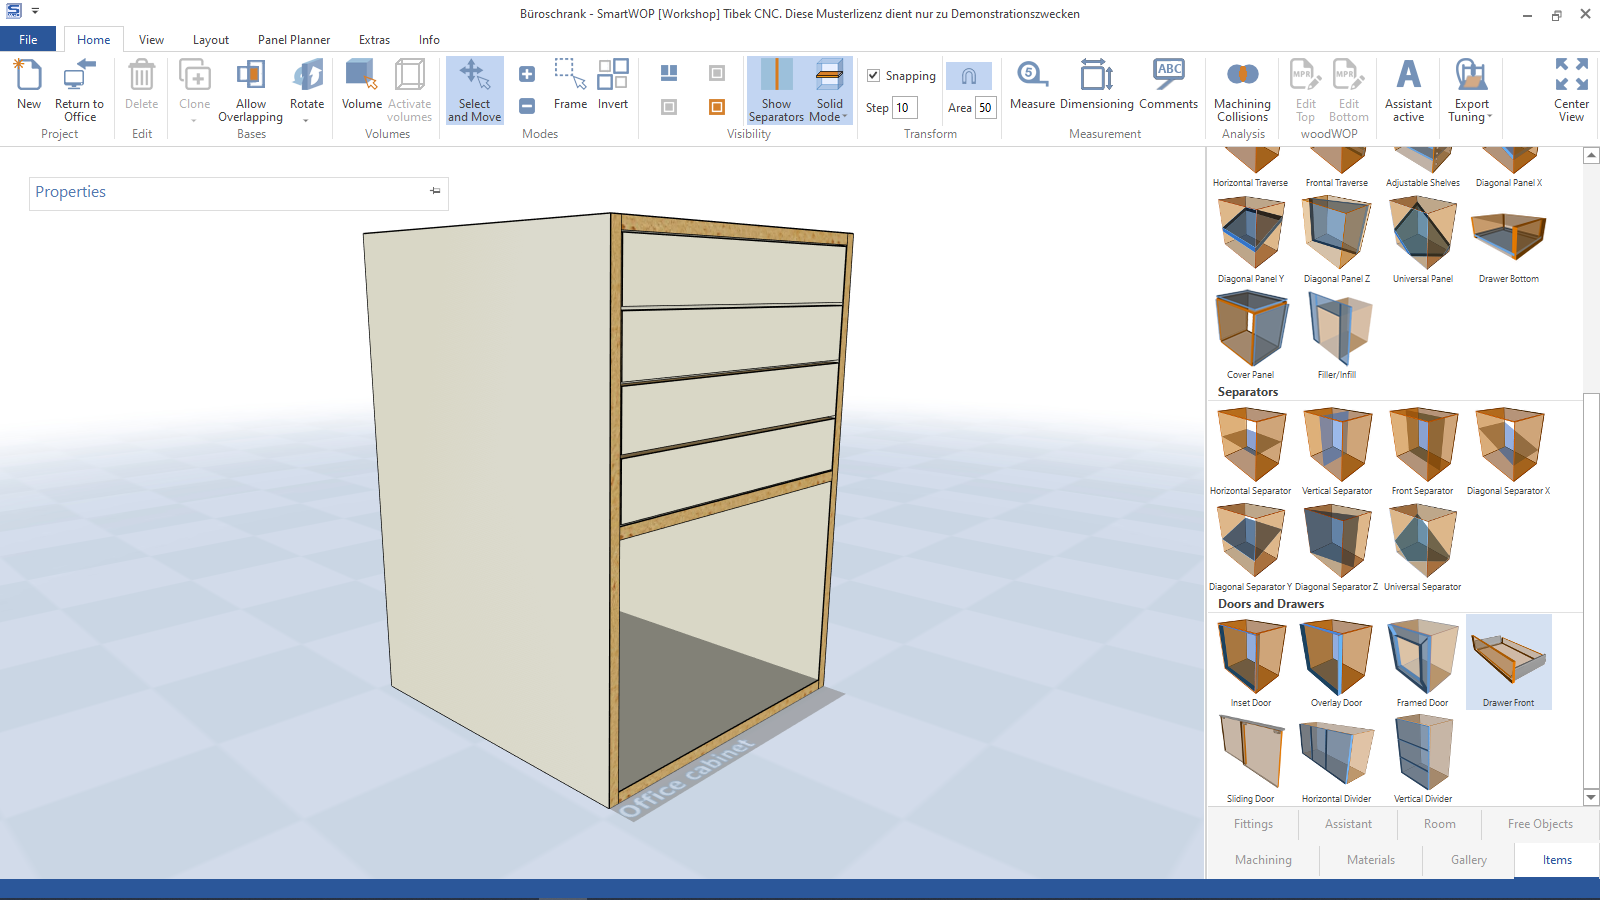
Example 2: cabinet with narrow drawers
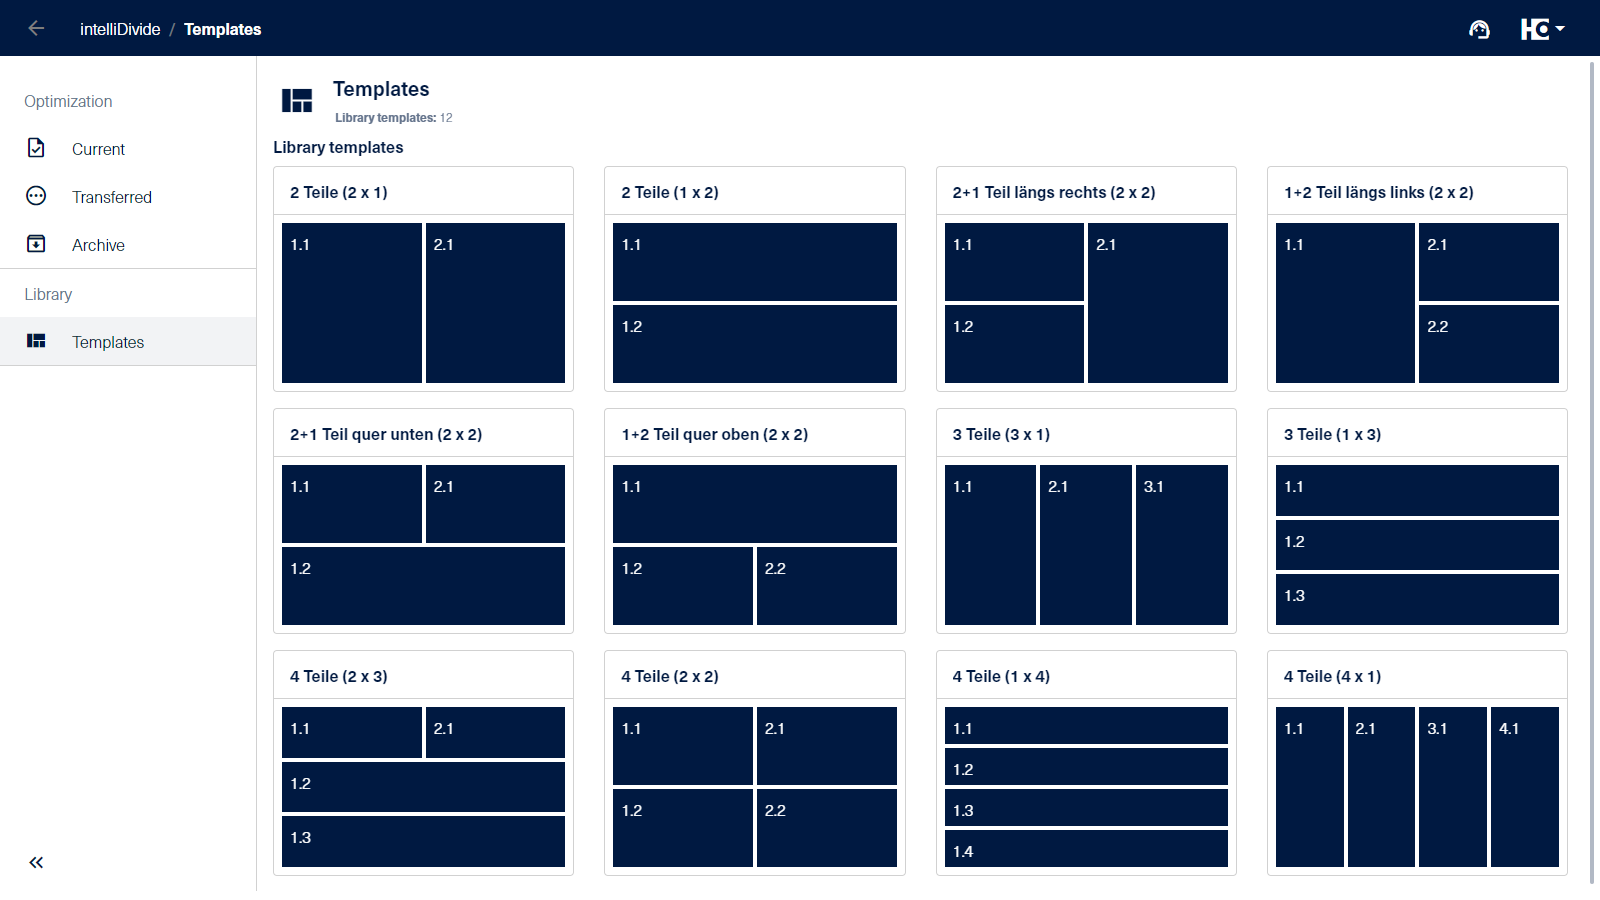
Library with drafts for the templates
Video-Tutorial
This is how you use templates to hold certain components together for optimization.
Step by step instructions in screenshots
Here you can see how to use the templates in practice in descriptive screenshots from importing the parts list to the finished cutting pattern.
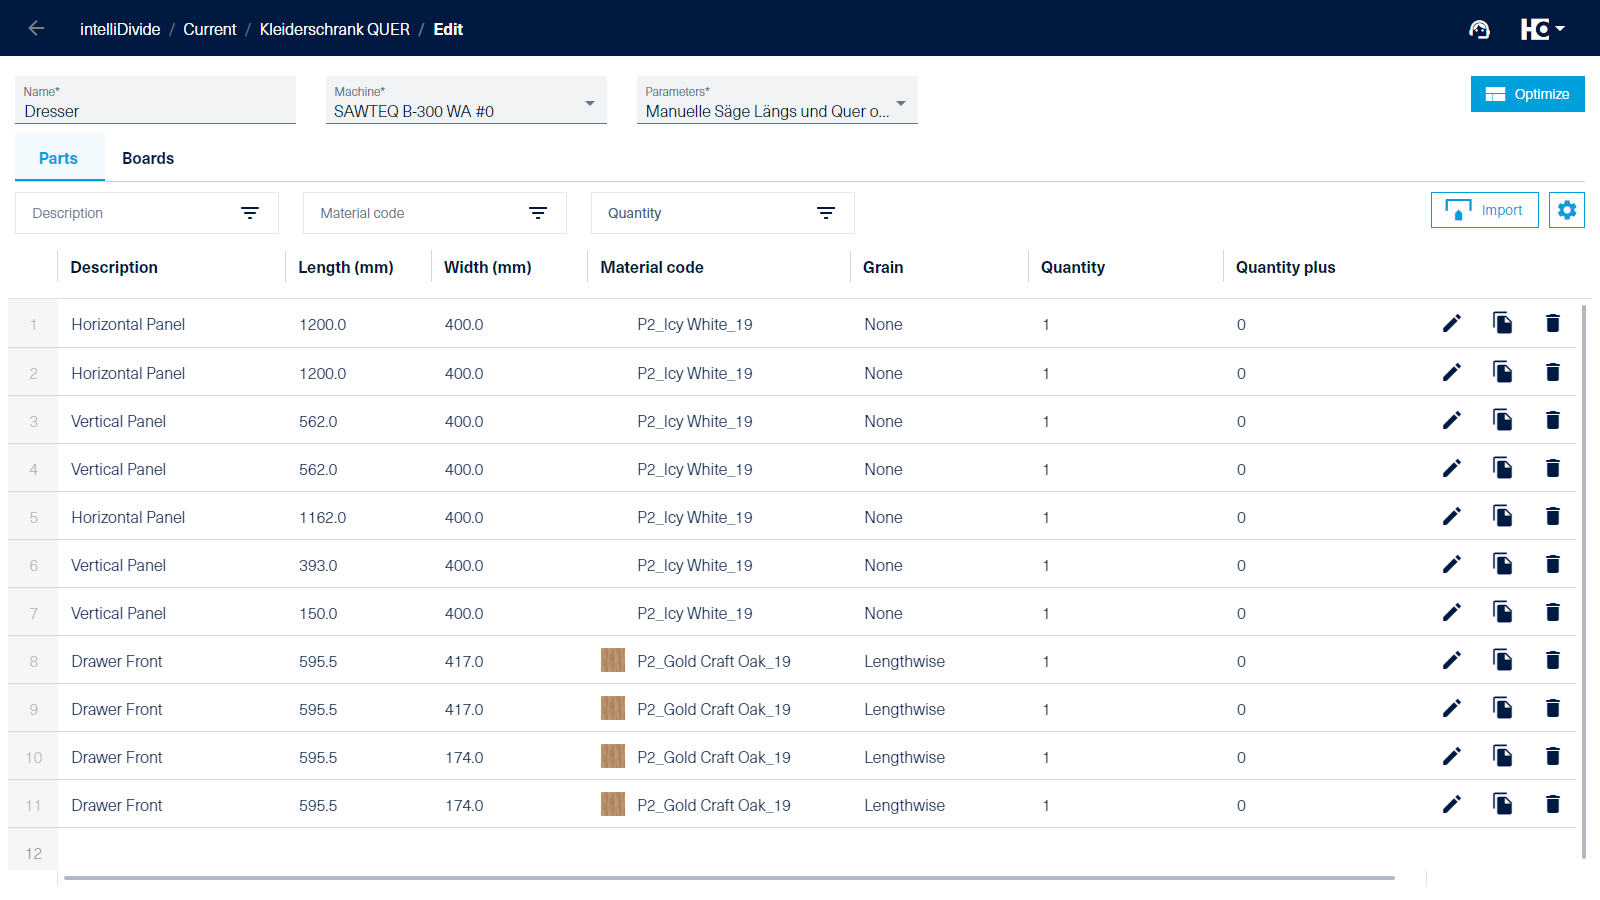


Step 1: Import a bill of materials
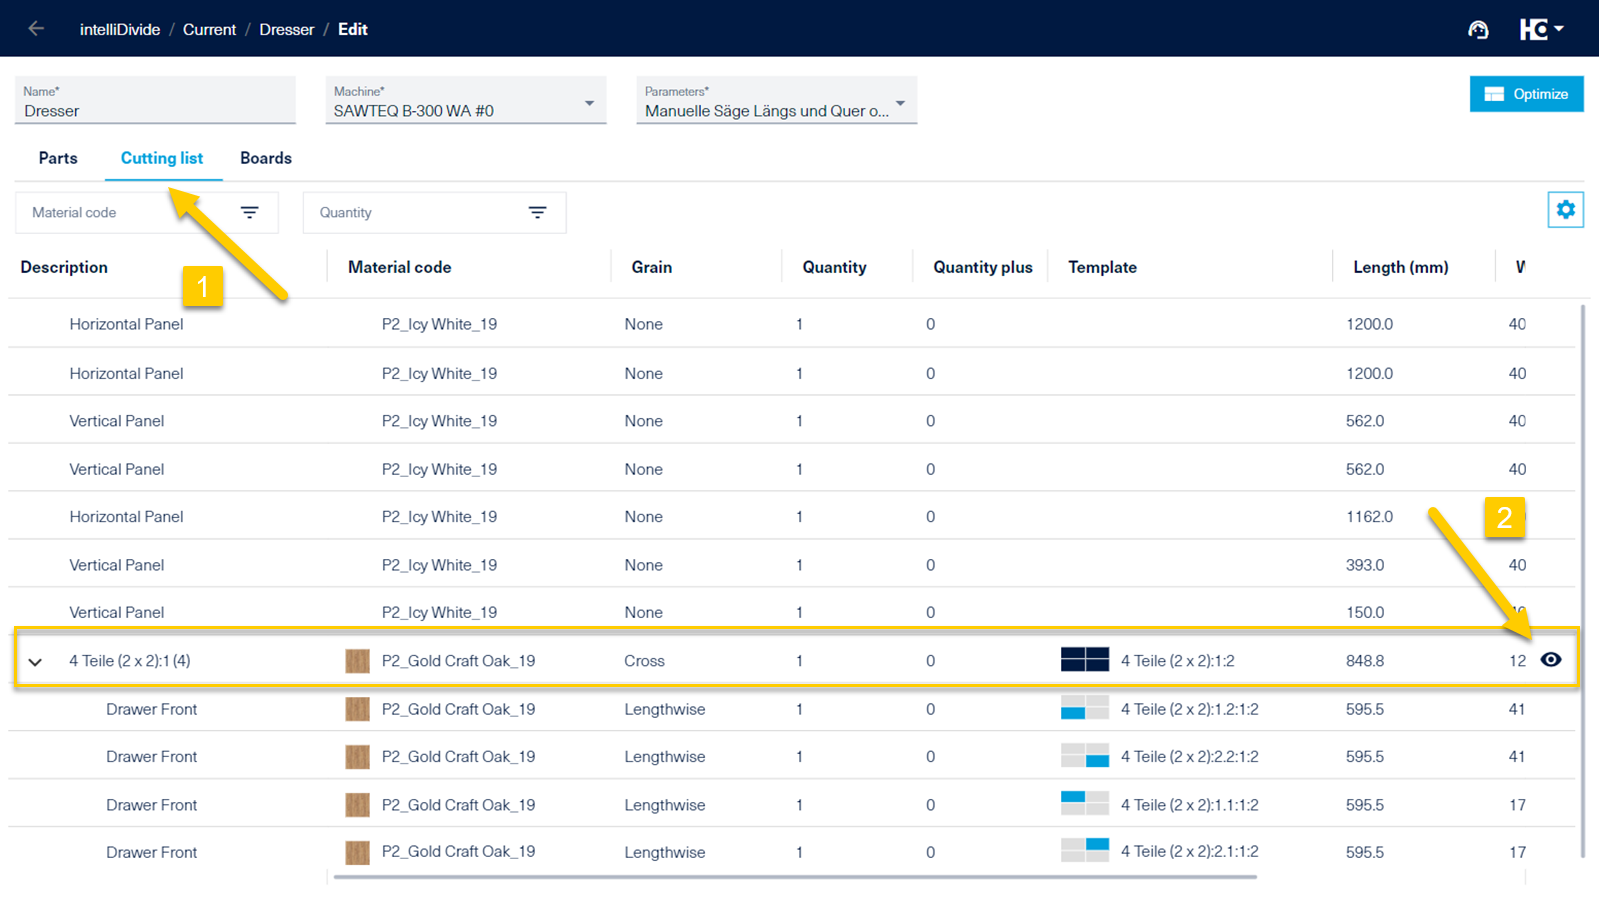
Step 2: In the table settings (1) add the field "Template" (2)
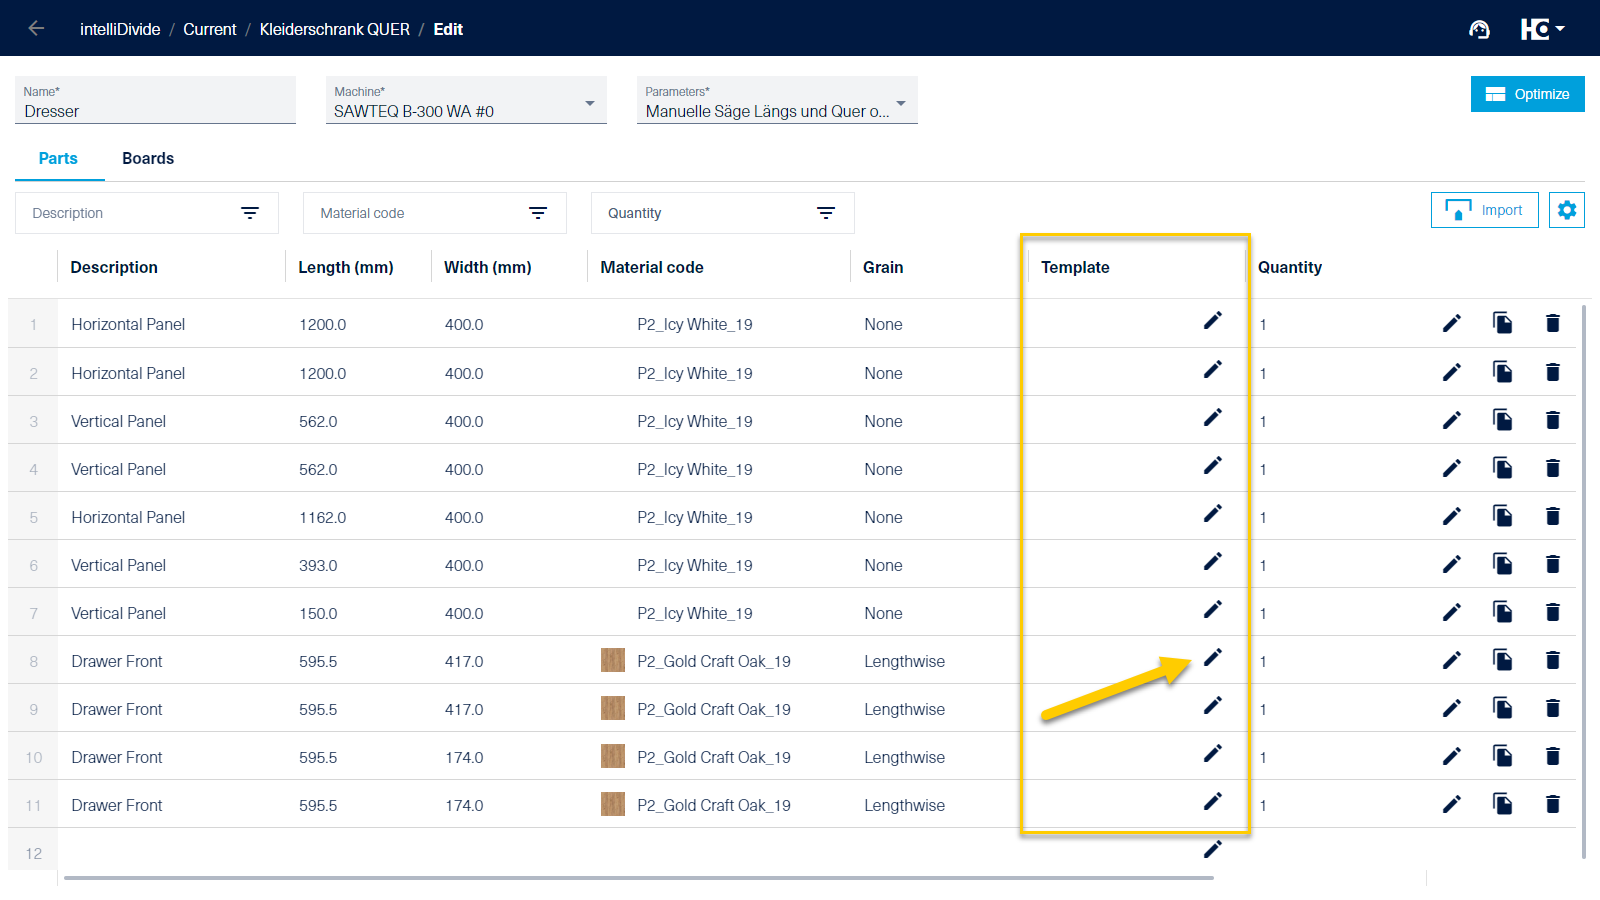
Step 3: By clicking on the icon, a template can be selected for each component.
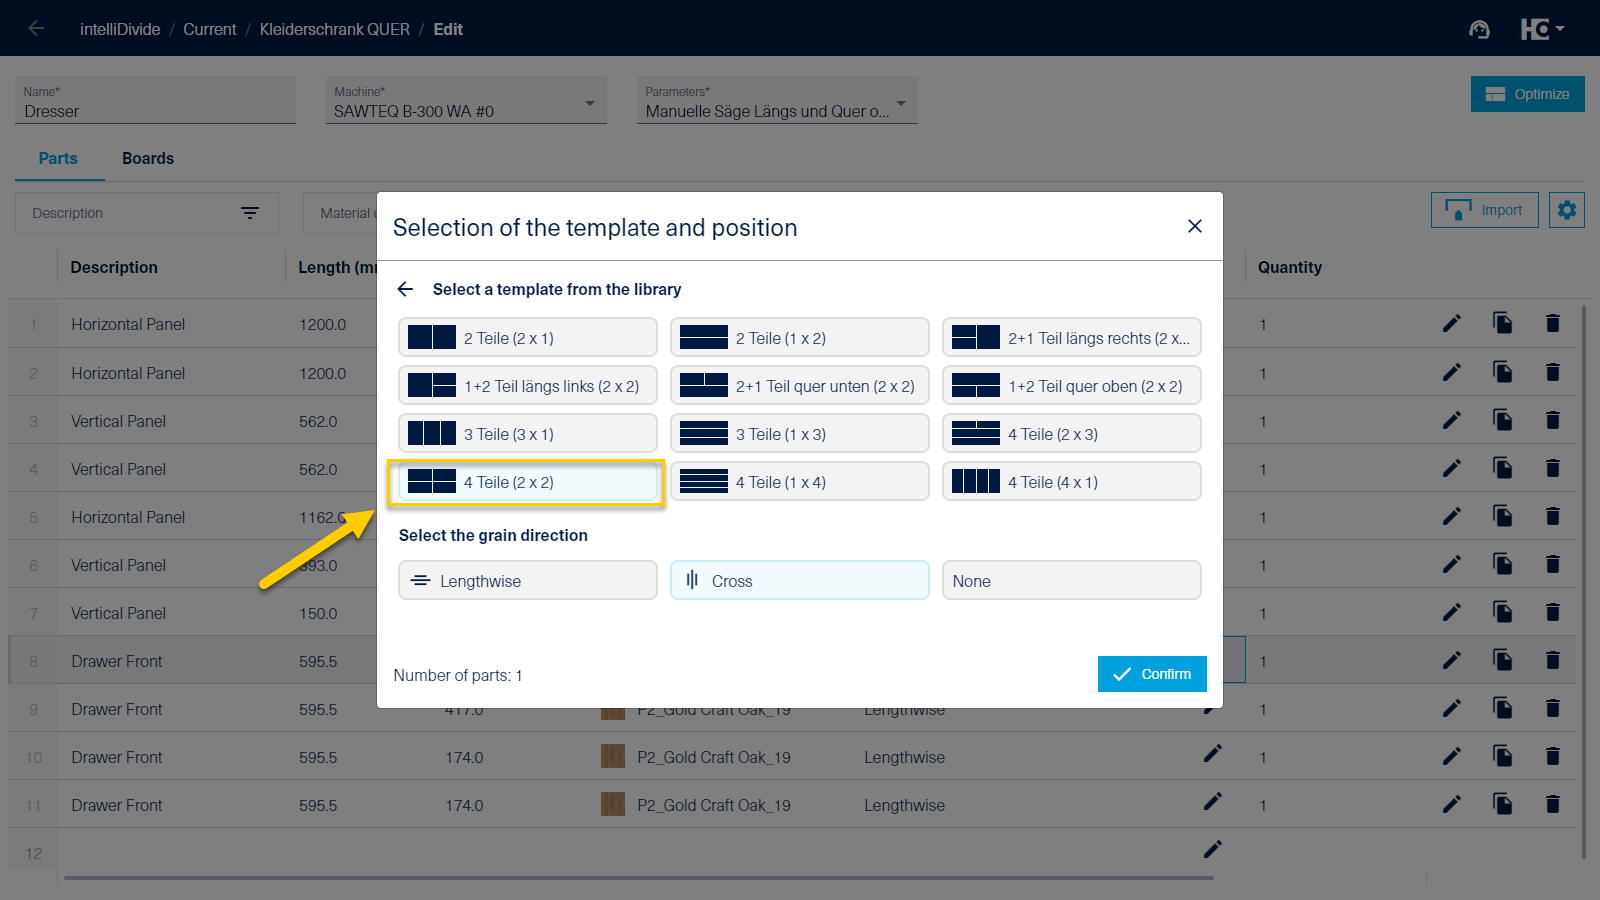
Step 4: Select template, select grain direction if necessary and confirm.
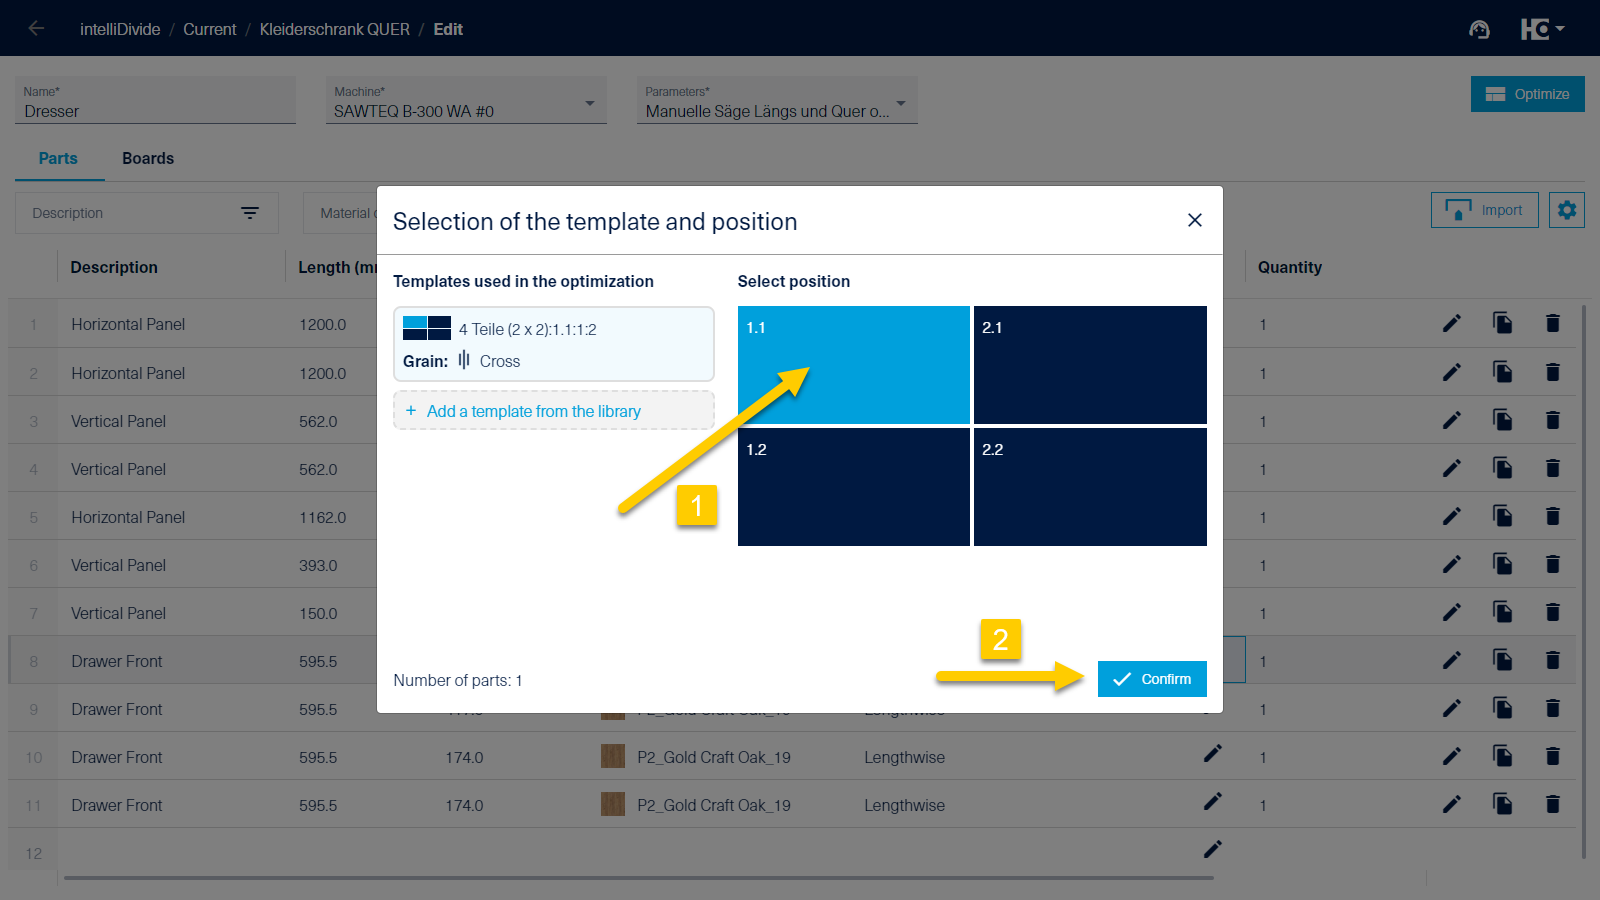
Step 5: Click on the position within the template (1) and confirm (2).
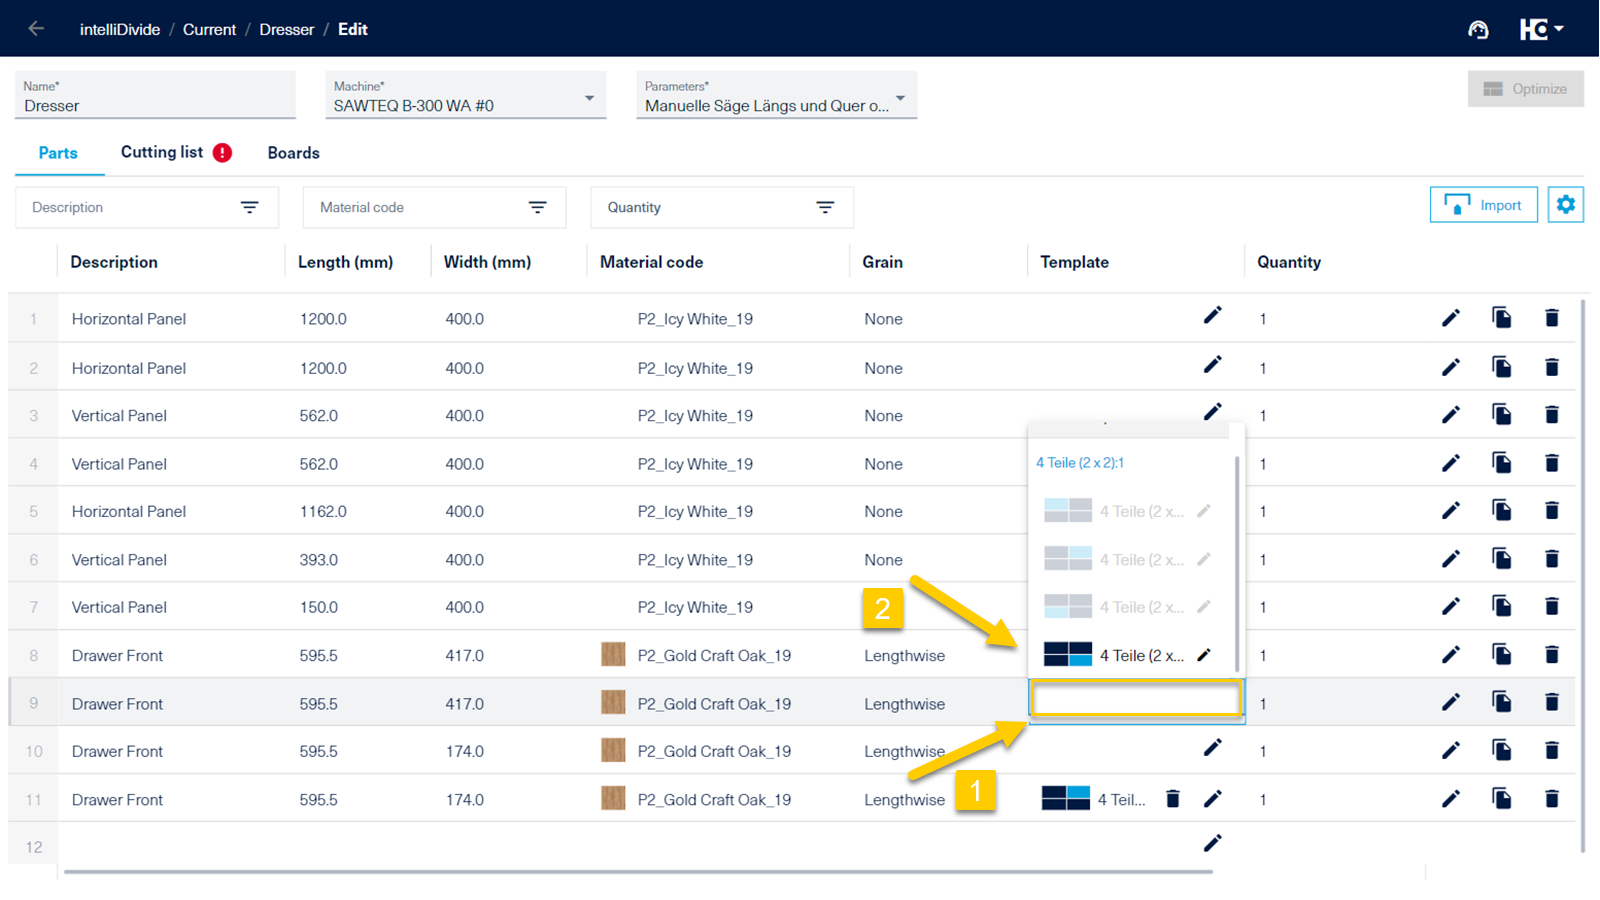
Step 6: Quick selection (2) by double-clicking in the cell (1).
Step 7: A new cutting list (1) was created. It contains the template as a new part. The icon (2) can be used to display a preview of the template for checking purposes.
Step 8: Preview the template part with real dimensions.
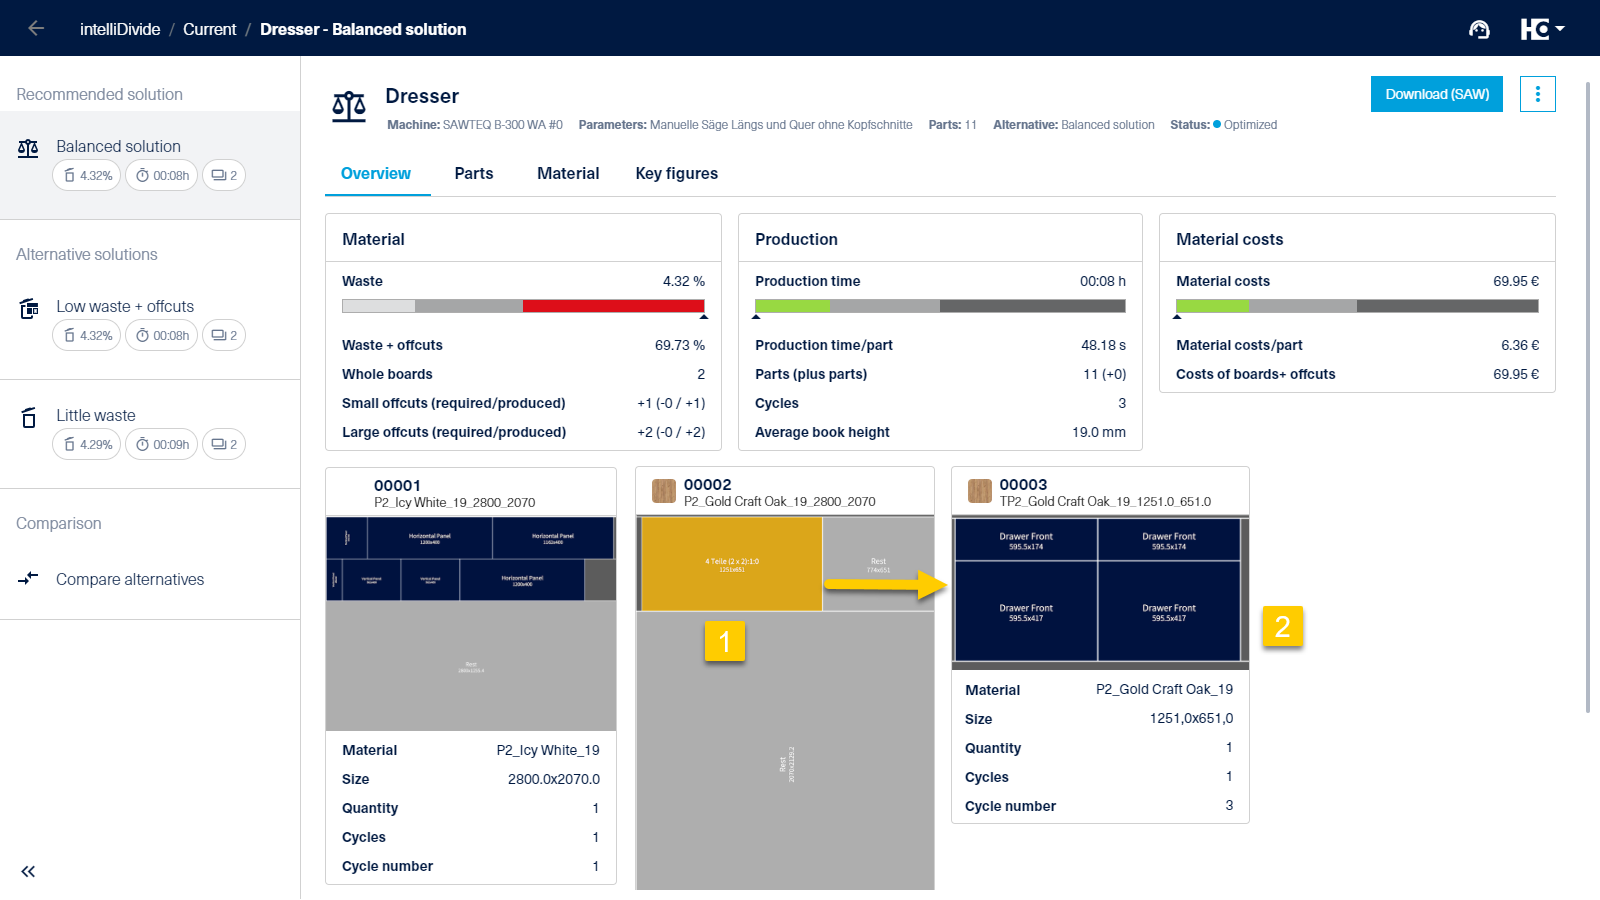
Step 9: The result: In the main cutting pattern (1), the template is a separate component. In a second cutting pattern (2), the template can be separated into the individual parts.
Video series: Working with templates