Configuration
The productionAssist Sorting app is part of the sorting assistant "Sorting Production Set".
Before first use, the components of the set must be launched. As soon as the commissioning is completed, the configuration of the app can be started by clicking on "Configure".
After the initial configuration, the "Configure" button turns into a gear. Here, you can make subsequent settings or connect additional devices.
The app guides you through the configuration in individual steps.
Step 1: Customize the name of the workstation
In the first step, the name (1) of the workstation can be customized. Assigning a name that is as meaningful as possible makes it easier to select the workstation later in the overview.
By activating the option "Last workstation, status is set to completed" (2), the status of the parts is set to completed after they have been reported as finished at this workstation.

Assigning the name and option as the last workplace
Step 2: Filter worklist
Here, you can define which conditions the parts, assemblies and articles must fulfill in order to be displayed in the worklist of a workstation. To make this setting easier for you, the following options are already suggested:
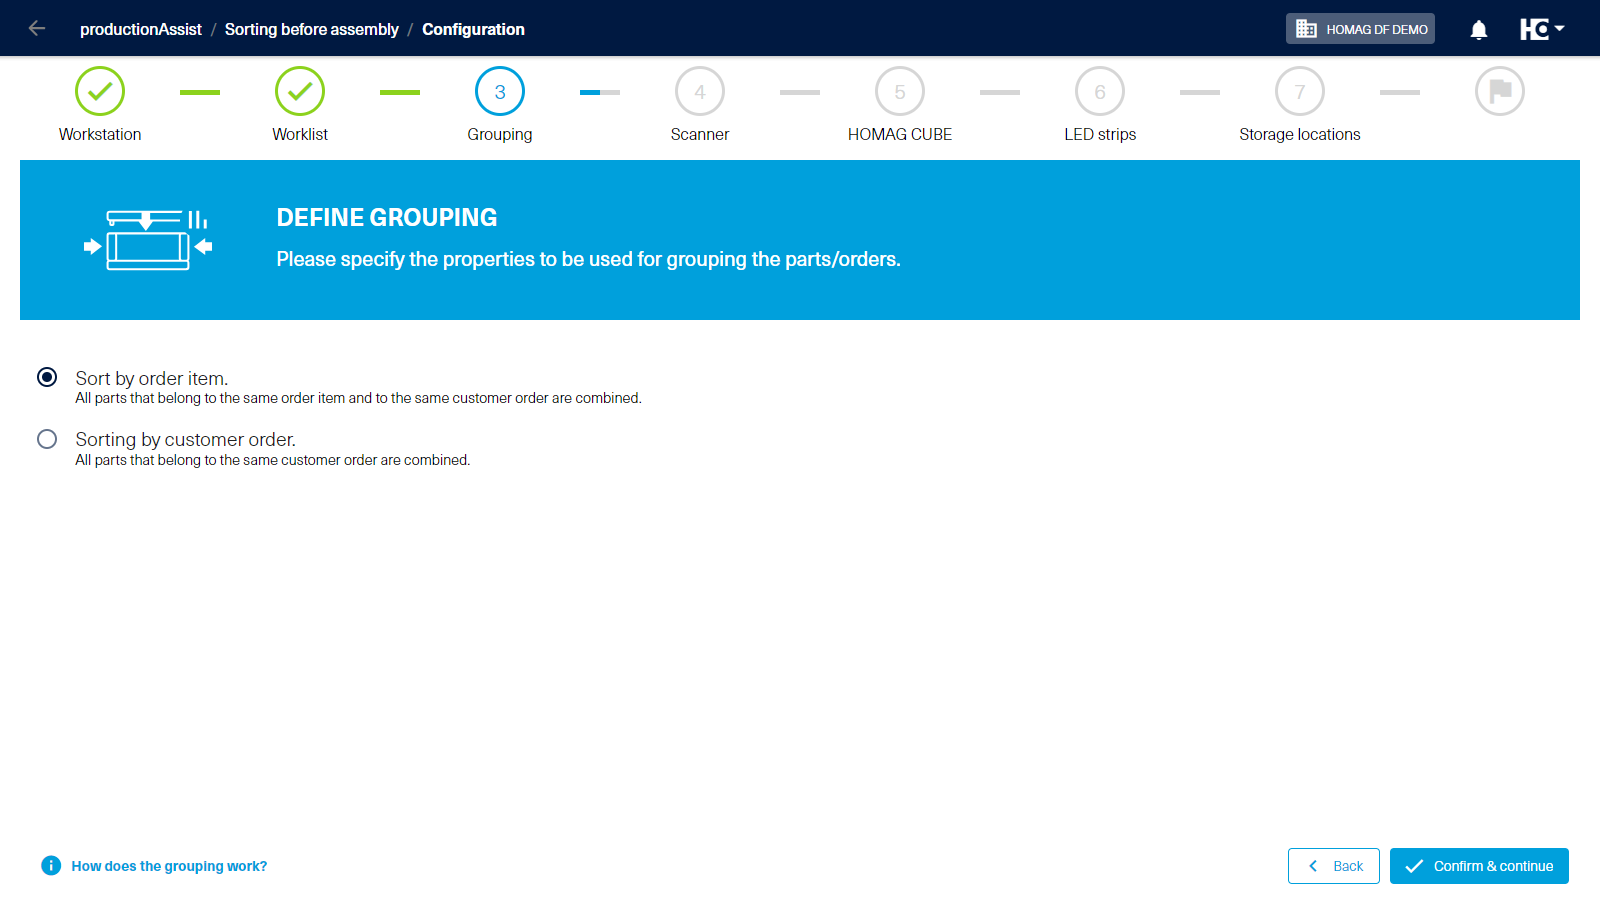
Select the option "Apply workstation-related filter for sorting before assembly." to display all parts. "Apply workstation-related filter for sorting before assembly and take the processing performed into account." displays all components that have already been processed at previous workstations. These two options lead to the selection of the grouping in the next step. You can group parts either according to whether they belong to the same customer order or whether they belong to the same order item within a customer order.
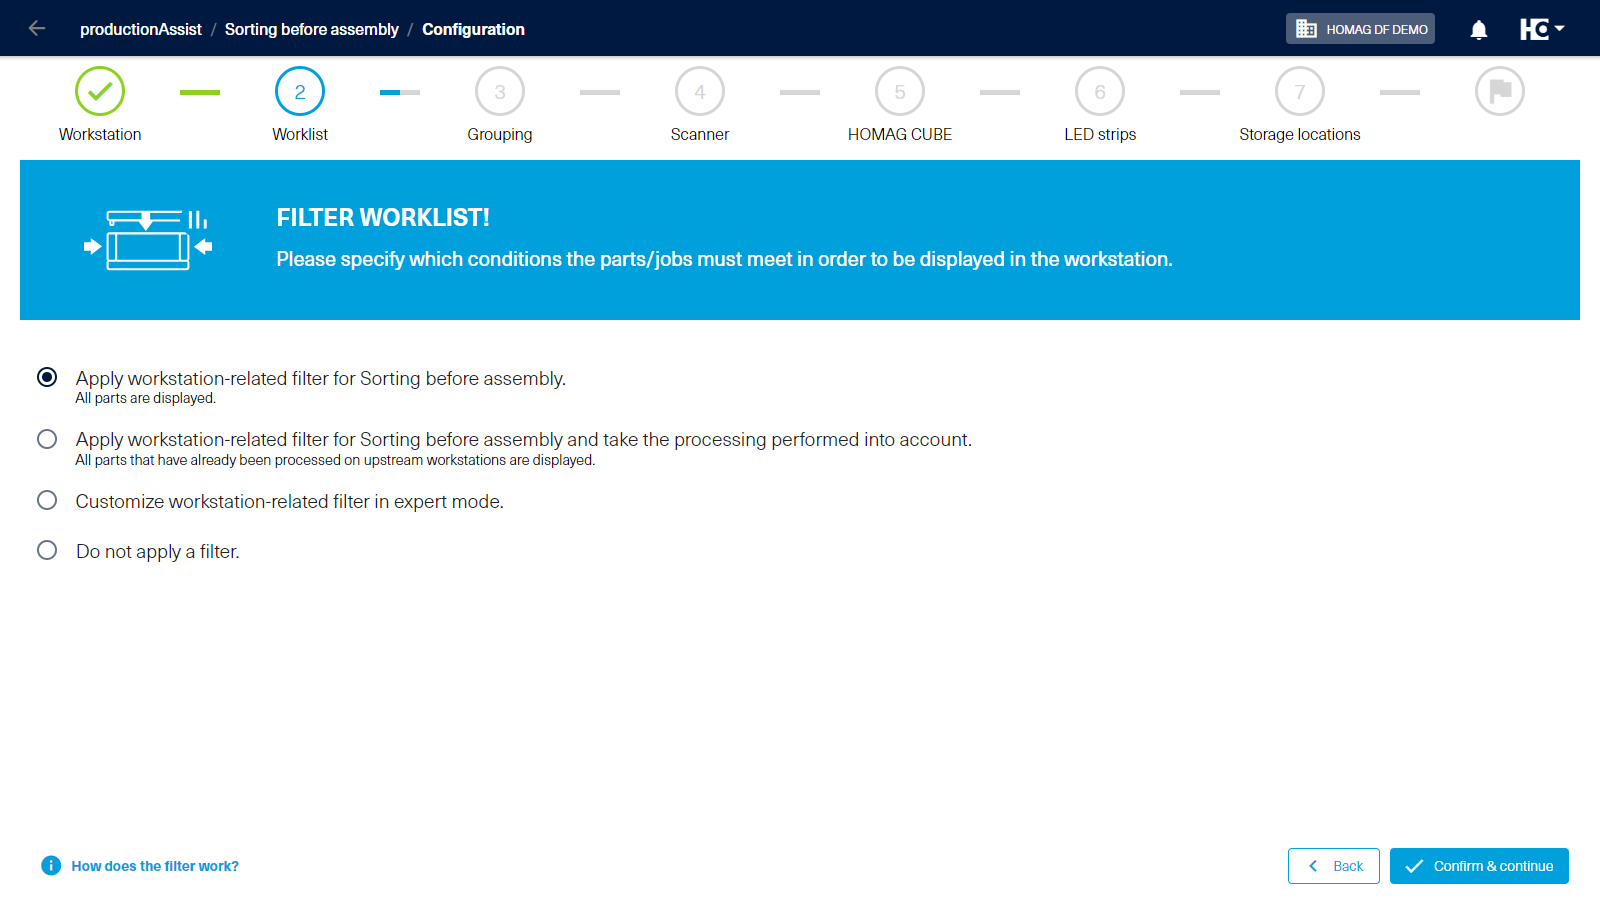
Select an option for filtering the worklist
Determine grouping
By selecting "Customize workstation-related filter in expert mode", you can set filters according to your requirements in the following view.
Tips for expert mode:
- Depending on the workstation type, it makes sense to only display those parts, assemblies or articles that are relevant for the respective workstation.
- First, you need to select a column on which to apply the filter. Next select the desired operator and ultimately enter or select the value. (1)
- You can use status fields, such as "Edge banding status", to set wheter the production progress of a part sould be taken into account.
- Click on the "+ And" button to add an and-condition to an existing filter. (2)
- Clicking on the "+ Or" button adds a new filter in the form of an or-condition to the existing filter. (3)
- Just try it out! You can adjust the settings at any time or fall back on the predefined options.

Customization of the filters in expert mode
Step 3: Configuration of the scanner
In the following step you can link a barcode scanner.
To do this, you must first connect the scanner to the tablet via bluetooth. The correct connection is checked by scanning the displayed matrix code. More details can be found here.

Connect scanner via QR code
The integration of a scanner is optional. However, working with the application in combination with a scanner is significantly simplified. We have listed some recommended models in the Equipment & Hardware section. If required, a device can also be added later by starting the configuration again.
If you do not want to include a scanner, click continue without scanner to reach the next step.
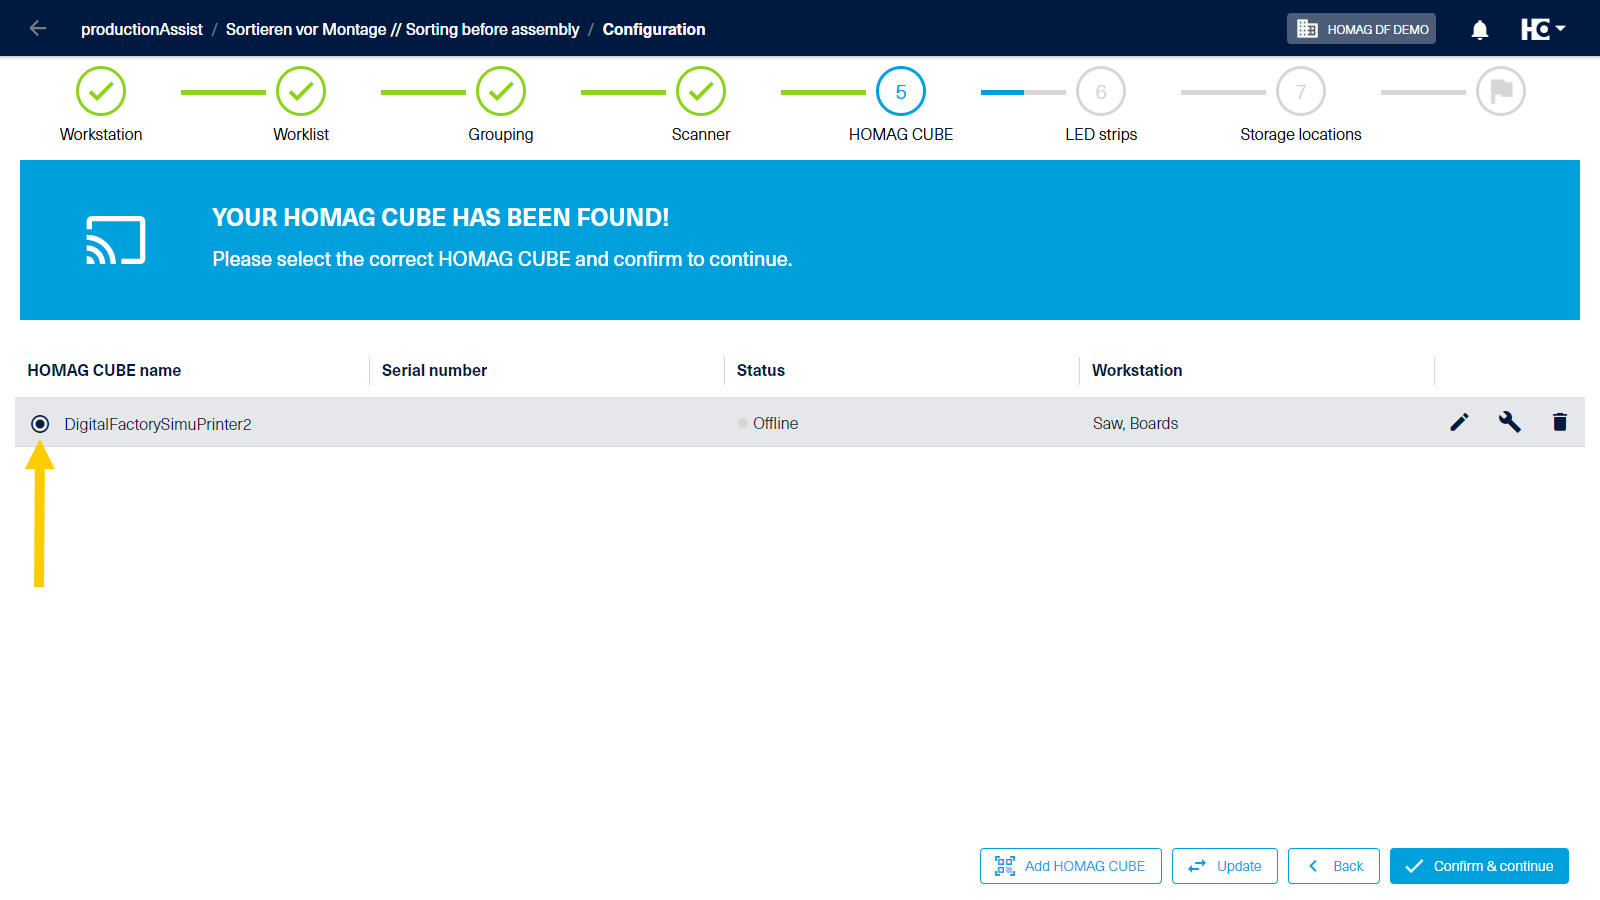
Step 4: Configuration of the HOMAG CUBE
Now you connect the HOMAG CUBE to the app.
The HOMAG CUBE can be added by scanning the label on the rearside. The tablet (or the bluetooth scanner connected in the previous step) can be used for this purpose.
For very large racks that require a large number of LED strips, several HOMAG CUBEs can be added successively.
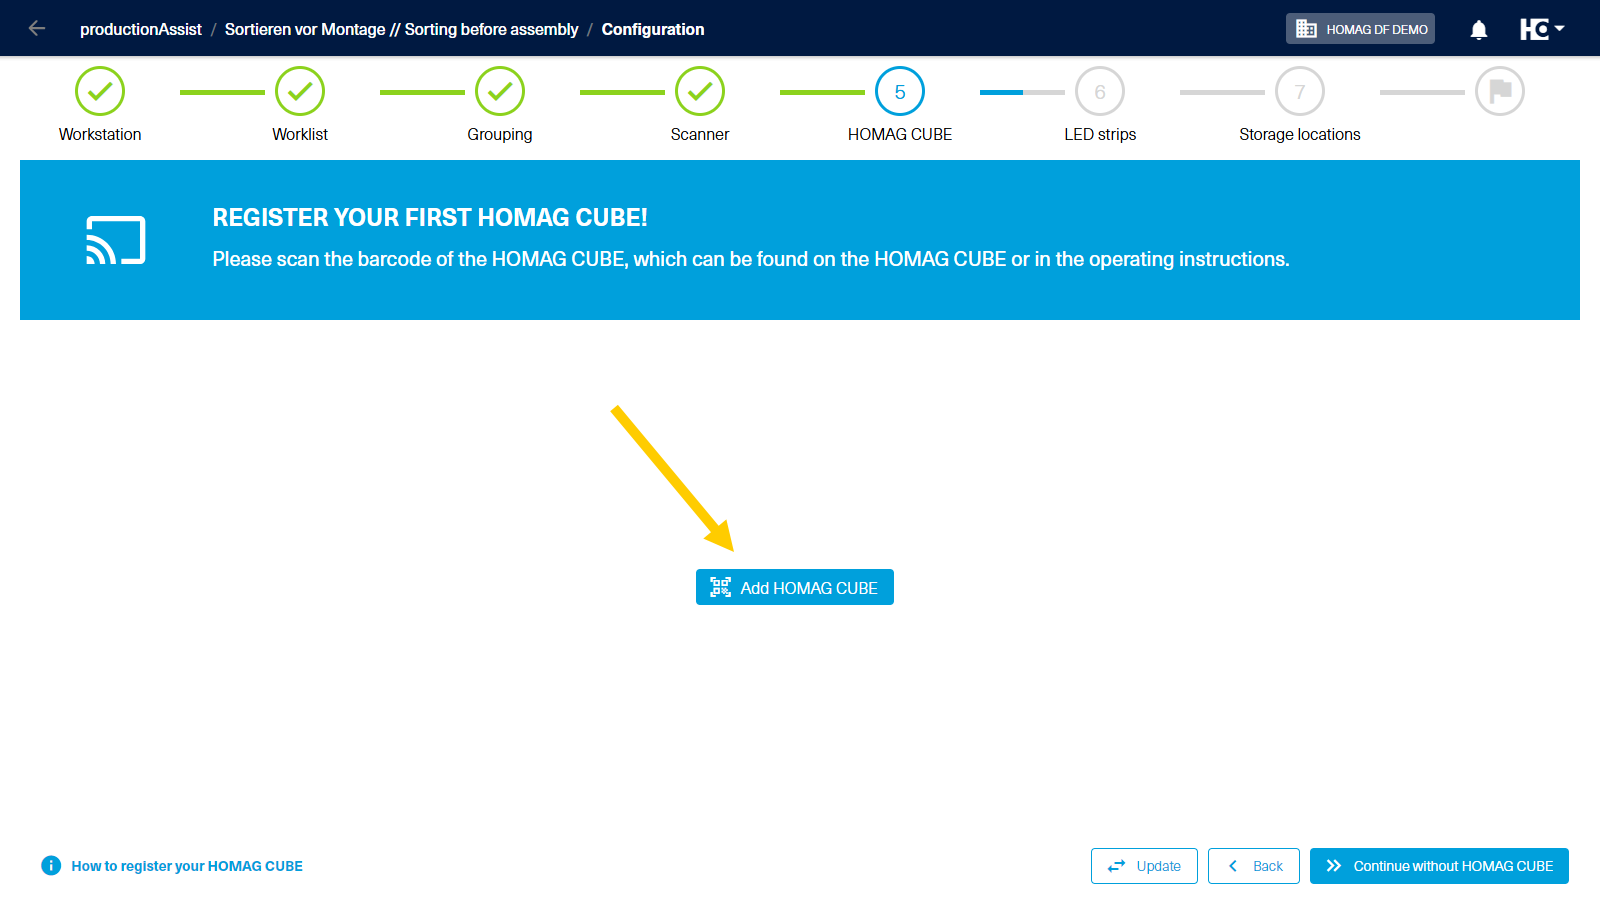
Add a HOMAG CUBE
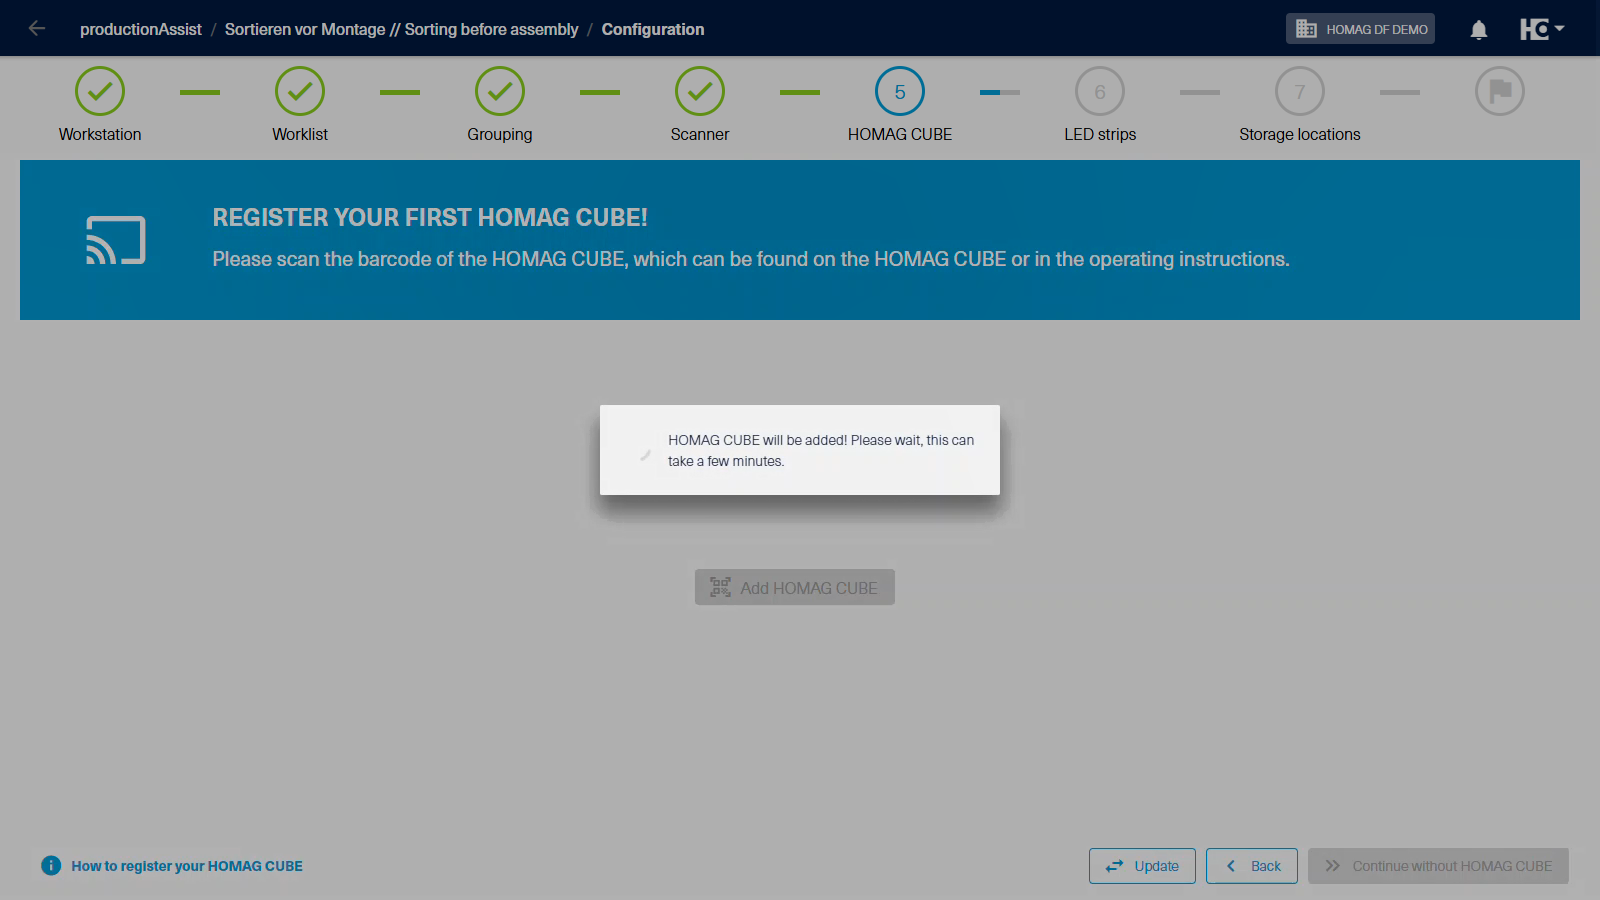
Adding a new HOMAG CUBE takes some time
Select one or multiple HOMAG CUBEs for the workstation
Step 5: Configuration of the LED-strips
LED strips installed on the rack help with easy identification of shelves during removal or storage.
You can easily integrate the LED strips connected to the HOMAG CUBE by clicking on "Add LED strip".

Add an LED strip
The number of LEDs (1) and connection (2) must be stored for each LED strip (5).
The connector indicates whether the connector of the LED strip is mounted on the right or on the left side.
The number of LEDs depends on the length of the LED strip.
| Length of the LED strip | Number of LEDs |
|---|---|
| 2.504 mm | 124 |
| 2.922 mm | 145 |
To simplify configuration, the LED bar lights up in the displayed color scheme.

Configuration of an LED strip
| Color | Description |
|---|---|
| Green (3) | Last LED; If the length is selected correctly, the last LED lights up green. |
| Red / Blue (6) | Block of 10 LEDs; 10 LEDs light up alternately in red and blue. This simplifies counting. |
| White | Number of the LED controller; This color is only used when several LED controllers are connected. |
| Orange (4) | Number of the LED-Box |
Step 6: Configuration of the storage locations
You can add the individual shelves or storage locations in the last step.
Therefore, each shelf is provided a code (see Rack setup). After that, each individual rack or location can be added by scanning it with a bluetooth scanner or after clicking "Add storage location" with the tablet.

Add a workstation
If a LED strip is available, a specific LED area can be assigned to the rack. When something is removed or stored in the shelf, this area will light up and also during the configuration of the shelf.
Es ist ebenfalls möglich, Lagerplätze ohne LED-Anzeige anzulegen. Dies bietet sich z.B. bei Paletten auf dem Boden oder einem weiter entfernten Materiallager an. It is also possible to create storage locations without LED display. This is useful, e.g., for pallets on the floor or a distant storage location.

Configure a workstation
Step 7: Completing the configuration
Once all steps have been performed, the configuration is complete and the workstation can be used.

Completing the configuration
Note: The configuration can be restarted any time by clicking on the configuration icon.